*This post is going to be a big one*

There are five types of markers that copic produce.
Classic – These markers have a square barrel, hold the most ink, available in 214 colours, are refillable, and come with a broad chisel nib as well as a fine point bullet.
Sketch – These markers have an oval barrel, come in all 358 colours, are refillable and come with a chisel nib and a super brush nib. These are the most popular option.
Cia0 – These markers have a round barrel, come in 180 colours, are refillable, and also come with a chisel nib and super brush. These markers are the more economical in the cost front many people will purchase the markers available in this range and fill in the rest with the sketch being as the ink is the same as well as the nib options.
Wide – These markers have a flat barrel, come in 36 colours, are refillable, and come with a 3/4″wide nib.
I personally LOVE my markers, and if you have been following my blog for a while you will already know that, and if you haven’t why not subscribe!
Getting the best out of your markers means finding a paper that allows the markers to blend (not all paper is great for this) without getting sticky and sitting on the surface. There are many different brands that crafters prefer for their markers and for me I have always used the Copic X-Press It blending card, have no issues with it and that is what I stick to and recommend.
When hand stamping my images onto the cardstock make sure to use a copic friendly ink, I use Memento Tuxedo Black. People do recommend the My Favorite Things hybrid inks as well but I have not tested it, so if it does hurt your markers do not blame me. When using my collection of digital images I print them on my HP Laserjet CP1025NW, the laser printer does not smudge when I touch my copics to it. There are some inkjet printers that people say work, do your research and buy what will work for you.
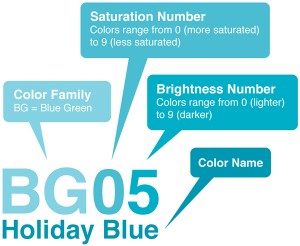
I love this image for breaking down what all those crazy letters and numbers mean on top of the markers! Copic has 16 different colour families”
BV – Blue Violet V – Violet RV – Red Violet
R- Red YR- Yellow Red Y- Yellow
YG – Yellow Green G – Green BG – Blue Green
B- Blue E – Earths C – Cool Grays
T – Toner Grays W – Warm Grays N – Neutral Grays
F – Florescent
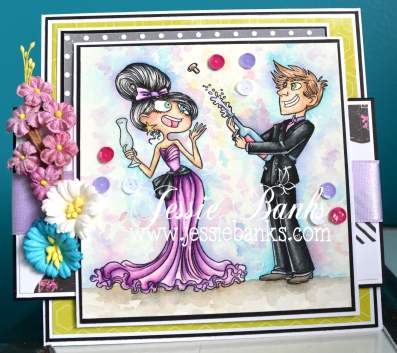
Blending!

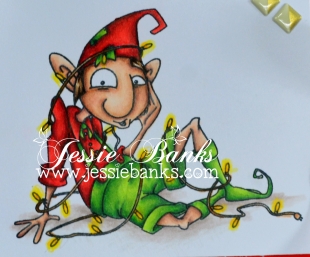
This image is Saturated Canary – Overdue
When beginning to blend with copic markers it is good to know that it takes about 3 markers to create a good blend (this is not a hard rule, remember this is art, you do not have to follow any rules!) a light, mid, and dark tone. For example G02 (light), G05 (mid) G09 (dark). You are basically blending using the brightness number, as long as all the other numbers are the same you are just using a different saturation of that colour.
You can also blend different colour families as long as the other things line up… but remember the colour wheel some colours make mud! You can blend an R into a Y or a V, there are difficult things in here as well RV’s are had to blend into Y because yellow and purple make brown. It’s all trial and error, make sure you practice on a scrap piece of paper!
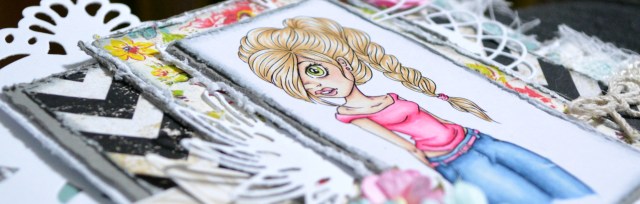
When it comes to skin tones people mix all sorts of things together and there is nothing wrong with that either! I have a couple go to combo’s
E04, E13, E11, E21, E00, E000. I will sometimes drop the E04 and/or E13 out of this combo.
E04, E11, E21, E51, E50, this combo gives me a slightly yellower skin tone.
A fantastic source for choosing what colours work together and also helping you decide what colour to buy is Sandy Allnocks Hex Chart, Sandy worked hard moving colours around and planning this chart out for us all and it worth far more then the 5.99 price tag on this. It has changed the way many crafters colour! And I reach for mine often! You will not regret this purchase, make sure to print it off and fill in on the paper you colour on regularly so you know the colours will be what you want them to be.
Cost
These markers are not cheap! You are buying an artist grade top of the line alcohol marker, there are less expensive options, but I have not played with any of these, maybe one day I will be able to pick up some different brands and do a comparison for you, this will be funded through something like my Patreon page.(You can find this in the other places to find me)
You are looking at retail of about $8 per marker you can find them on sale for $5.25 per marker. But, remember this is an investment, after you have purchased the marker they are refillable and all the nibs are replaceable, other markers I looked at when deciding which ones I would purchase did not have these options. And others that you can change from a bullet nib to a brush nib, by the time you purchase the brush nibs to replace the bullet nibs they cost about the same as a copic anyway.
I am sure there is more and there may be a part 2 for this. If you have any questions feel free to leave them below!
Thanks for stopping by,
Hugz,
Jess


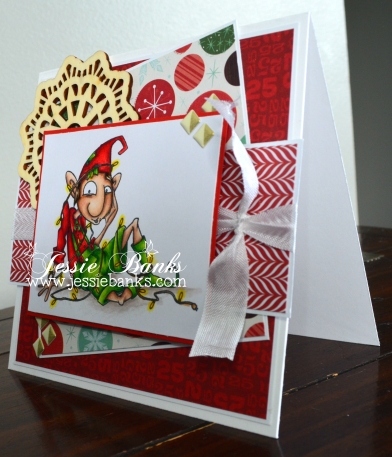
![IMG_3252[1]](https://i0.wp.com/jessiebanks.com/wp-content/uploads/2015/11/img_32521.jpg?w=259&h=368&ssl=1 "IMG_3252[1]")