Hey everyone, today is more of an update post, over on my Youtube Channel Part 2 and 3 of the C.C. Designs videos are up! I also have a new one for you today! Colouring Art Ninja from Bloobel Stamps!

Thanks for stopping by,
Hugz,
Jessie

Hey everyone, today is more of an update post, over on my Youtube Channel Part 2 and 3 of the C.C. Designs videos are up! I also have a new one for you today! Colouring Art Ninja from Bloobel Stamps!
Thanks for stopping by,
Hugz,
Jessie
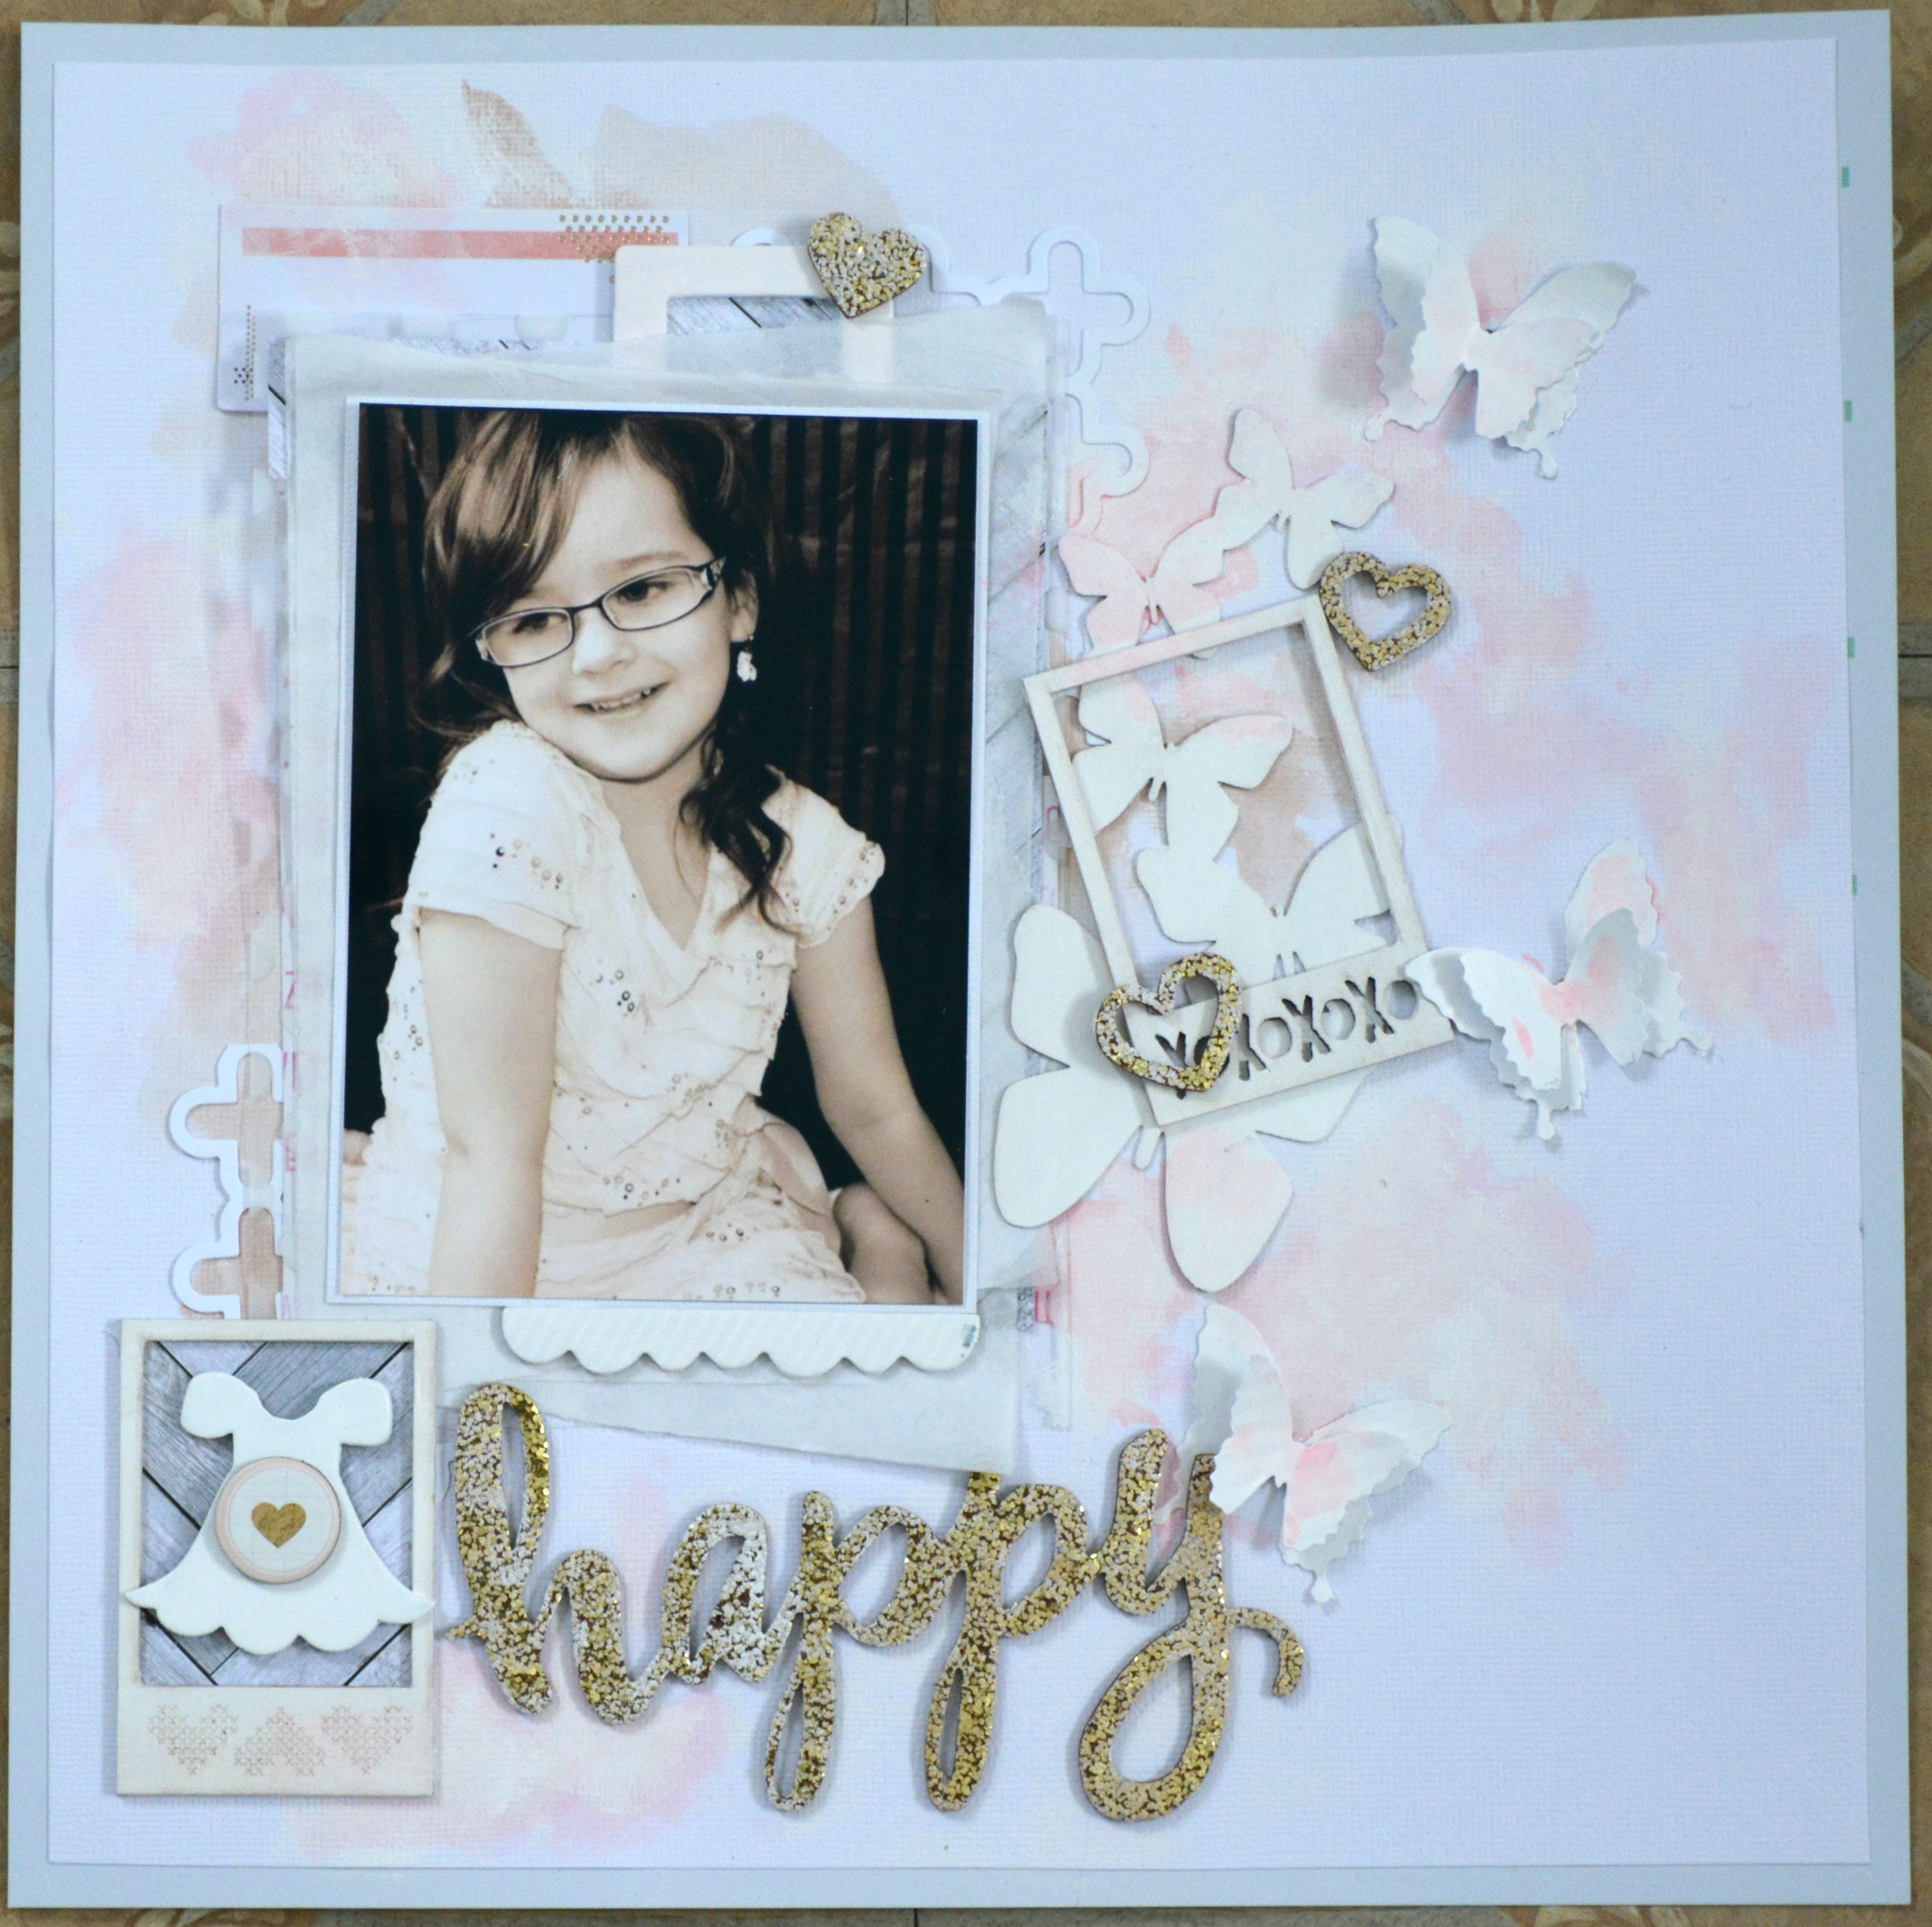
Hey everyone, first things first, I am sorry that my whites are reading slightly blue (teal kitchen couldn’t find my grey card, and its snowing outside). Anyway, this weekend challenge on the Hip Kit Member Forum on facebook is a challenge based on Wilna Furstenberg, lots of white space with just a little colour. These types of layouts are a big challenge but I had a ton of fun doing it!
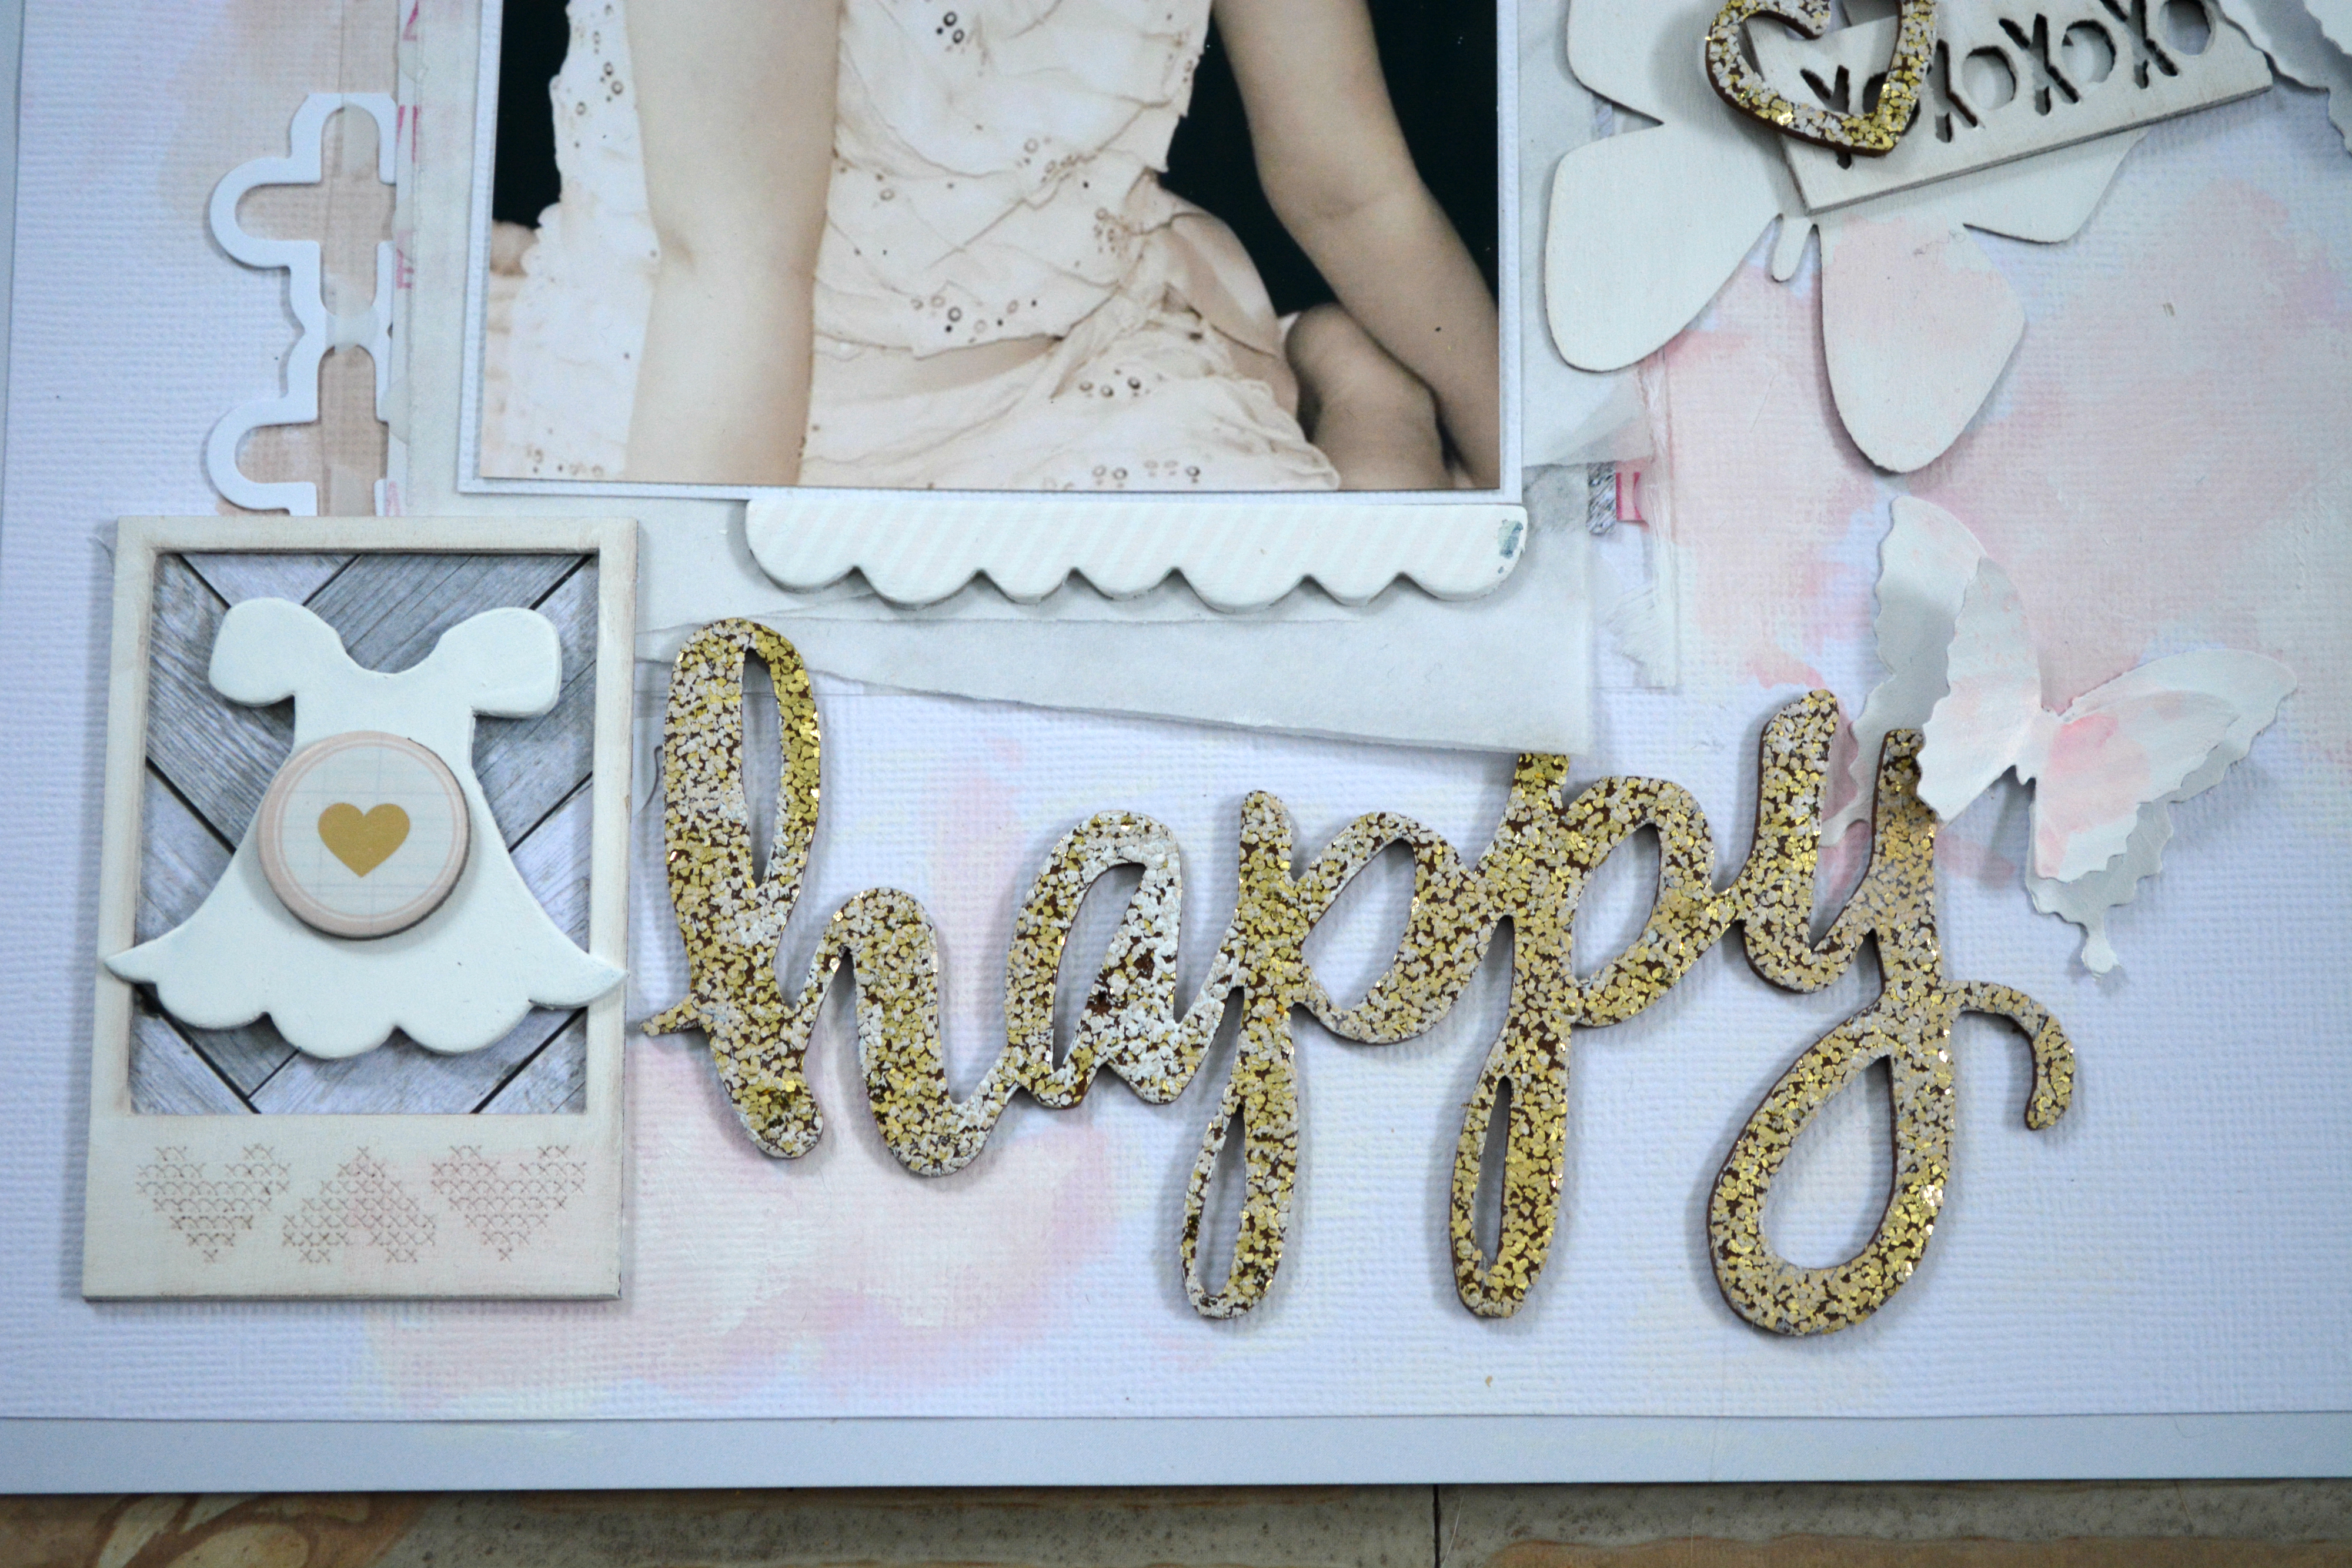
I dug into my stash for a bunch of shapes and pieces that I wanted to use and then painted them all white. The glitter word thickers were a little bit to bright for the layout I felt so I did brush over them all with a dry brush to dull it a bit with white paint.
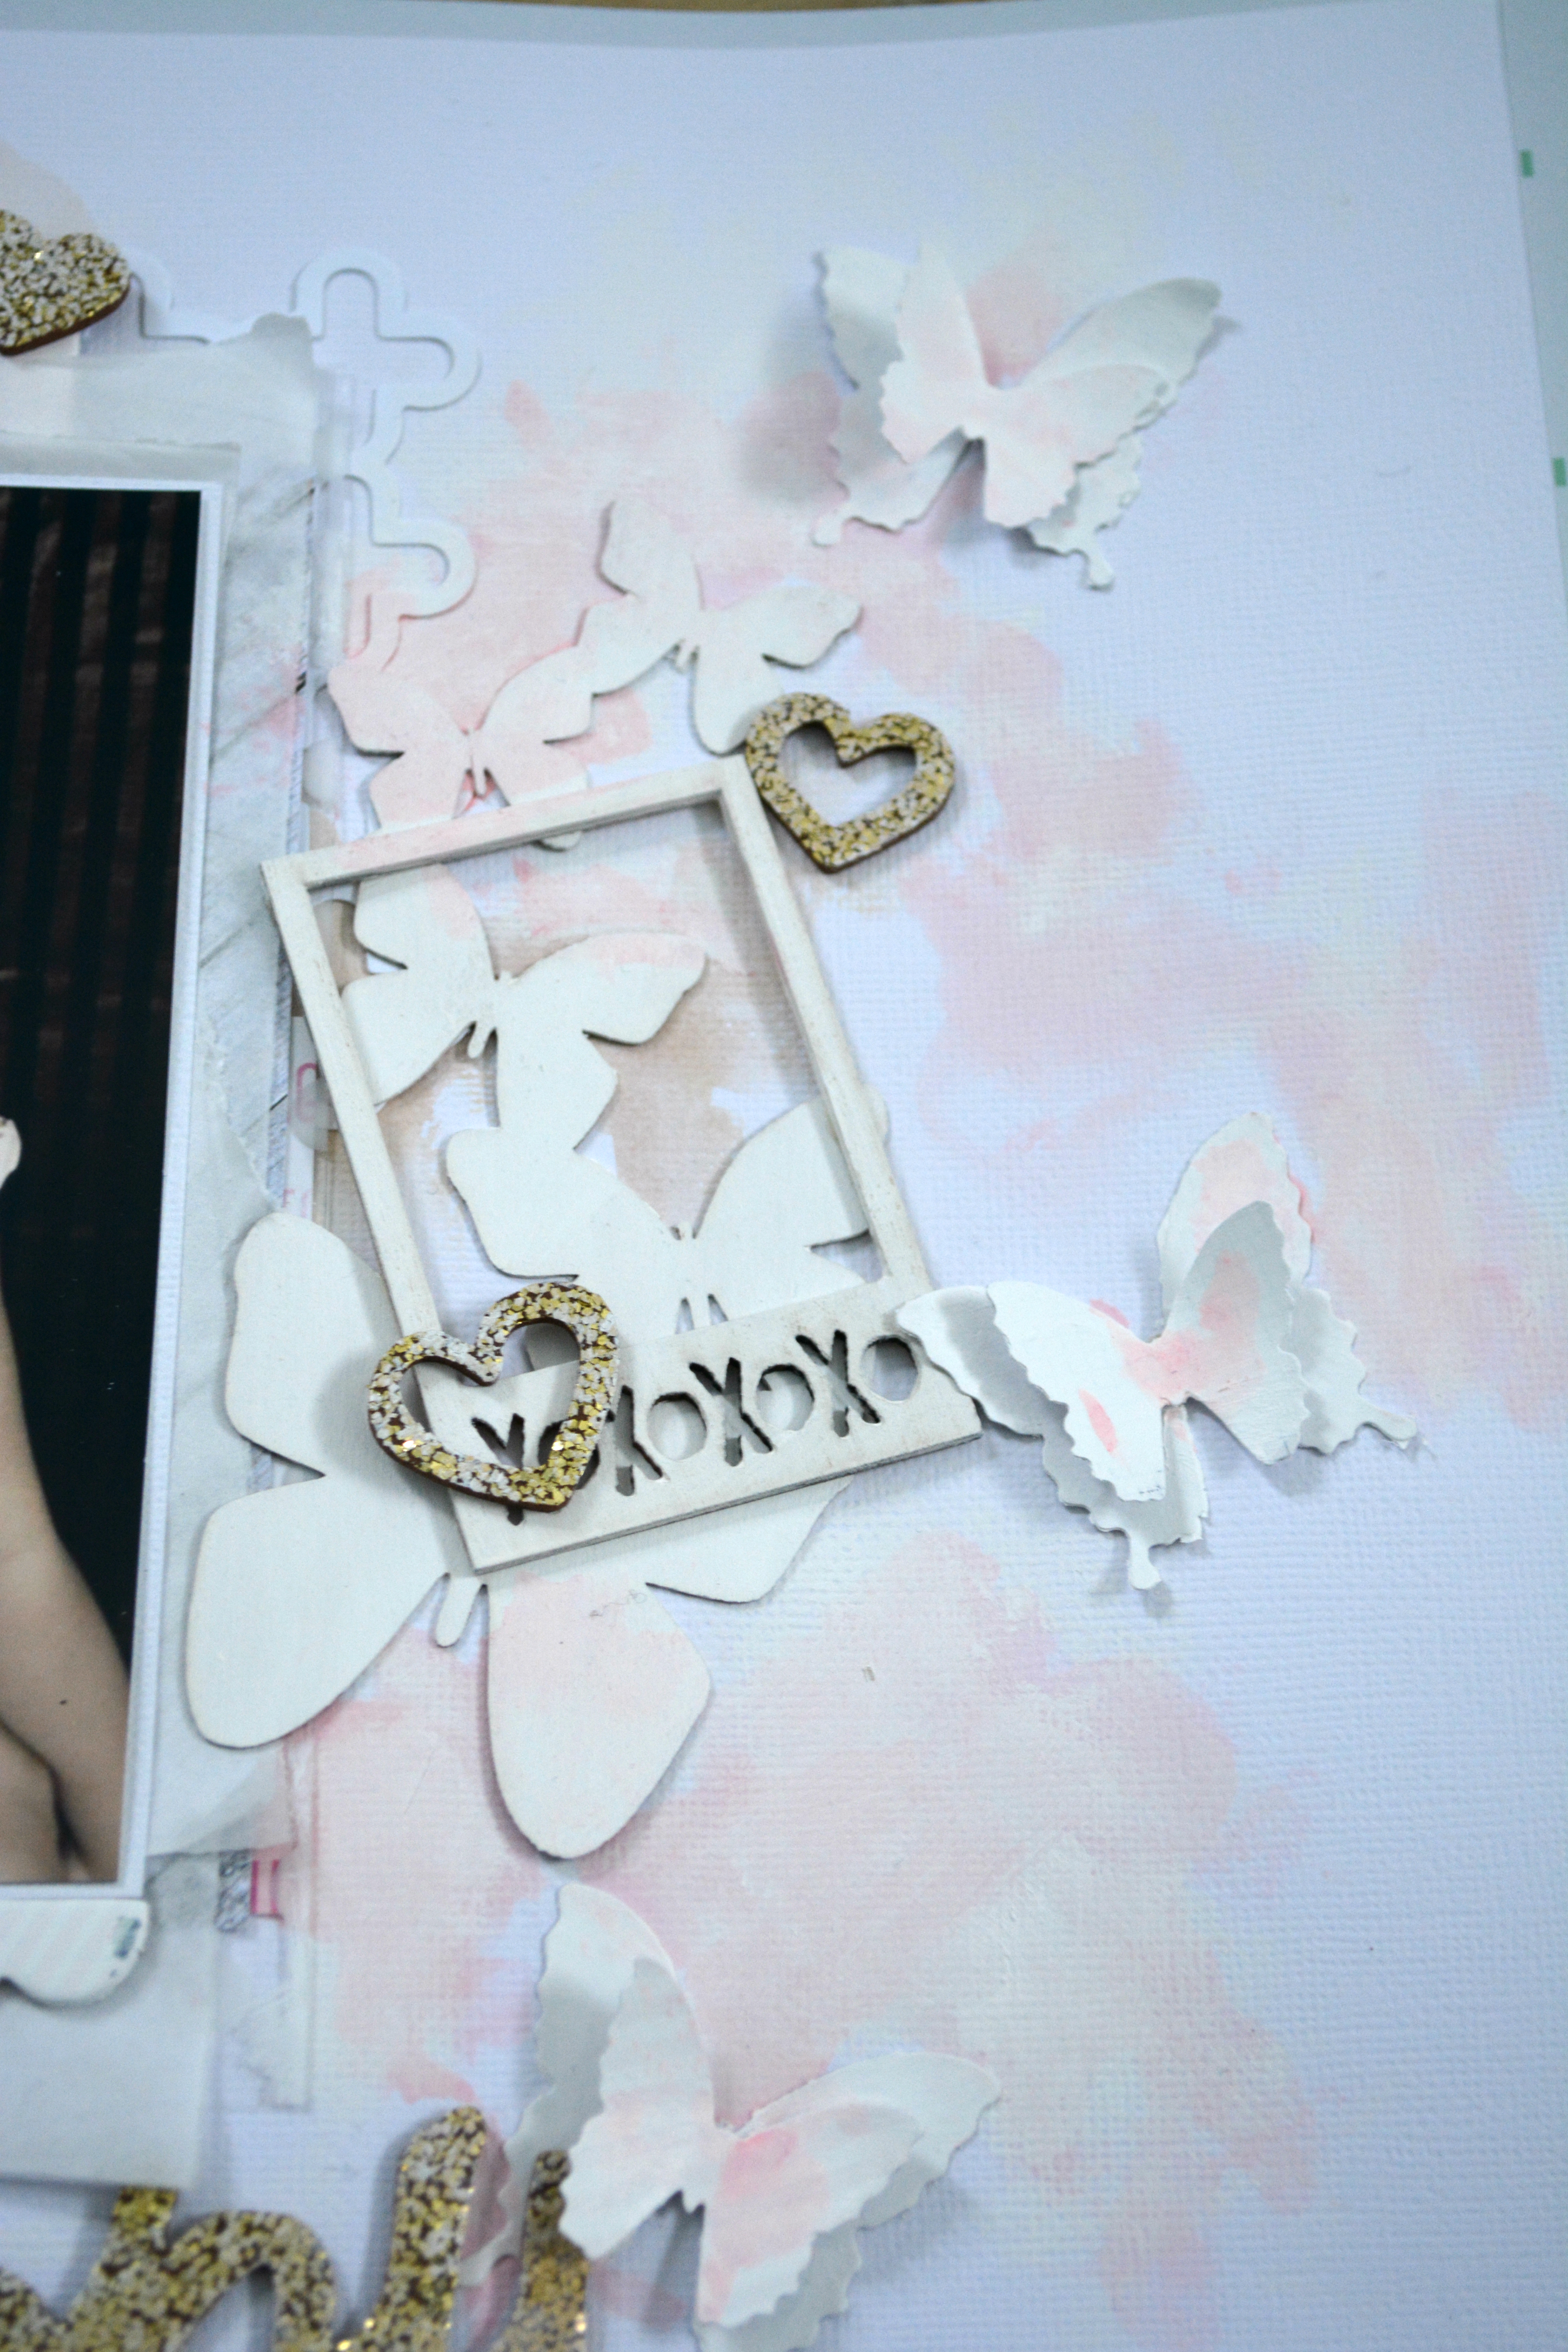
The pink colour and the brown were added using my peerless watercolours, and then I added some white acrylic lightly over top as I thought the colour was just a bit to bright. I also layered just a little bit of the patterned paper from the Seridipity 6×6 pad under the photo and tissue paper and between the acetate sheet just for a hint of colour.

Products used:
Americian Crafts – White Cardstock
Theresa Collins – Daily Stories – Butterfly stickers
October Afternoon – Daily Flash – Flash Chips – Frame Up
October Afternoon – Daily Flash – Flash Chips – To the Point
Crate Paper – Oh Darling – Chipboard Stickers
Jullibean Soup – Mini Placemats – Here’s the Story
Thickers – Story font – Glitter Foam Phrase – Open Book
Maggie Holmes – Open Book – Chipboard
Amy Tangerine – Stitched – Die cuts
Golden Titanium White Heavy Body Acrylic Paint
Thanks for stopping by,
Hugz,
Jess

Hey everyone! I was simply thrilled to get my hands on the December and January Hip Kits (I live in Canada so Kim ships to me every other month saves me a little money).
I thought these pages were so simple and soft and I have been wanting to scrapbook this photo from my sisters wedding and it all just worked together so well.

These die cuts we got in the Heidi Swapp package made a perfect title, I was a little worried at the start as they were slightly bend and twisted from in the package but once I sprayed them down they worked wonderful!
The background paper is Canson watercolour paper, I used Golden Titanium white acrylic paint to give me more of a contrast between the paper and the paint the white and off white look lovely together, especially after I added the Heidi Swapp colour shine to it.
The patterned paper that is backing the layout I think is from the December hip kit, but I can no remember for sure. If you need to know leave a comment and I will find out for you.

Products used:
Hip Kit January Embellishment Add on
Canson Watercolour paper
Heidi Swapp Color Shine- Blush – Coral
Sewing machine white thread
Thanks for stopping by,
Hugz,
Jess
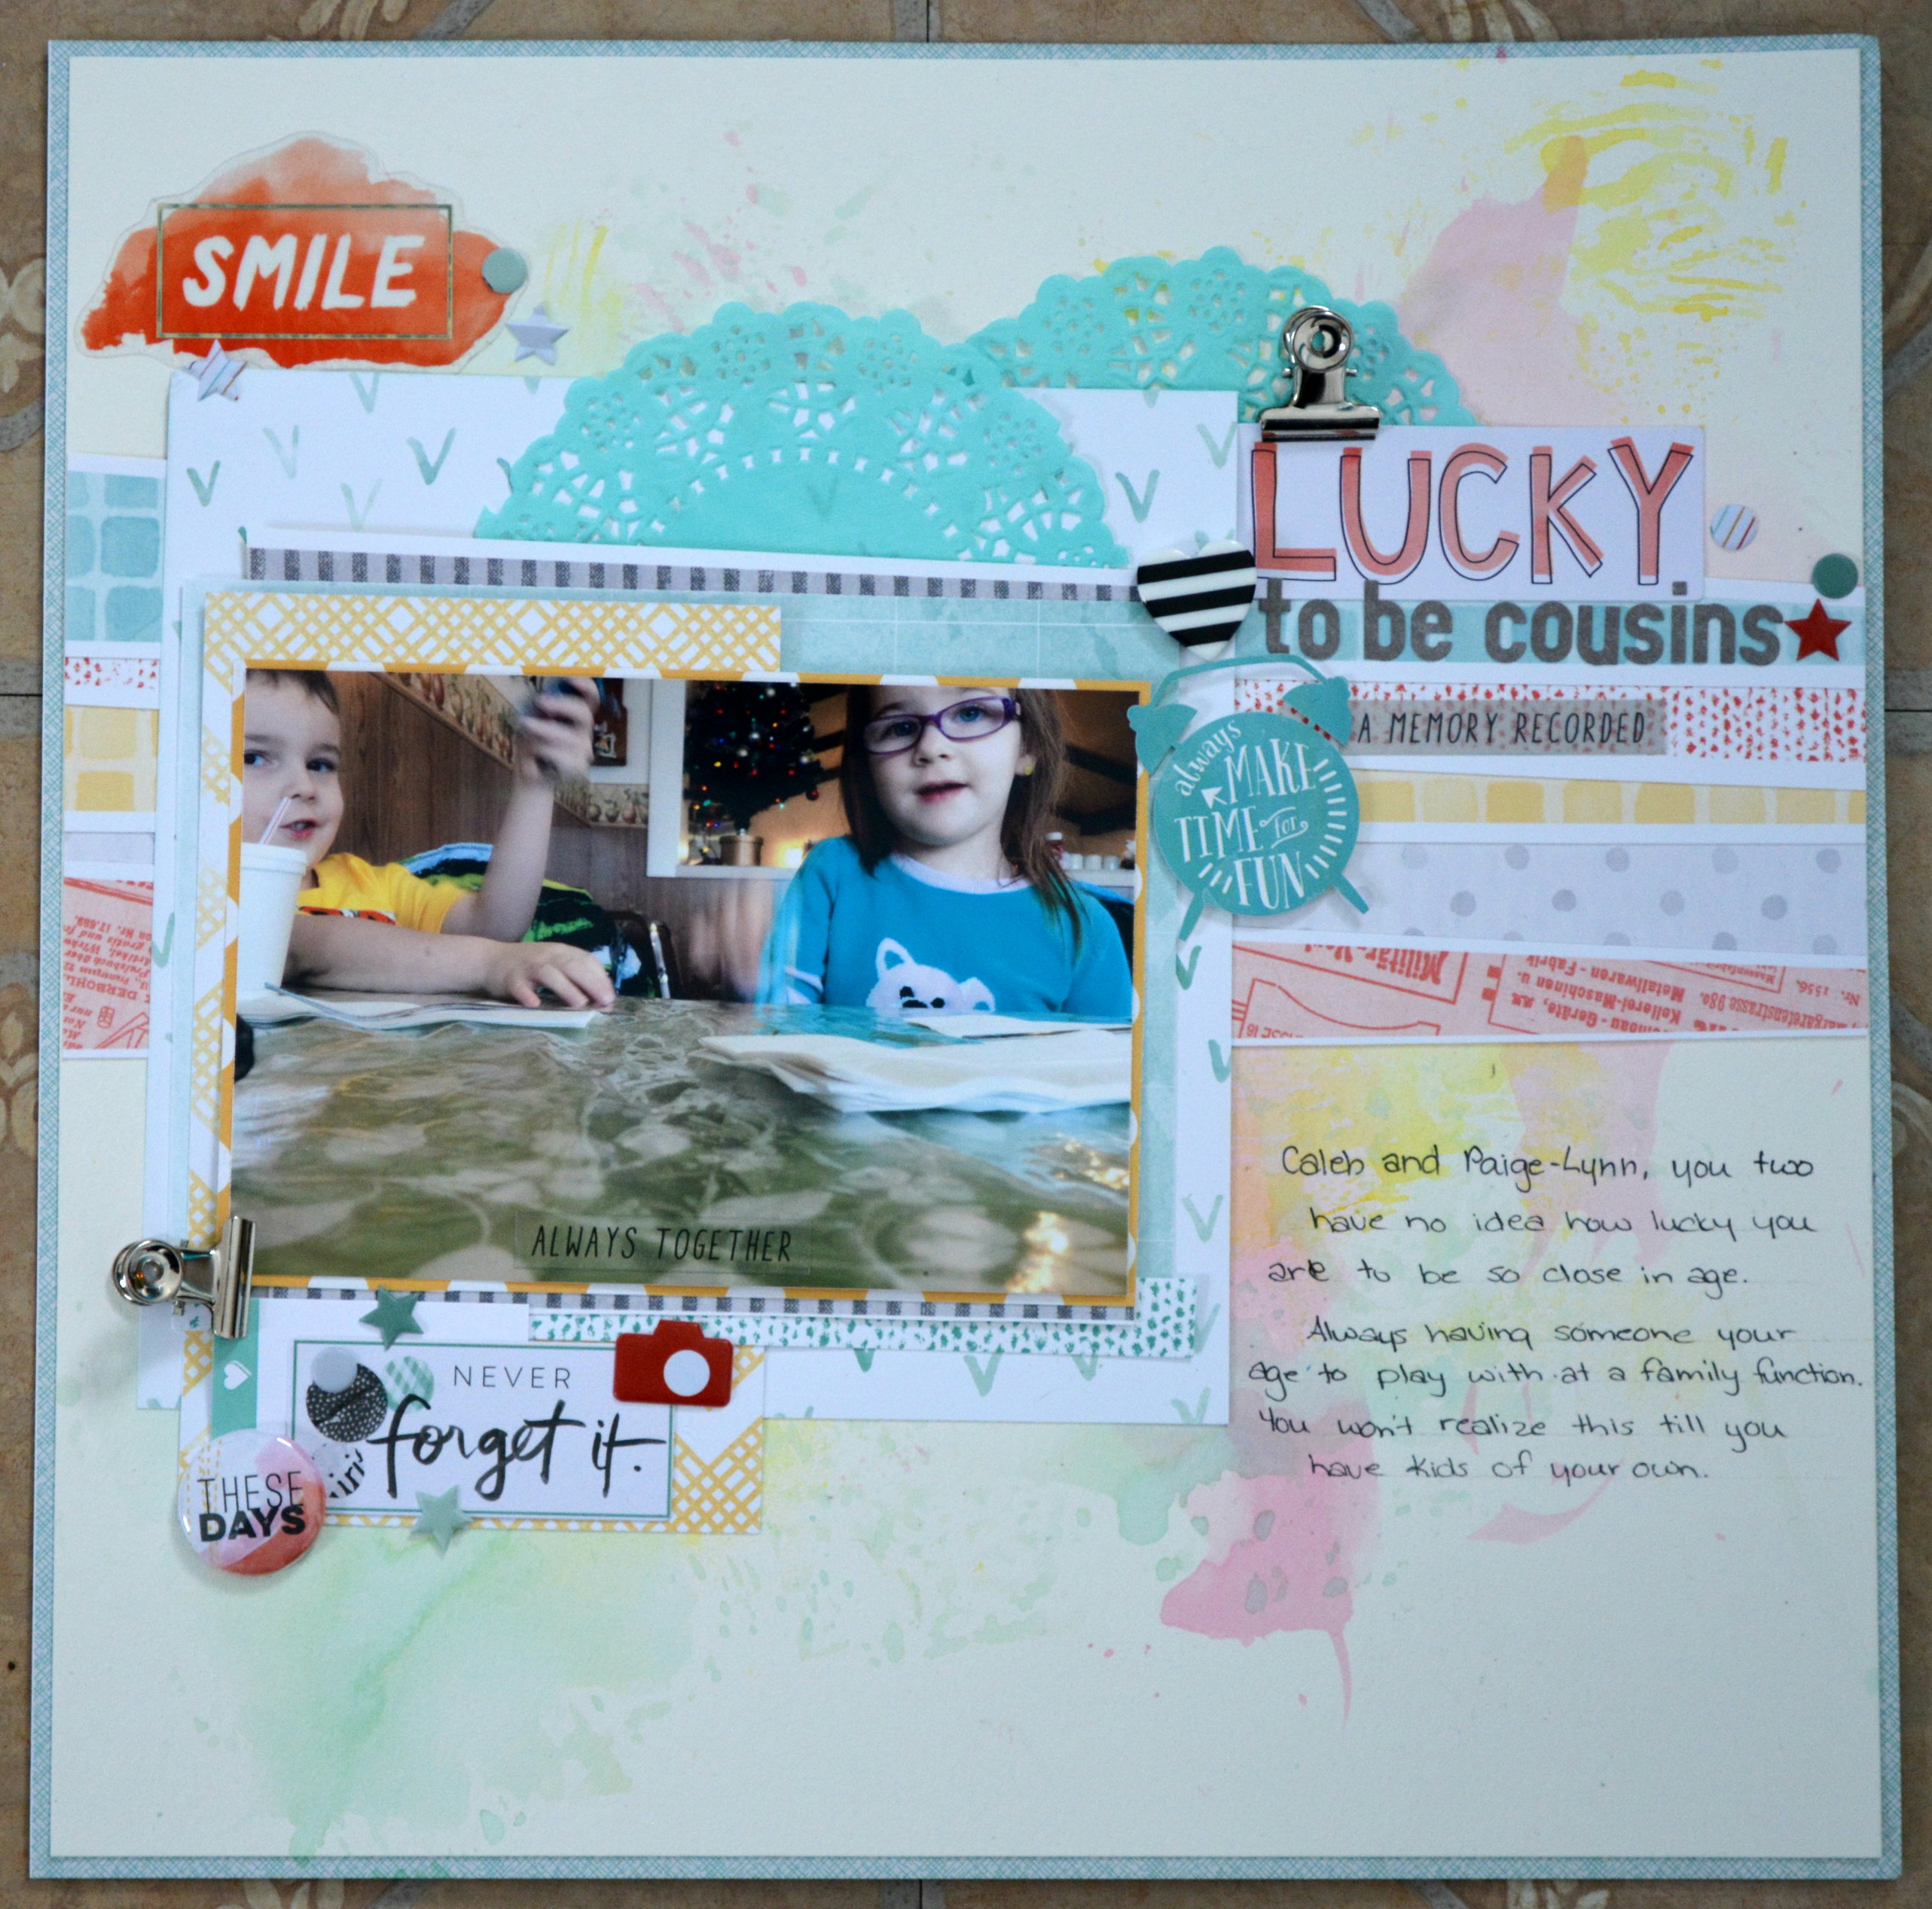
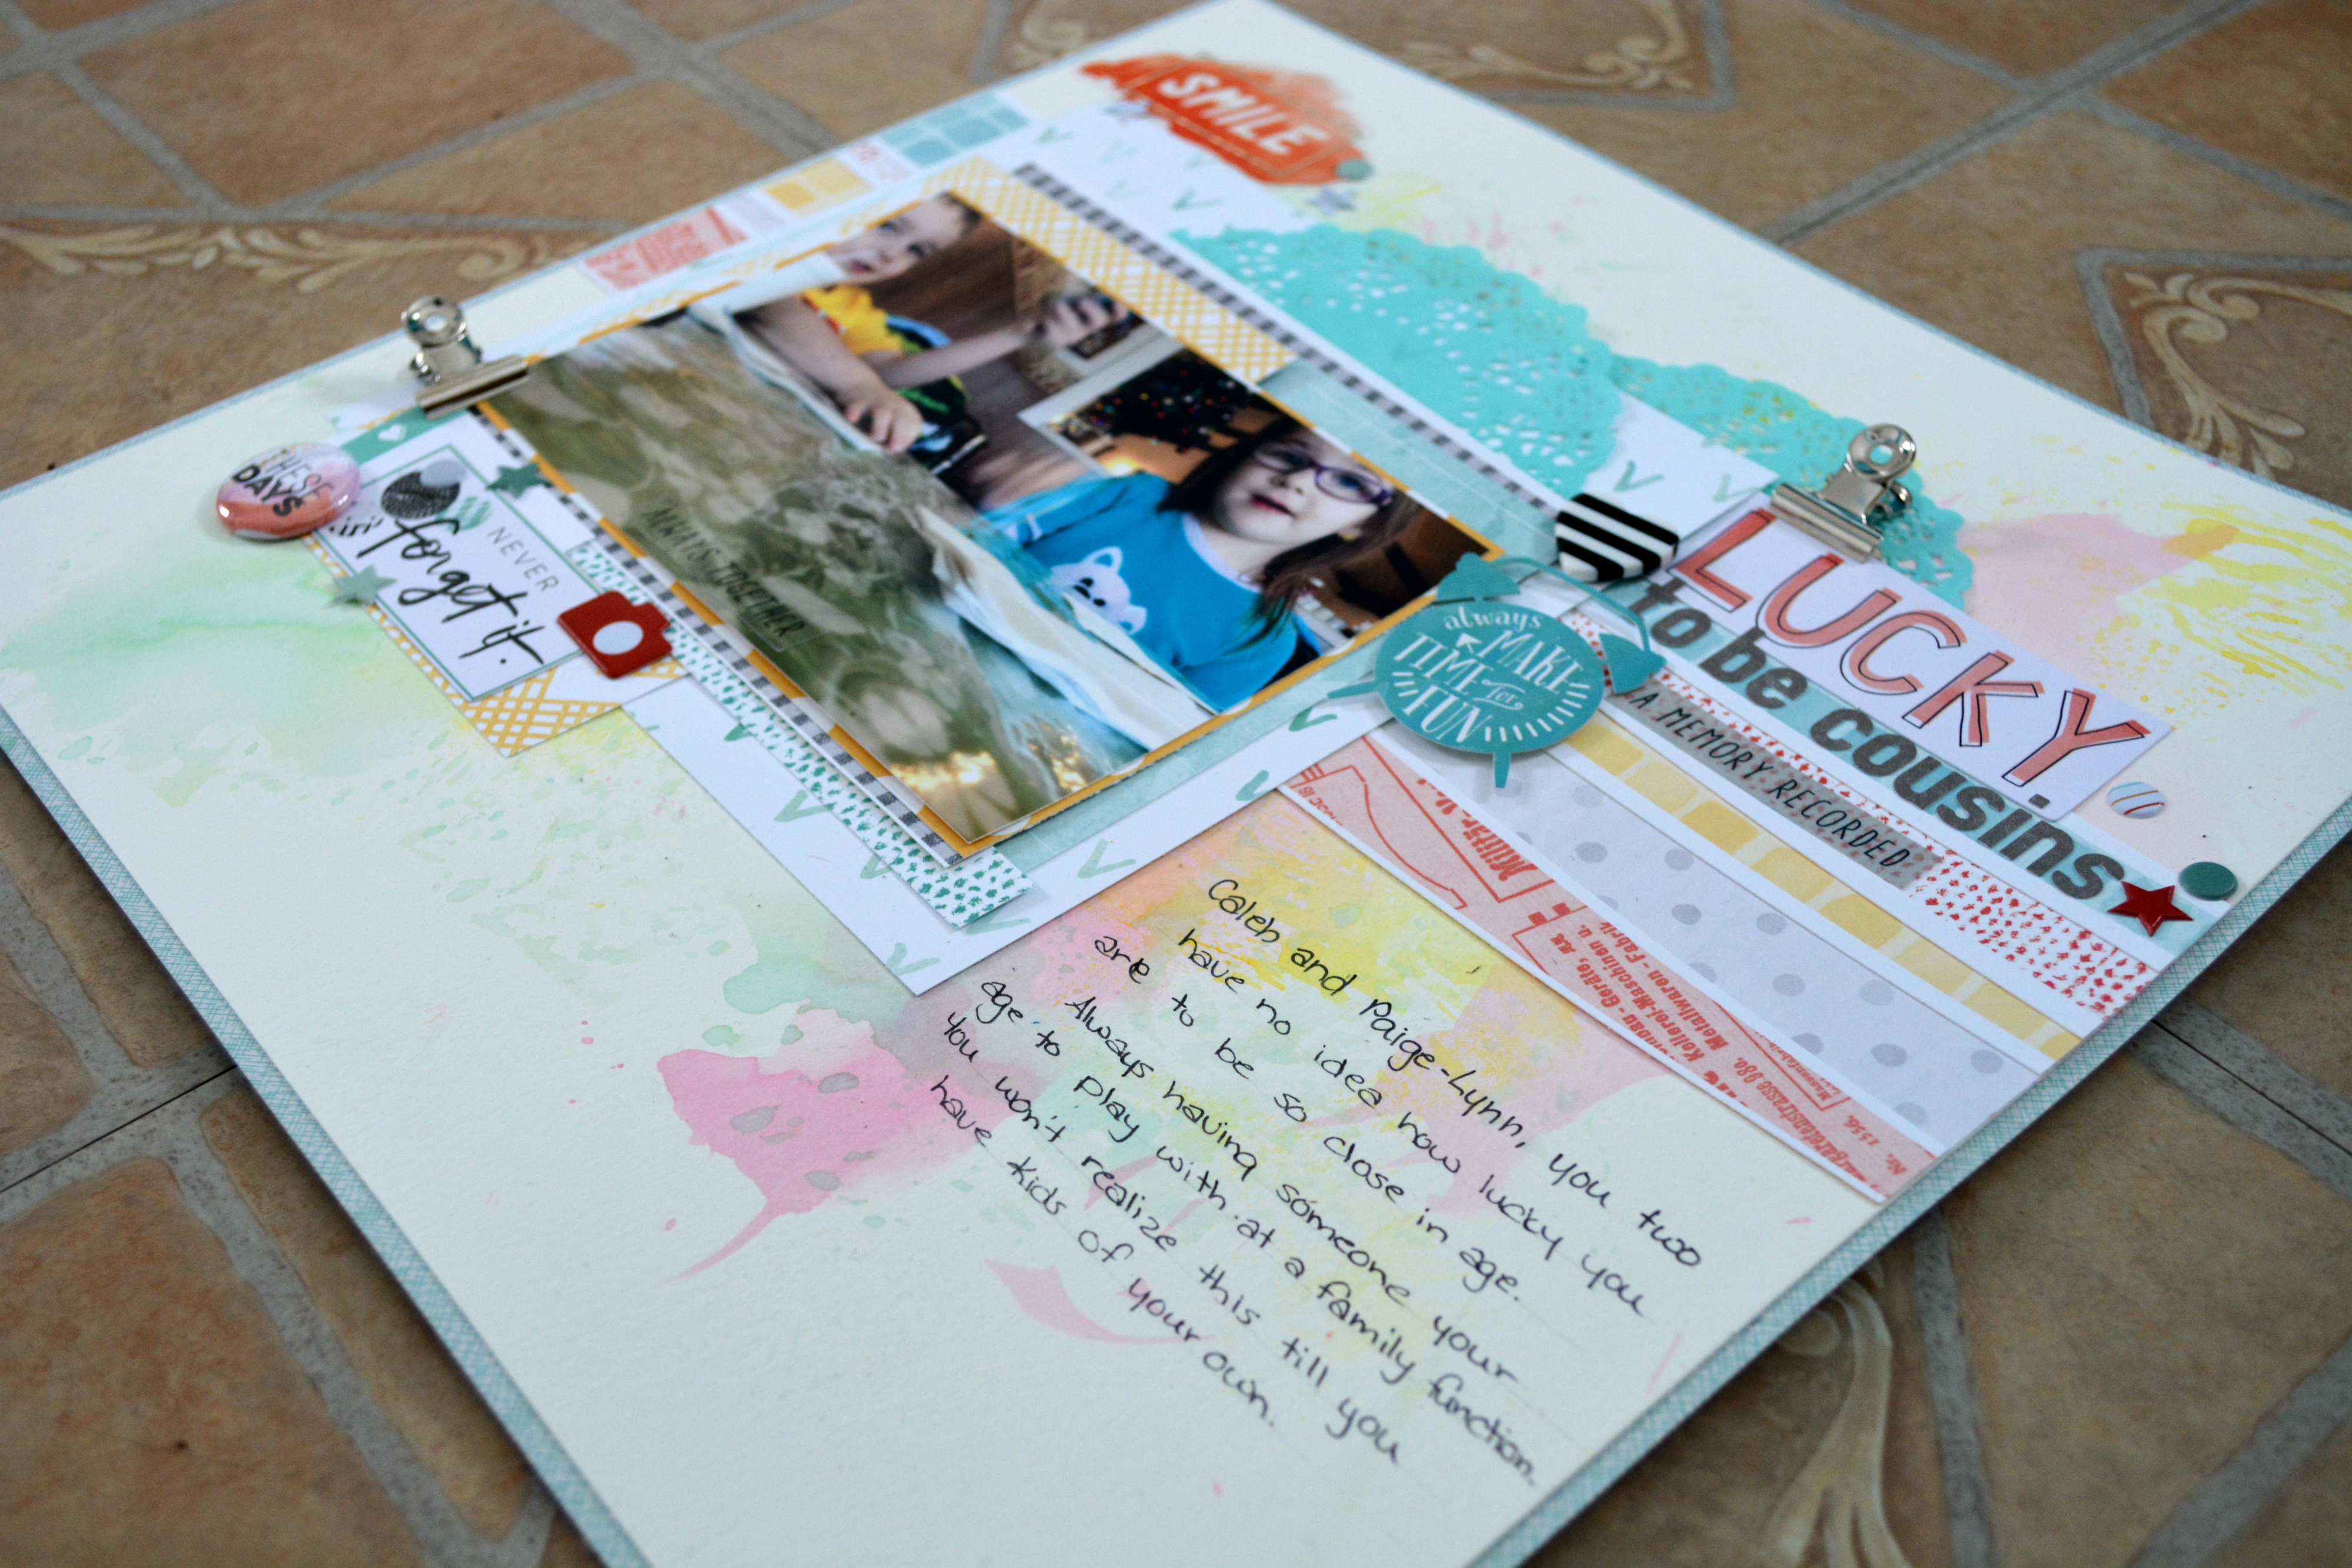
Hey everyone! I am here again with another layout to share with you all. I finally received my December Kit from Scraptastic on the 7th of January (Christmas slows all the mail down). I loved all the papers included in this kit!
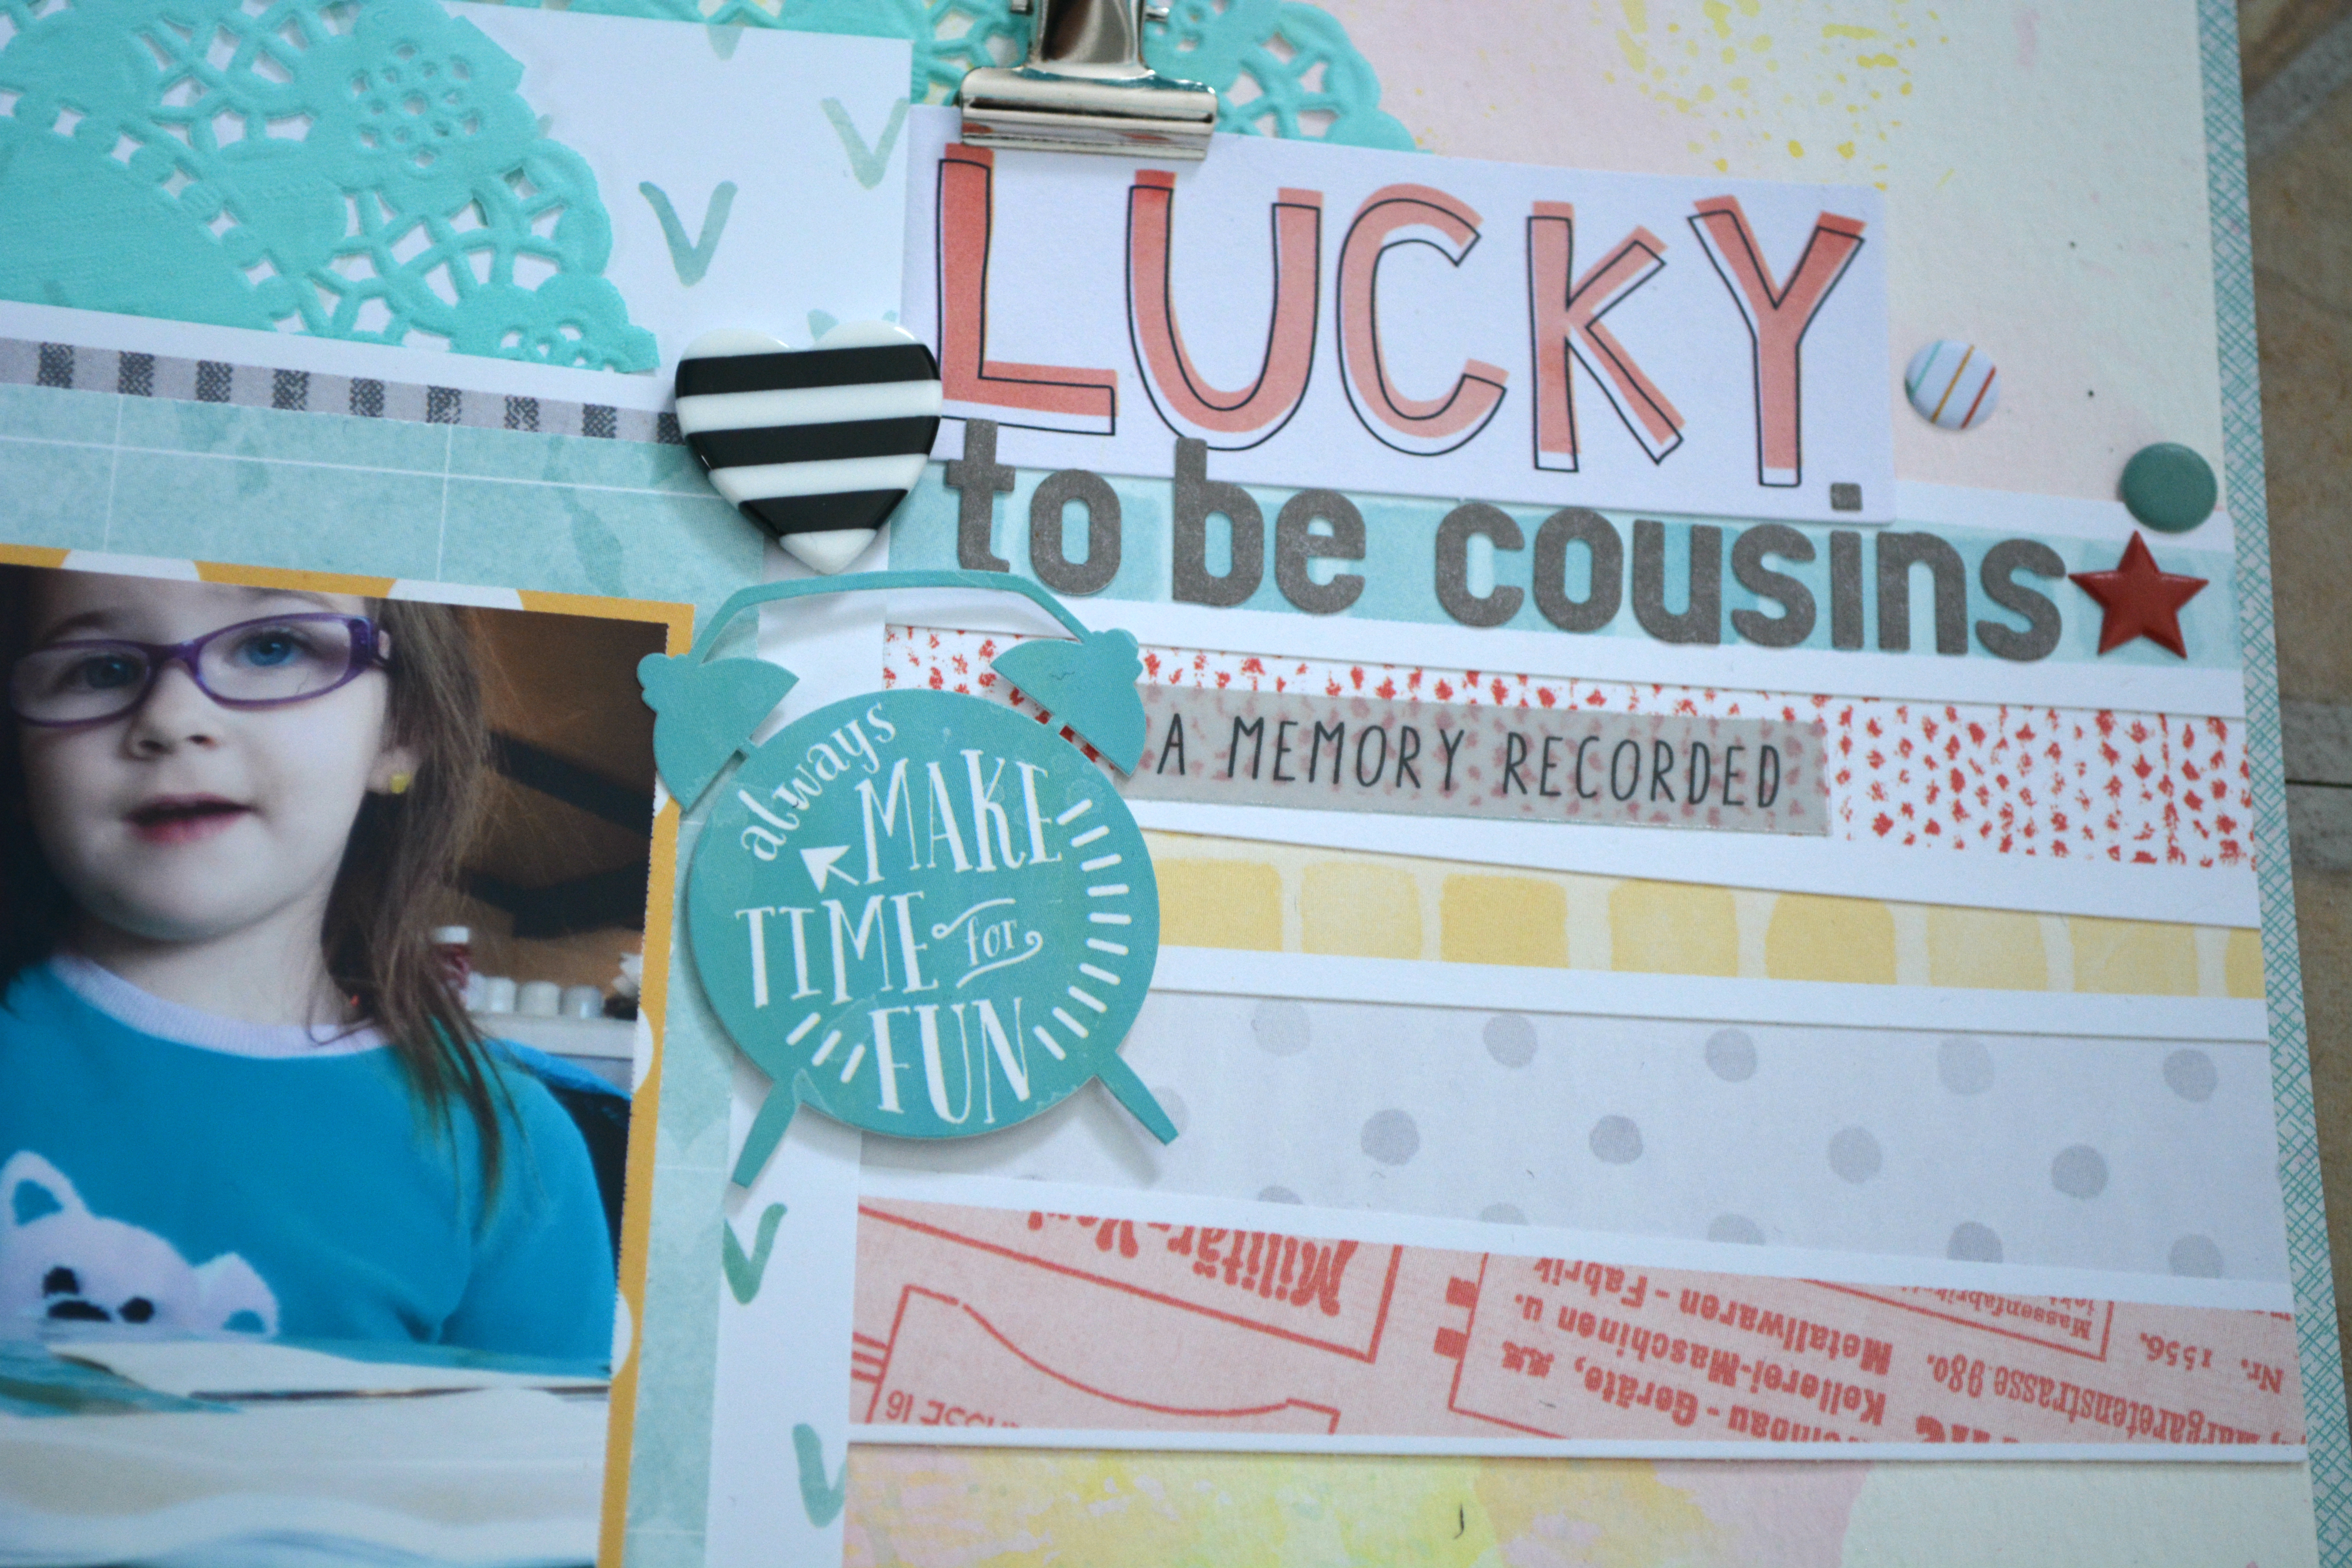
My son and my niece are truly lucky to be as close in age as they are (3 weeks apart). I just felt this photo was perfect to show that. Just a simple lunch out with me and them playing at the table.
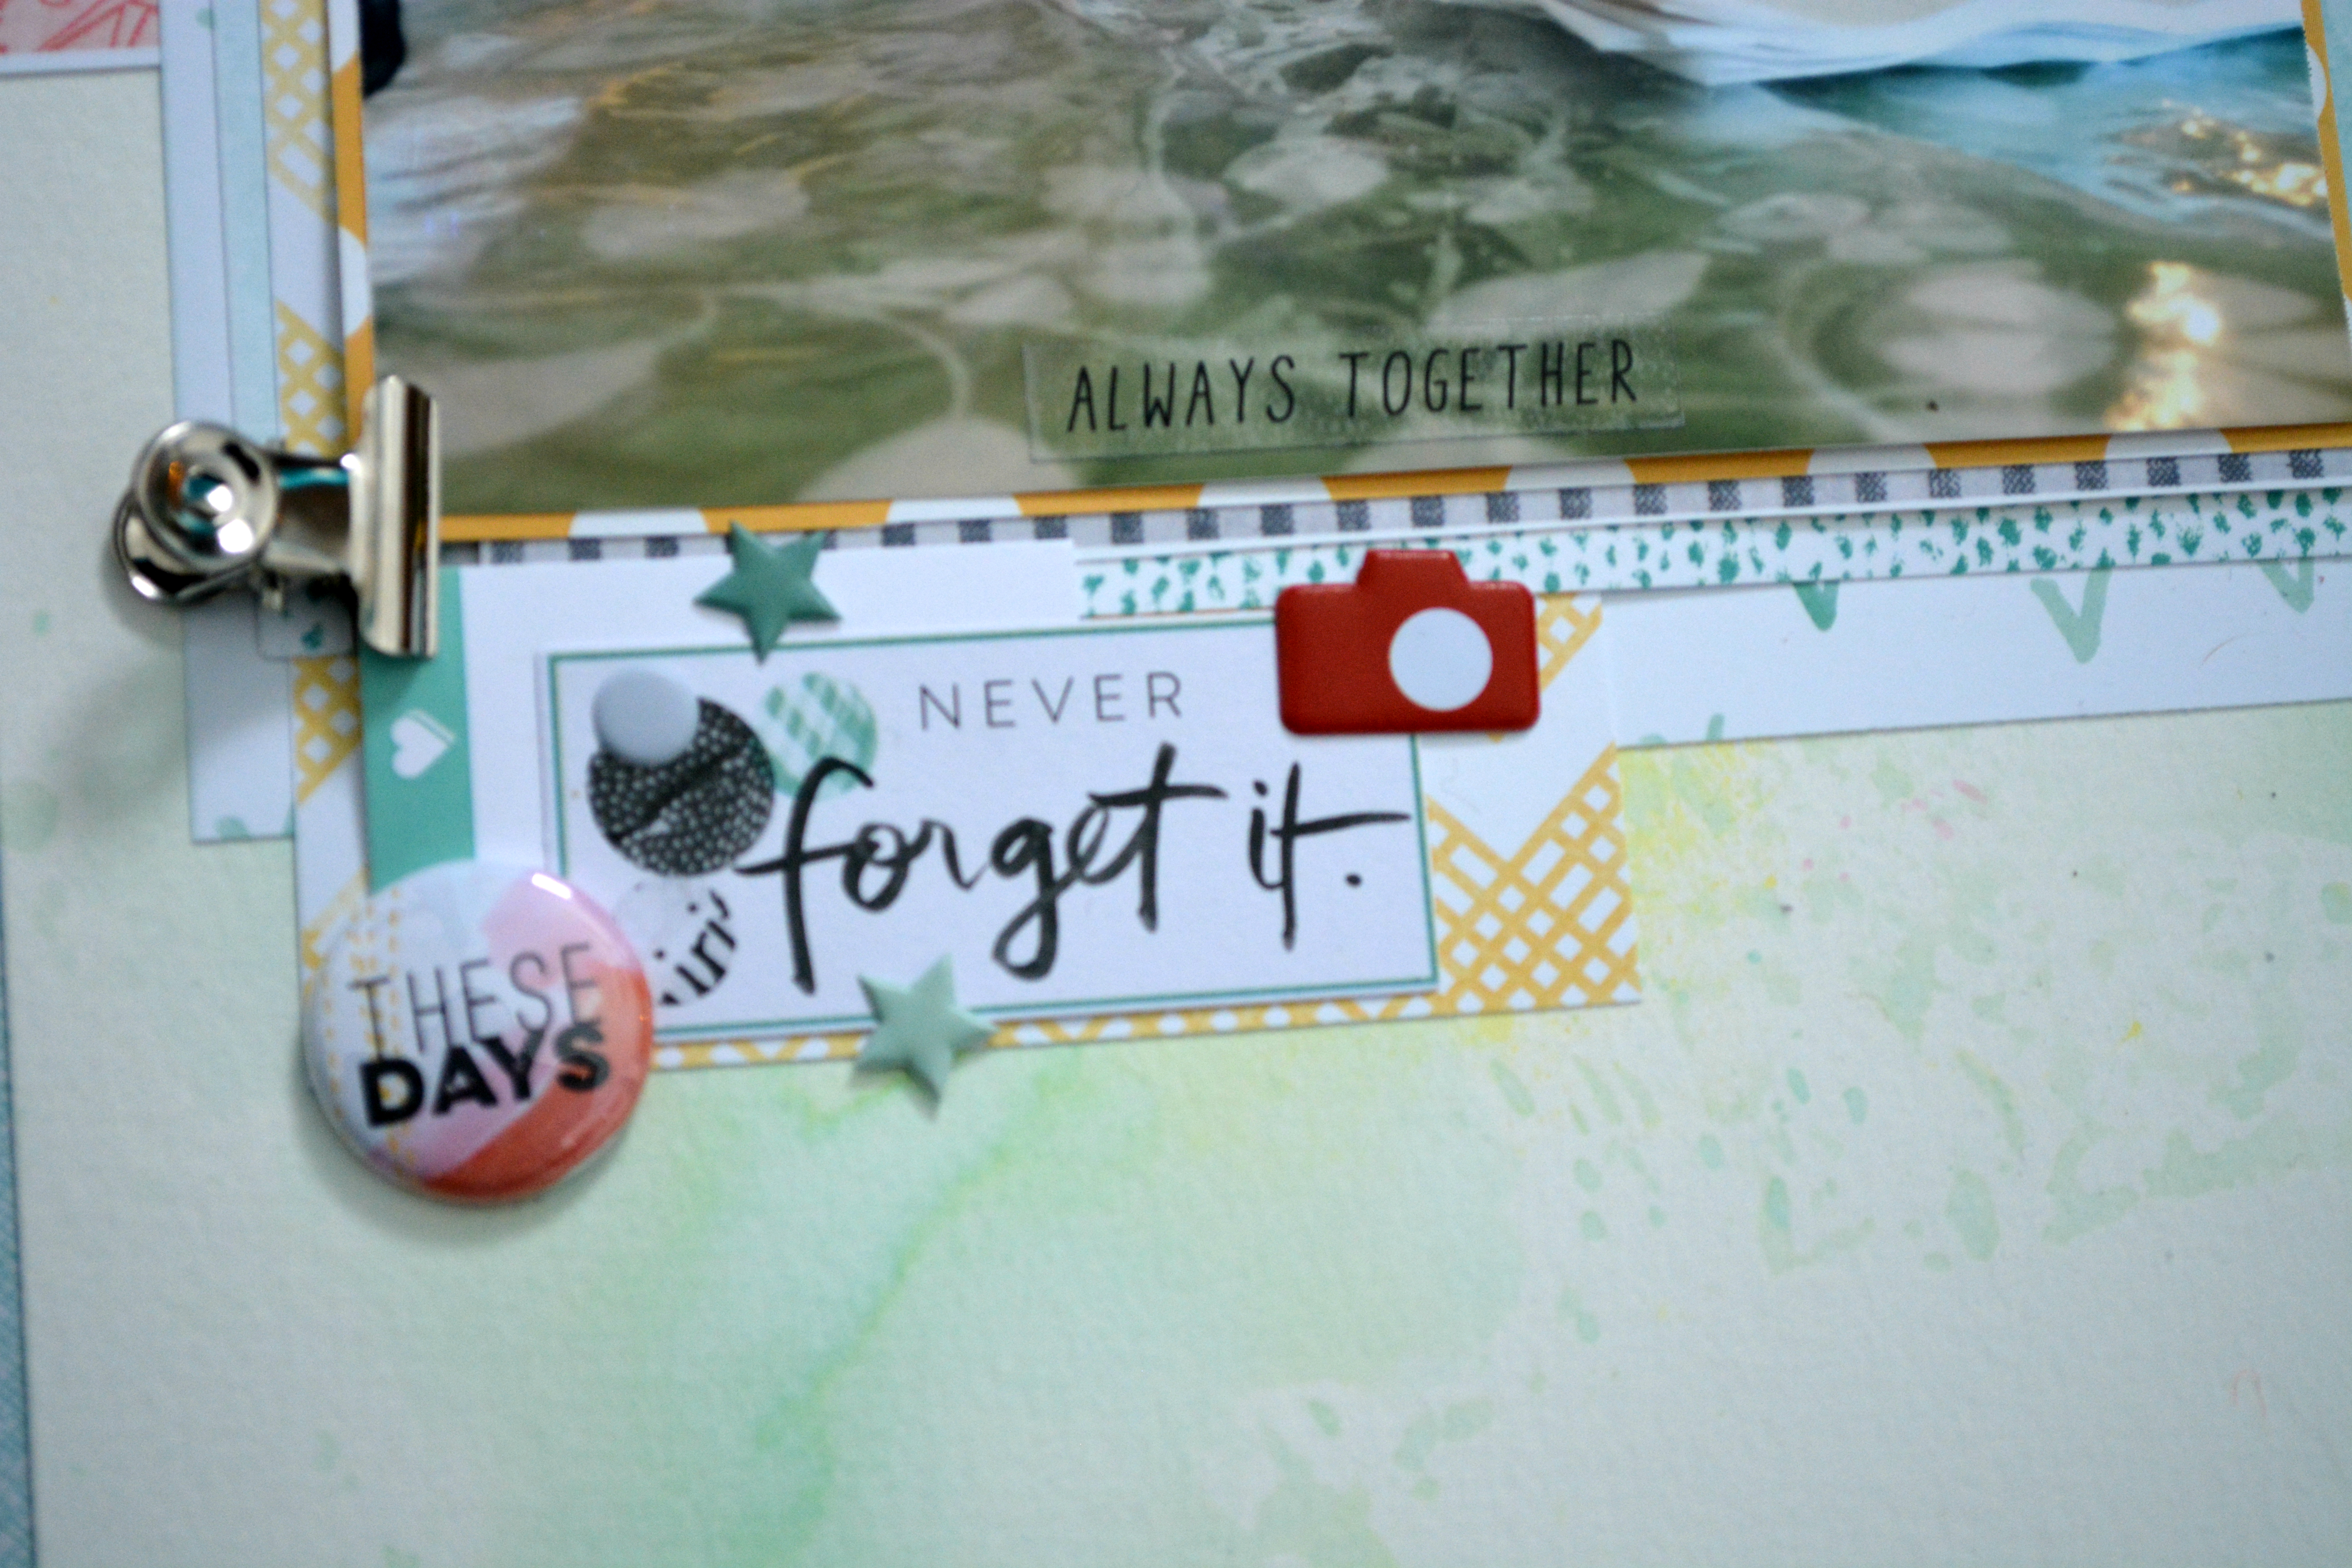
The background of this layout is Canson Watercolor paper. and I used Lindy’s stamp gang sprays to add colour (colours will be listed at the bottom of the post.
Products used
Scraptastic December Heartbeats Kit (the kit is sold out I can not find it on the site so I just linked to their site, if you really want to know what papers I used leave a comment and I will get the info for you.)
Canson Watercolour Paper
Lindy’s Stamp Gang Flat Fabios – Pink Ladies Pink, Pineapple Paradise, T-bird Turquoise
Black Sharpie Fine Tip Pen
Thanks for stopping by,
Hugz,
Jess
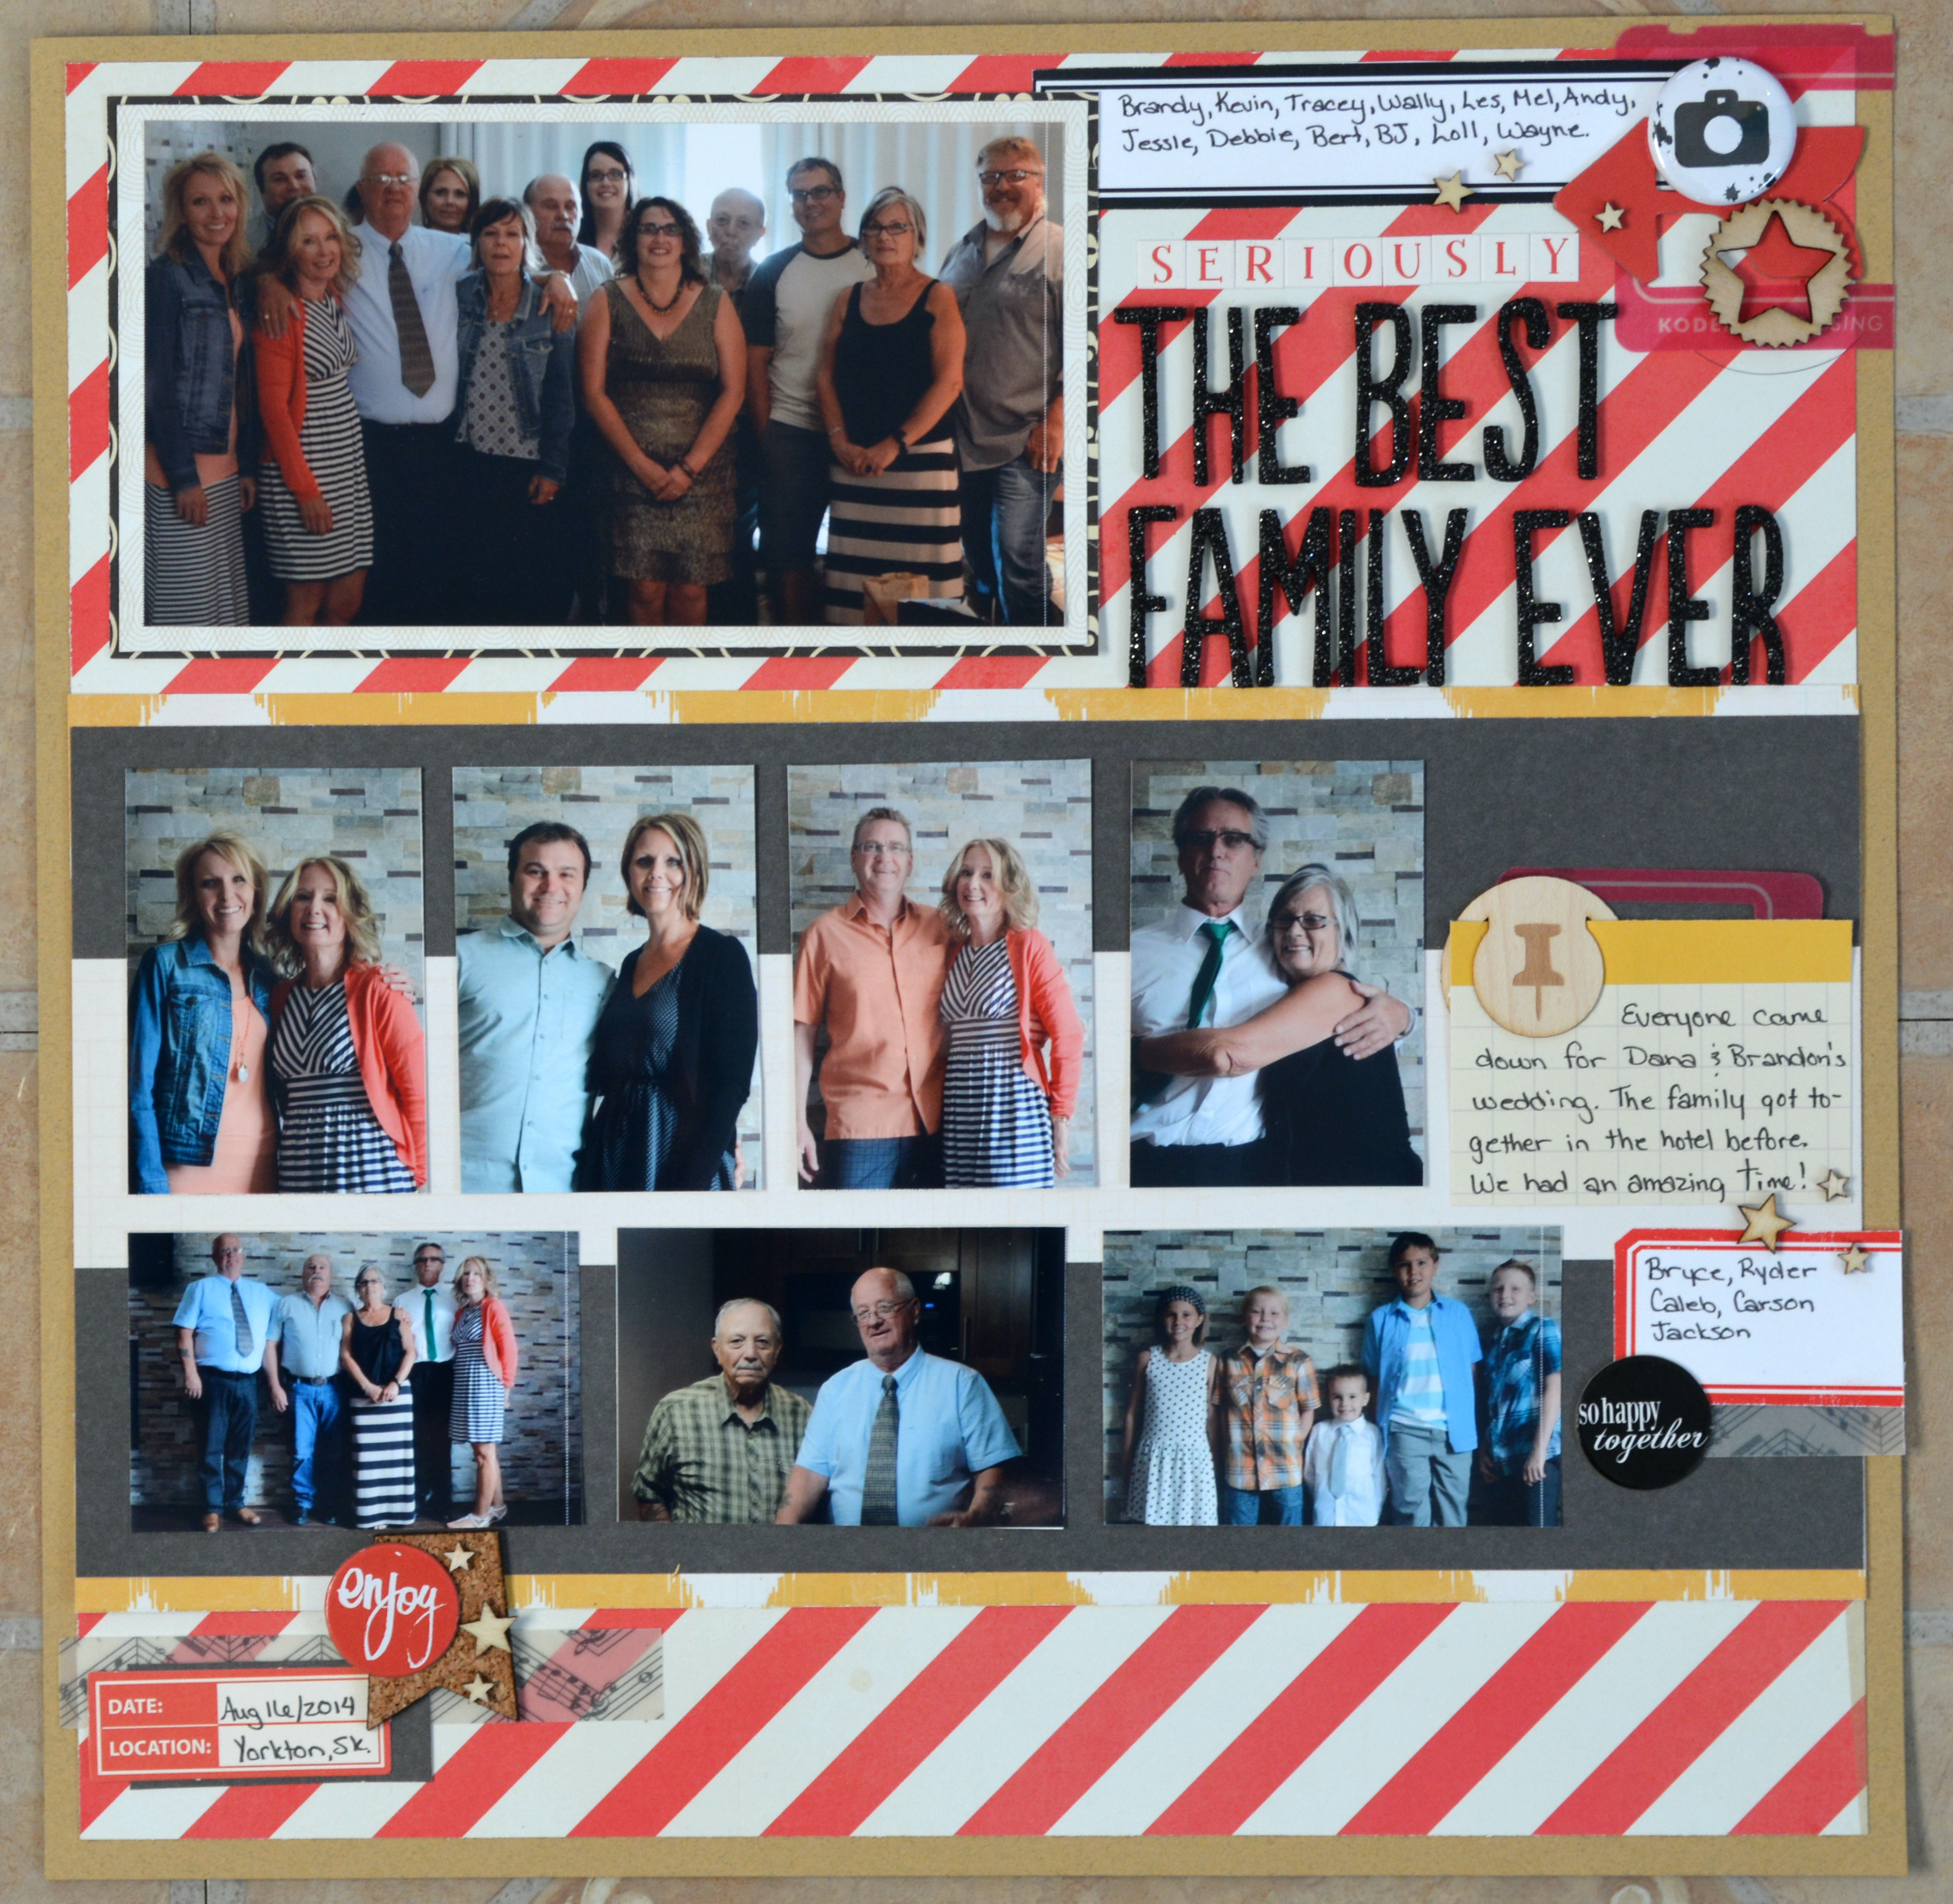
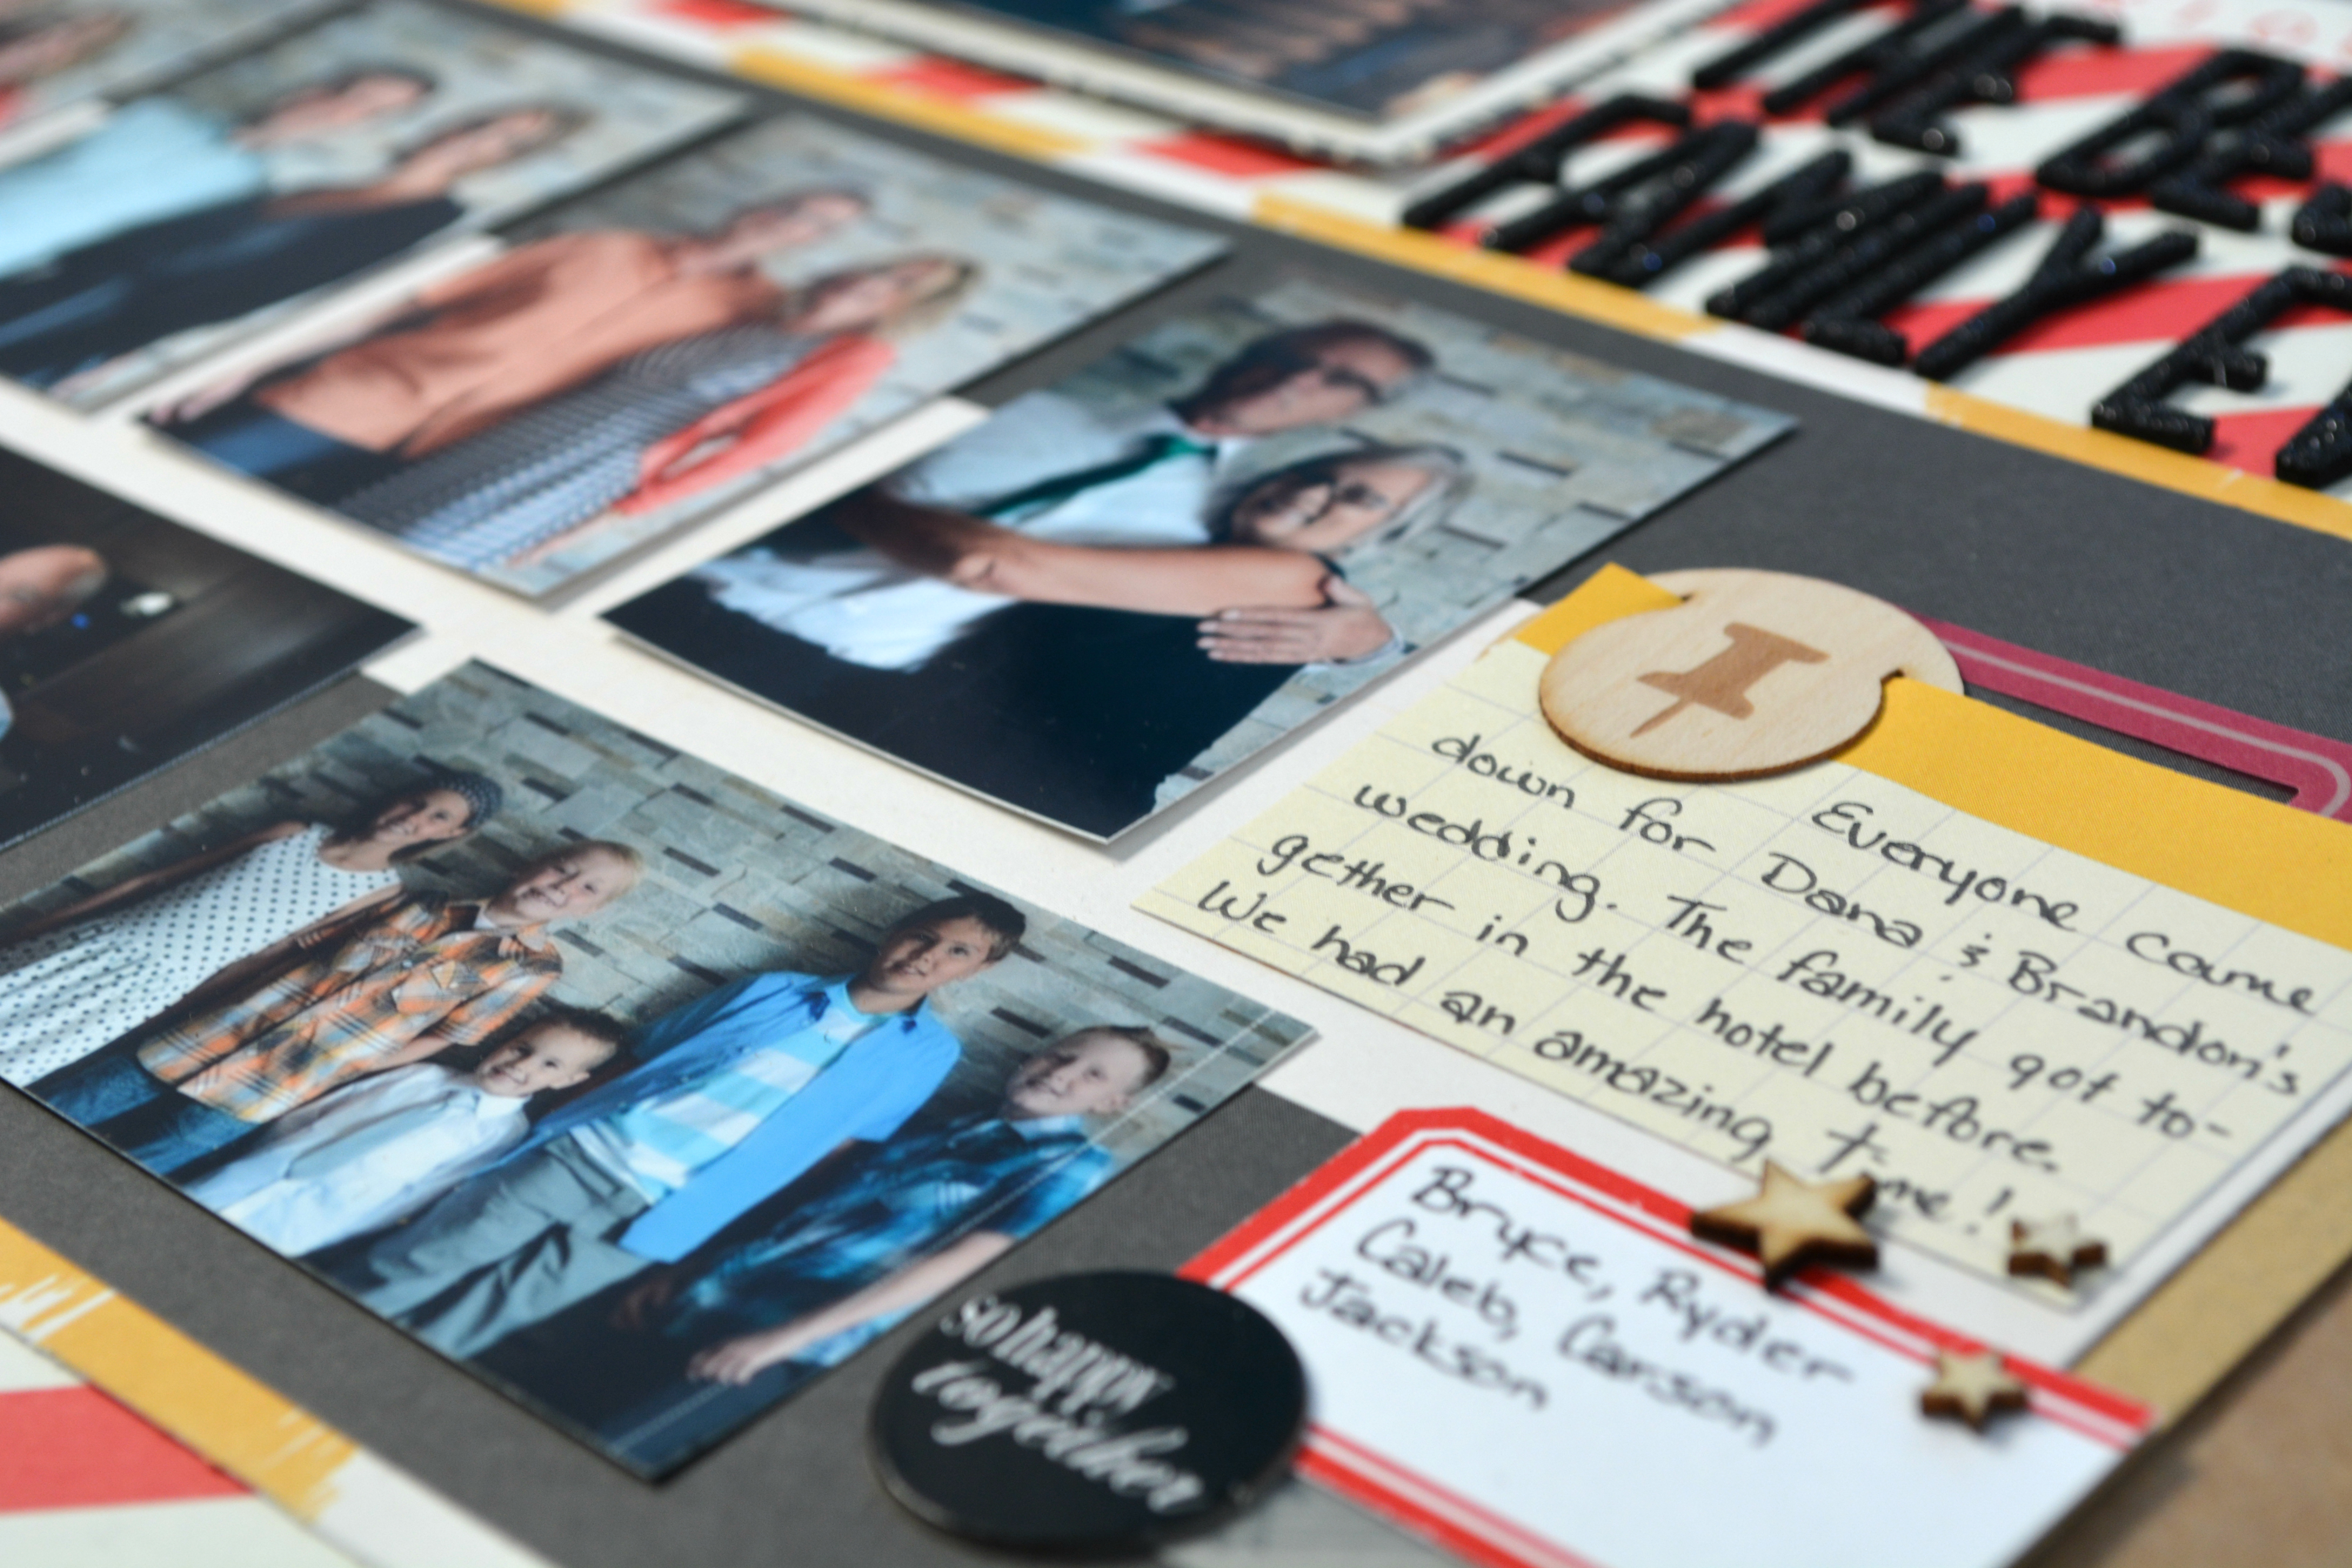
Hey everyone, I am usually a one or two photo’s on a page type person, I just seem to find more photos difficult to work with. So this layout has EIGHT, that’s right count them!
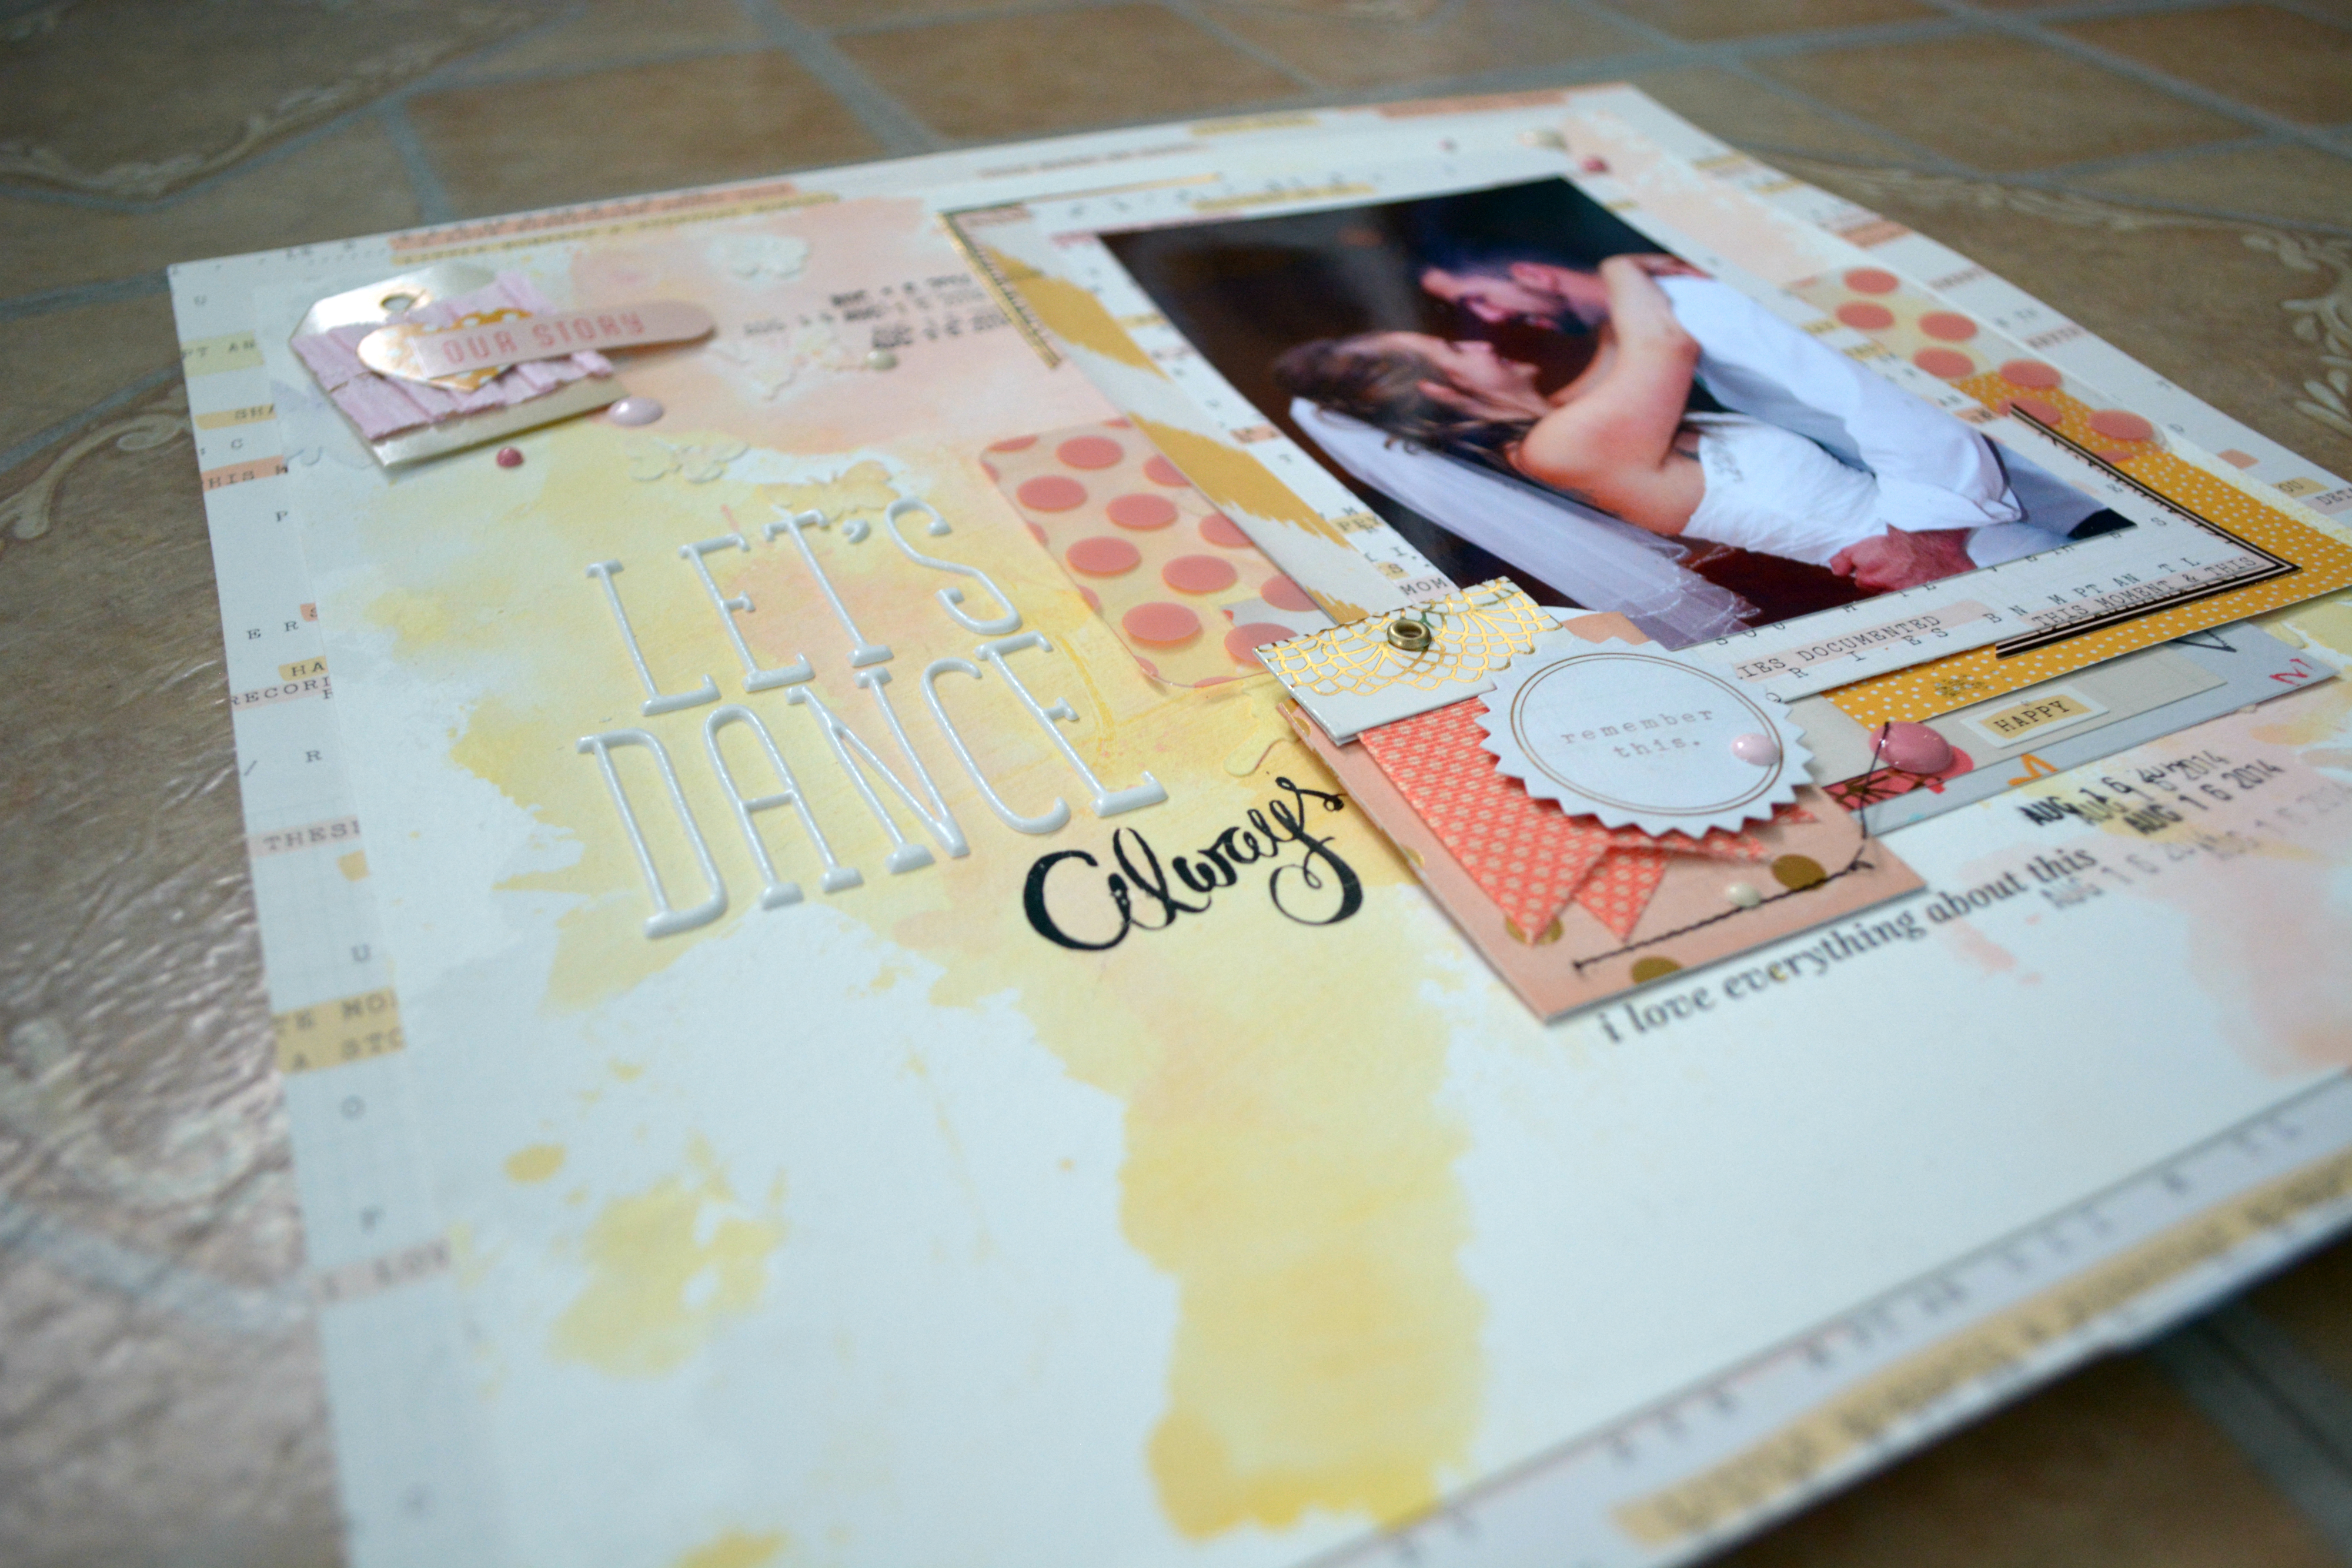
These photo’s are from back in August of 2014, my sister got married and everyone came up for the wedding, my parents rented a suit in a hotel across the street from the venue and we all hung out in there having a couple of beverages before the wedding.

I used the labels to list the people in order in the photo (you never know who may look at these and not remember everyone by their appearance at that time, or if I will always remember. Also I find I enjoy having names listed when there are many people in a photo.)

So on the bottom of the layout I used smaller photo’s to have closer looks at some of the people that were there, as well as all the children that were there.

Products Used
Kraft Cardstock
Crate Paper – Love Notes – Checked out
Crate Paper – Open Book – So Treasured
Crate Paper – Open Book – Little Notes
Pink Paislee – Solstice – Maldives
Crate Paper – Open Book -Bookmark Paper
Simple Stories – 24/7 – Good Stuff
Thickers – Journal Font – Black Foam Glitter
October Afternoon – Daily Flash – Red Alpha
Studio Calico Label Printables
Crate Paper – Oh Darling – Vellum Shapes
Project Life Chipboard
Daily Flash – Snap Caps – Girl Talk
Scraptastic Exclusive Flair, Wood Veneer, and Cork
Studio Calico – Tiny Stars Wood Veneer
Thanks for stopping by,
Hugz,
Jess
Wahoo, I am on a roll two blog posts and its only the 4th of January, and I have a few more that are ready to go, maybe I will keep up posting this year (fingers crossed).
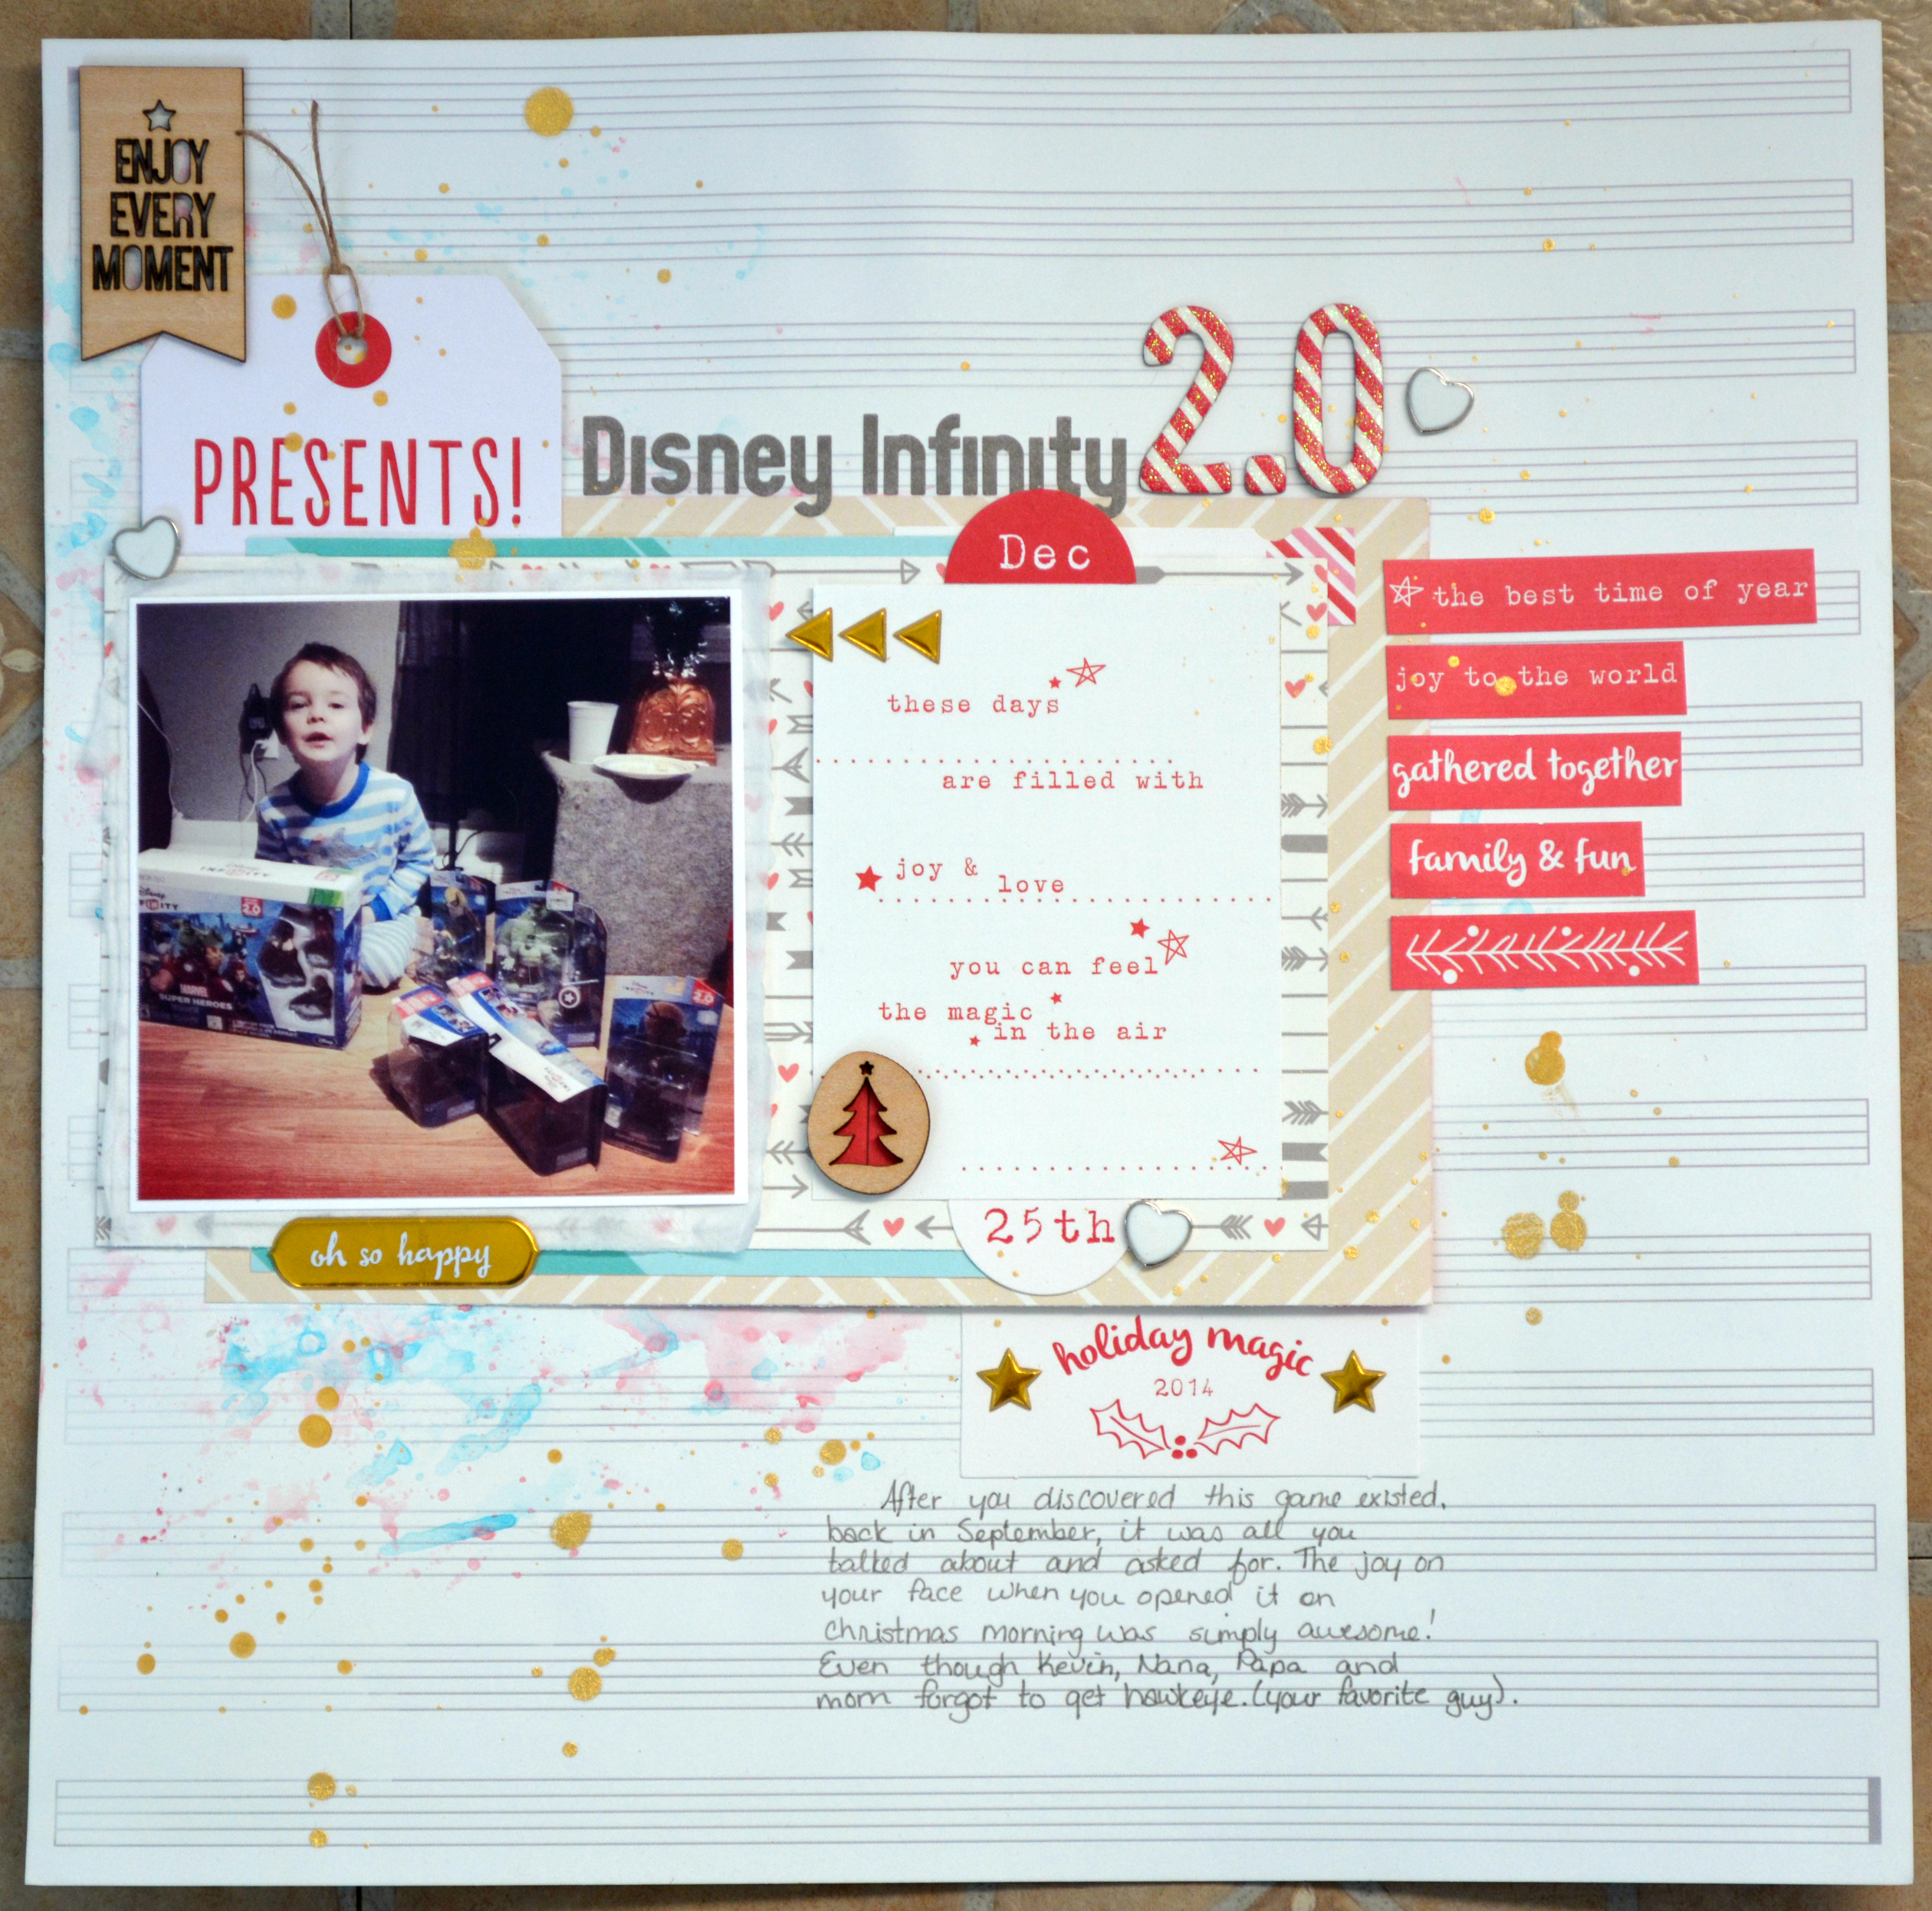
This is a photo from my instagram from Christmas morning, one happy little guy with his new video game.
So I started this layout by adding gesso and Izink’s to the backround then splattering some gold mist.
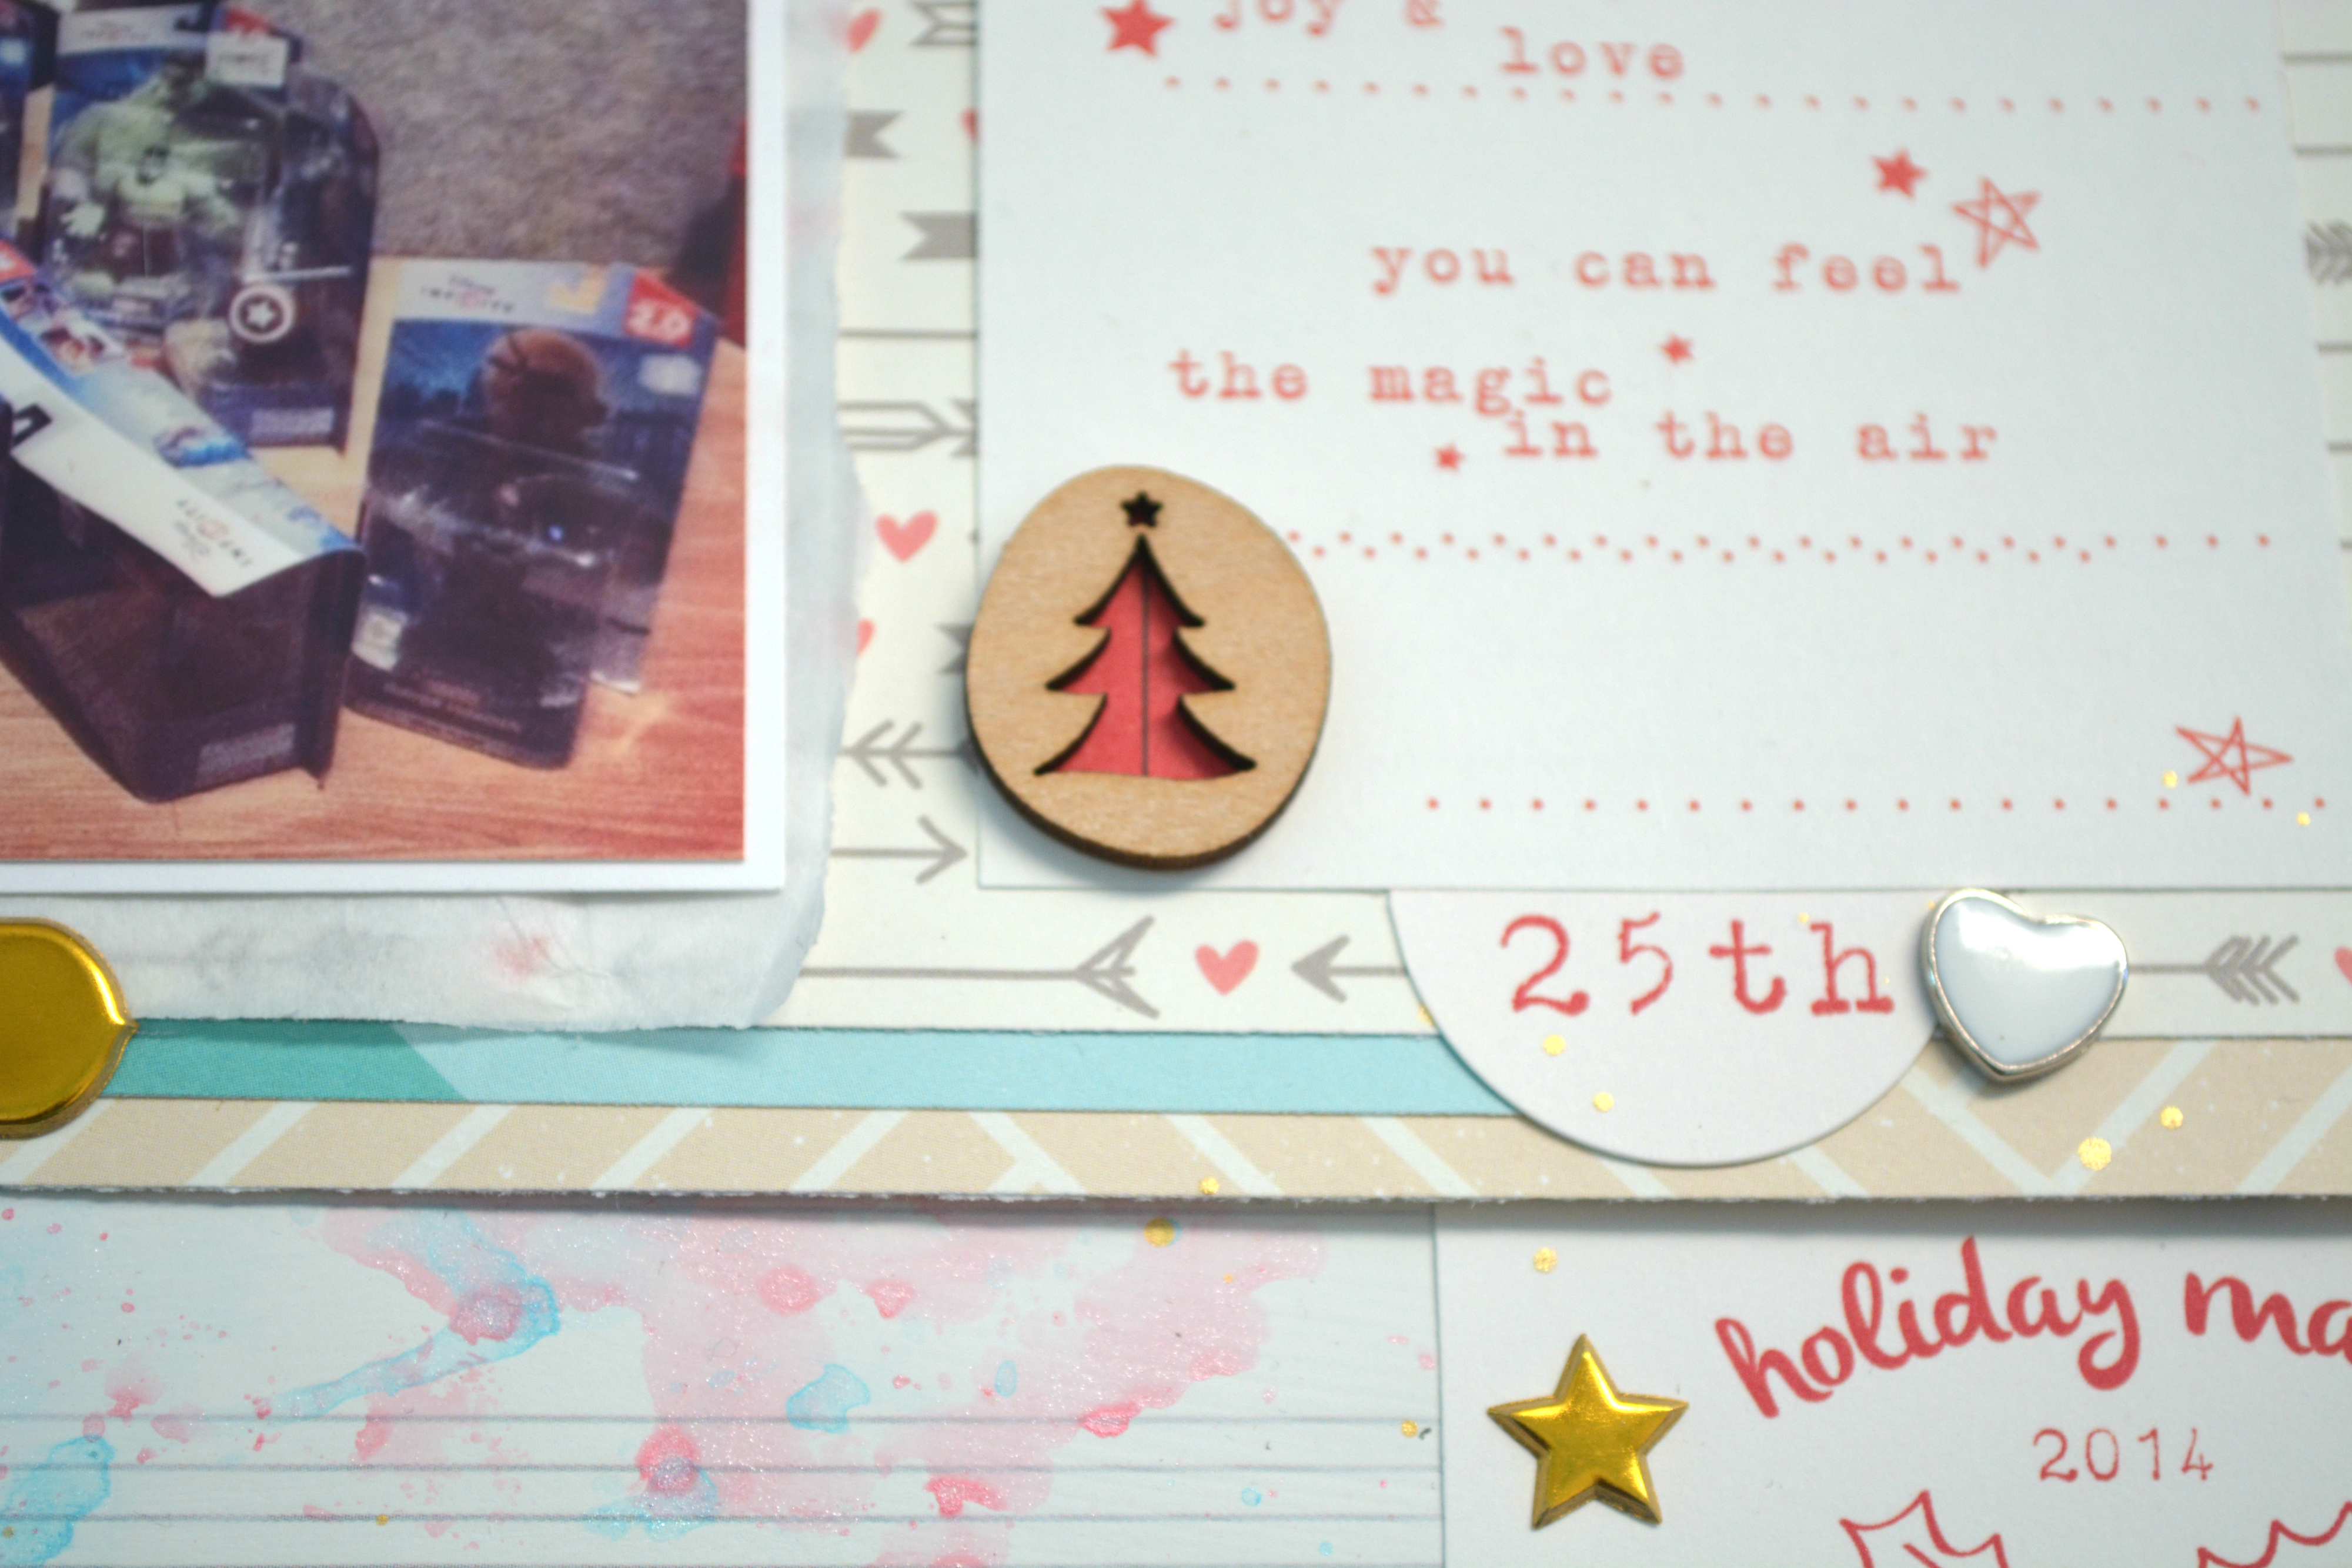
Layering up some of my scraps from the December Hip Kit and adding some tissue paper from my stash finishing the base for the photo to lay on,
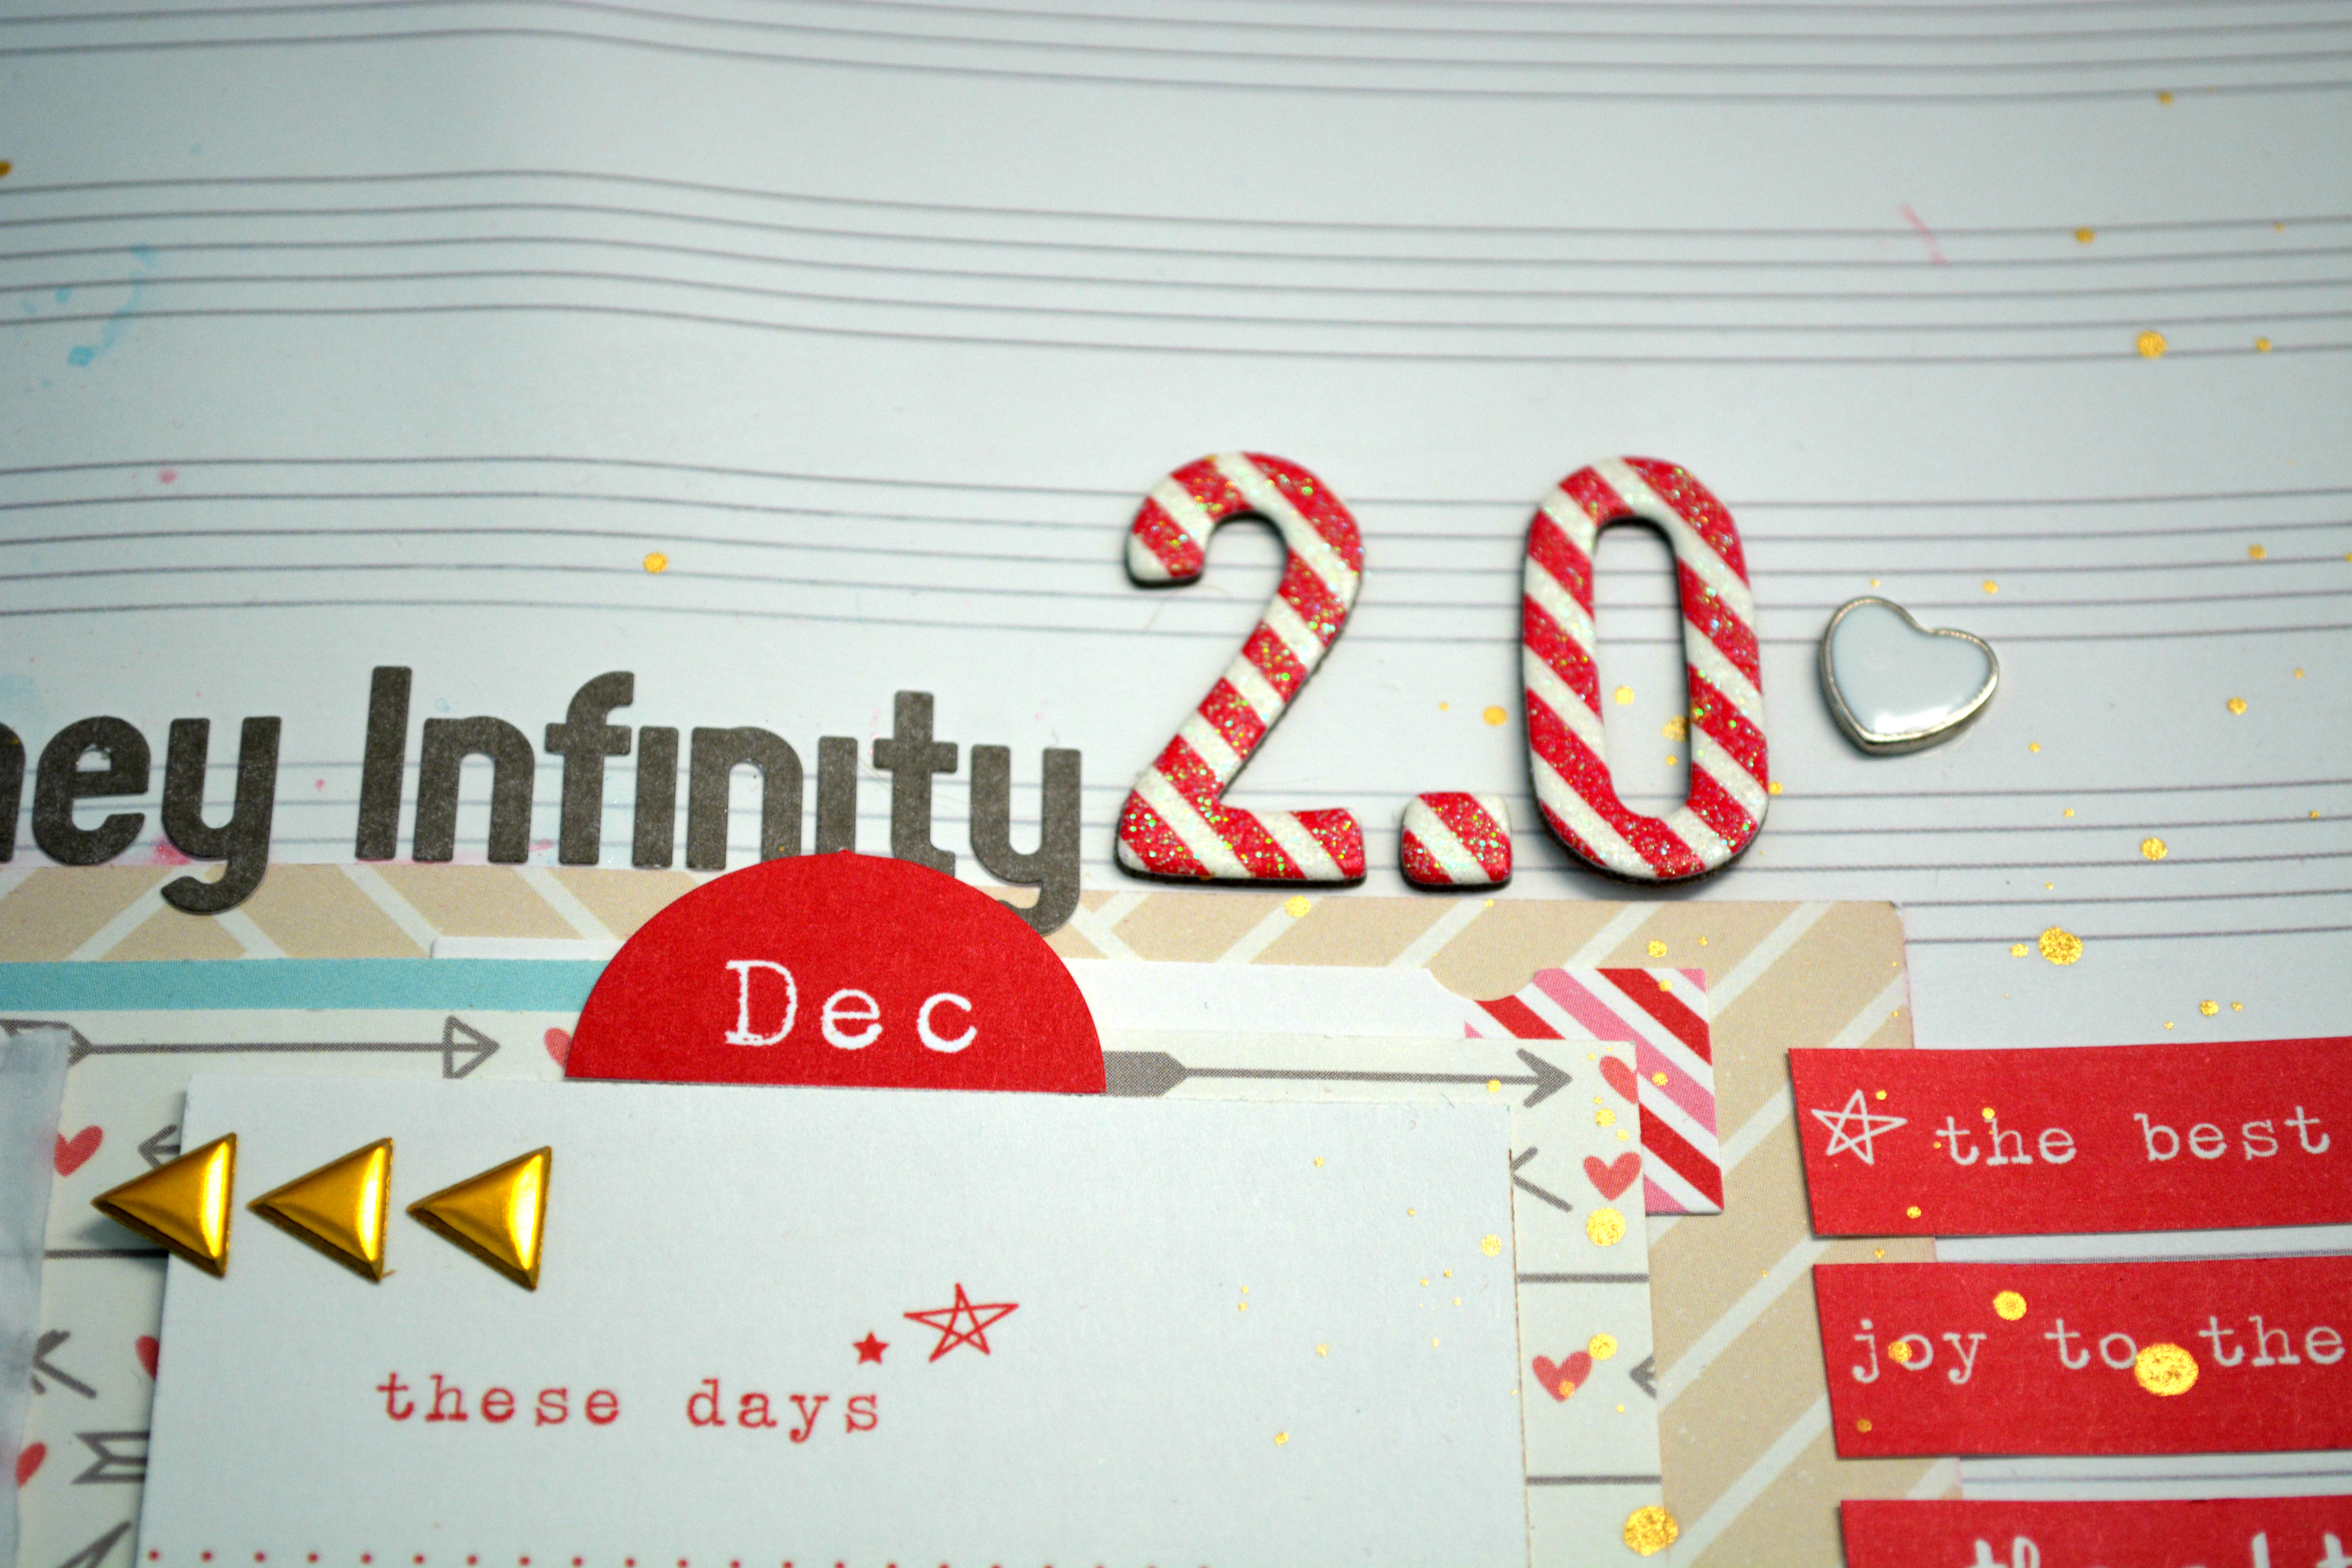
Embellishing with different bits and pieces from the kit brought this layout together rather fast, and the Elle’s studio grey letter stickers were perfect because there are so many of every letter I had no issue making the words I needed.
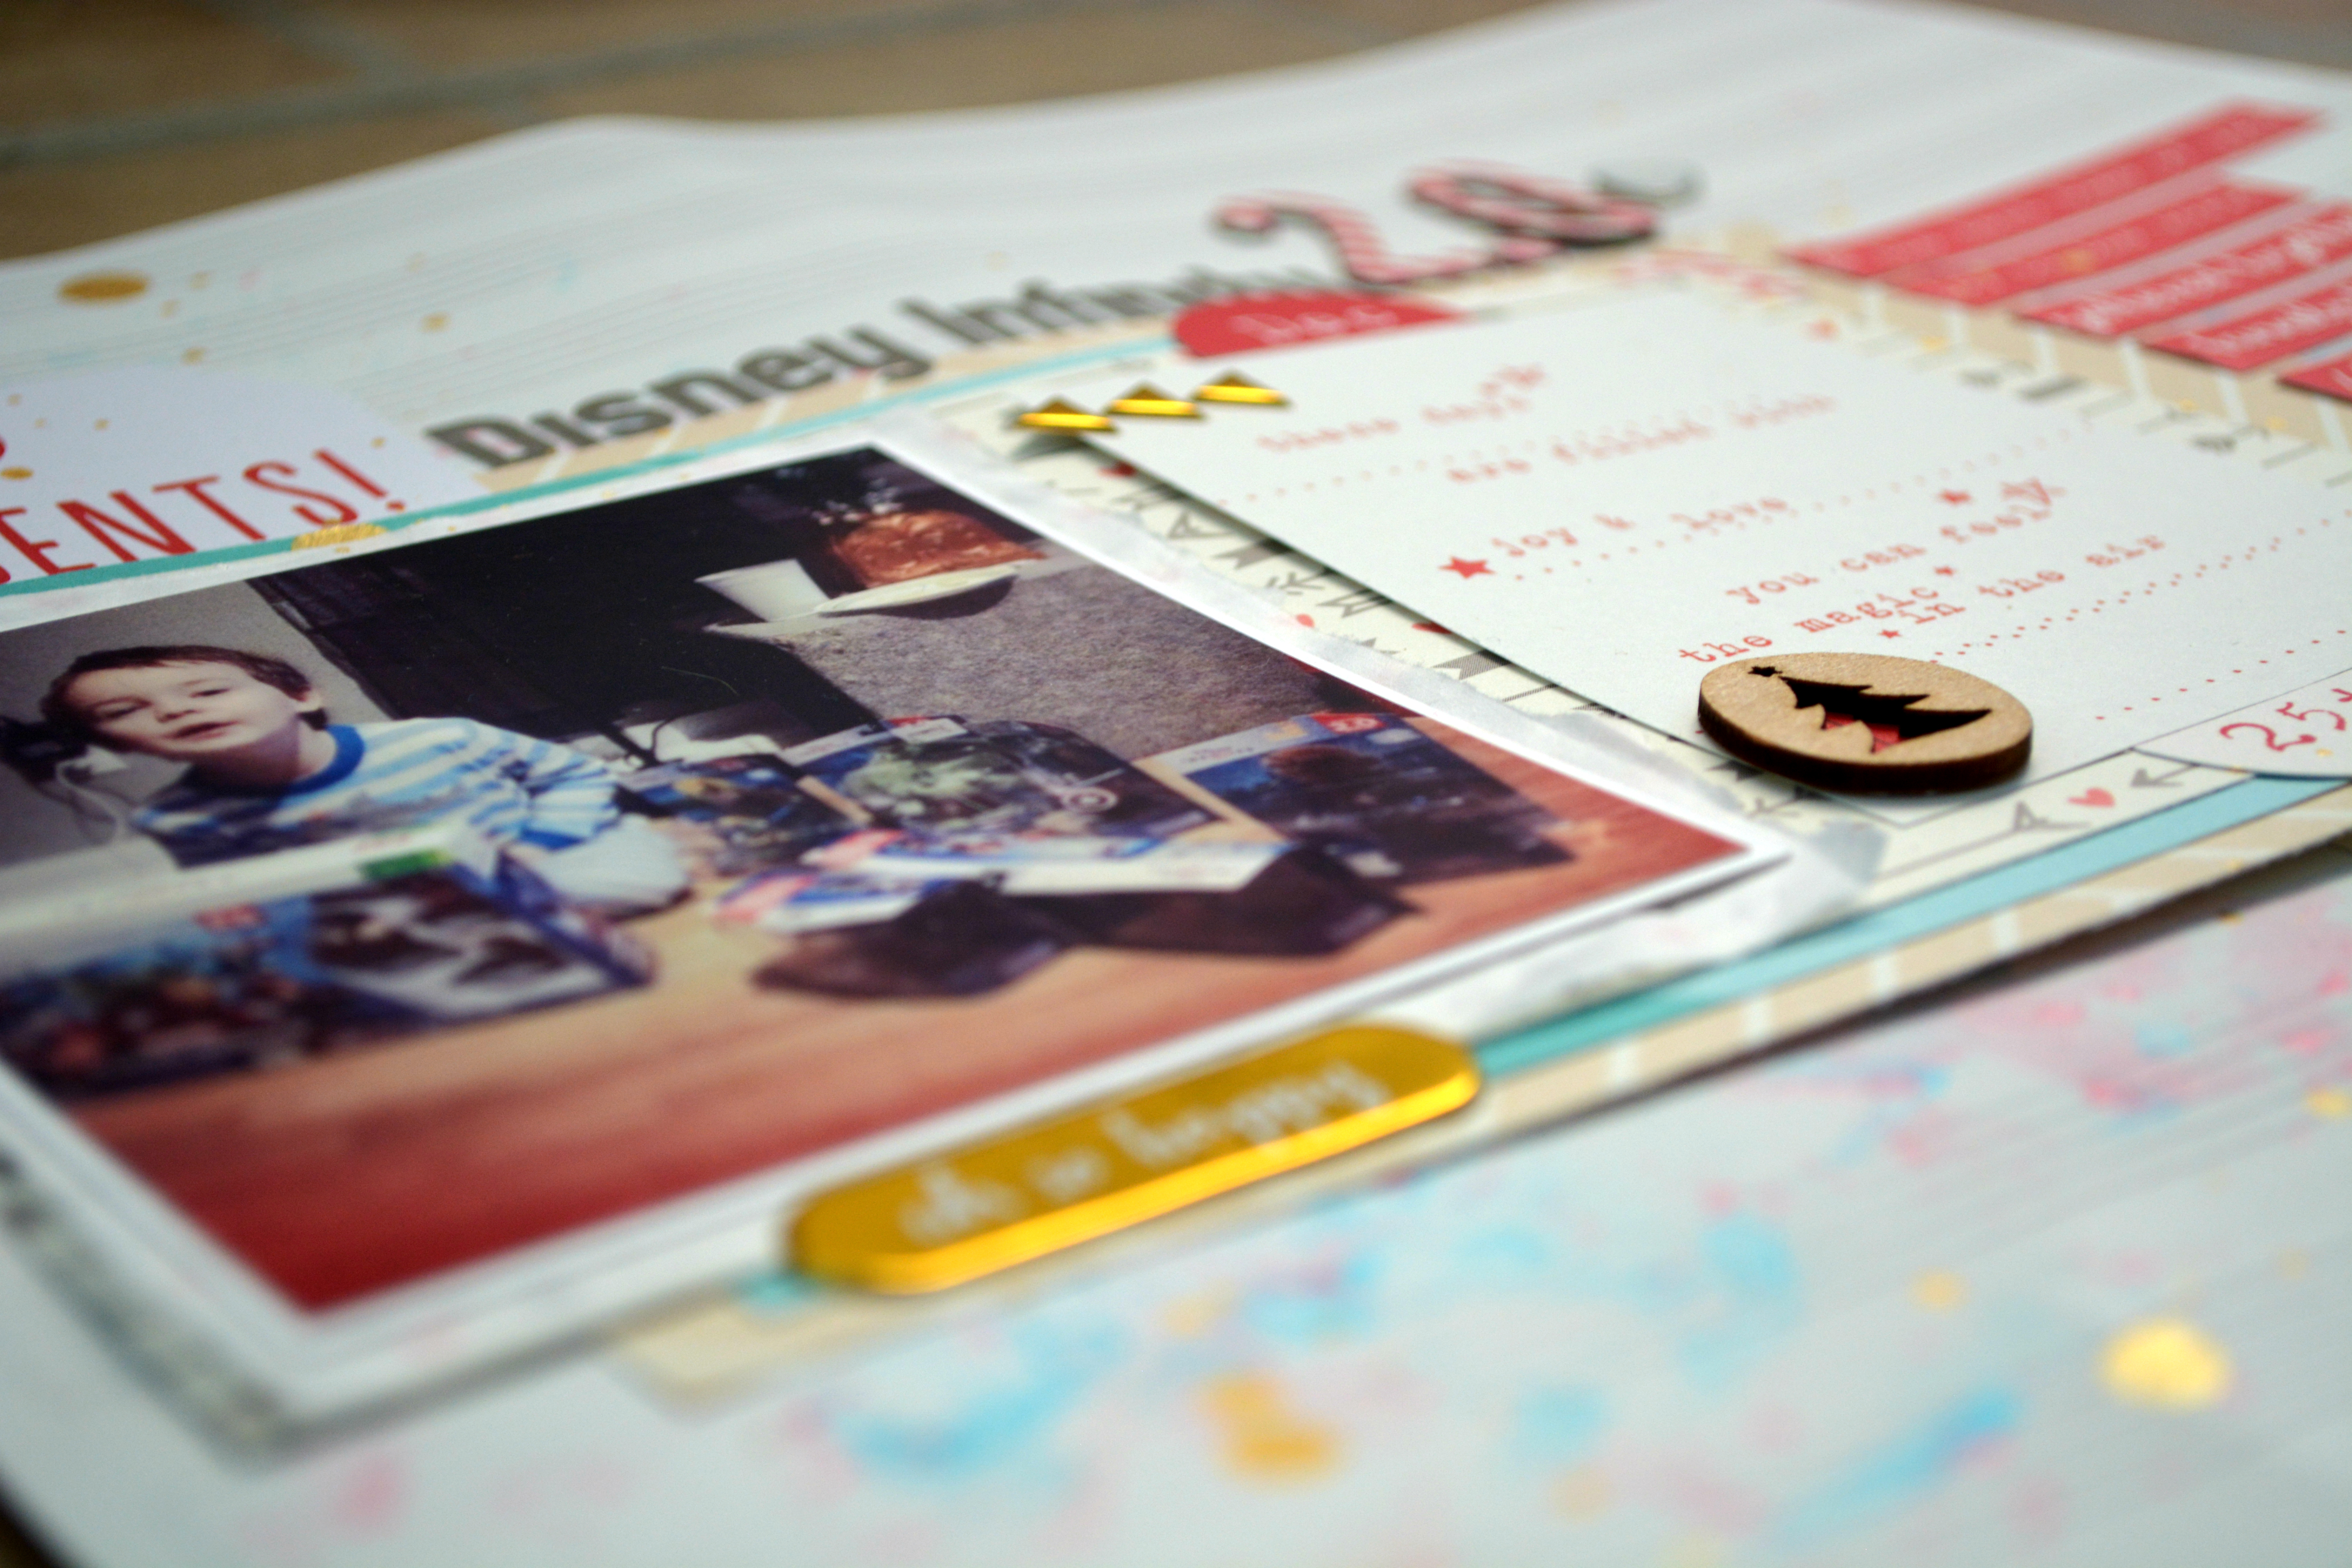
If you are looking for a kit to try, I highly recommend the Hip Kits, Kim seems to find the perfect balance between paper, and TONS of embellishments to meet any need you may run into on your layout.
Products used:
Hip Kit – November Main Kit (sold out)
Hip Kit – November Color Add-on
Heidi Swapp Gold Lame Color Shine
Freckled Fawn Metal Hearts (Oh Deer Me kit) I can’t find them in their shop any longer
White Gesso (I used Artist Loft from Michaels)
Thanks for stopping by,
Hugz,
Jess
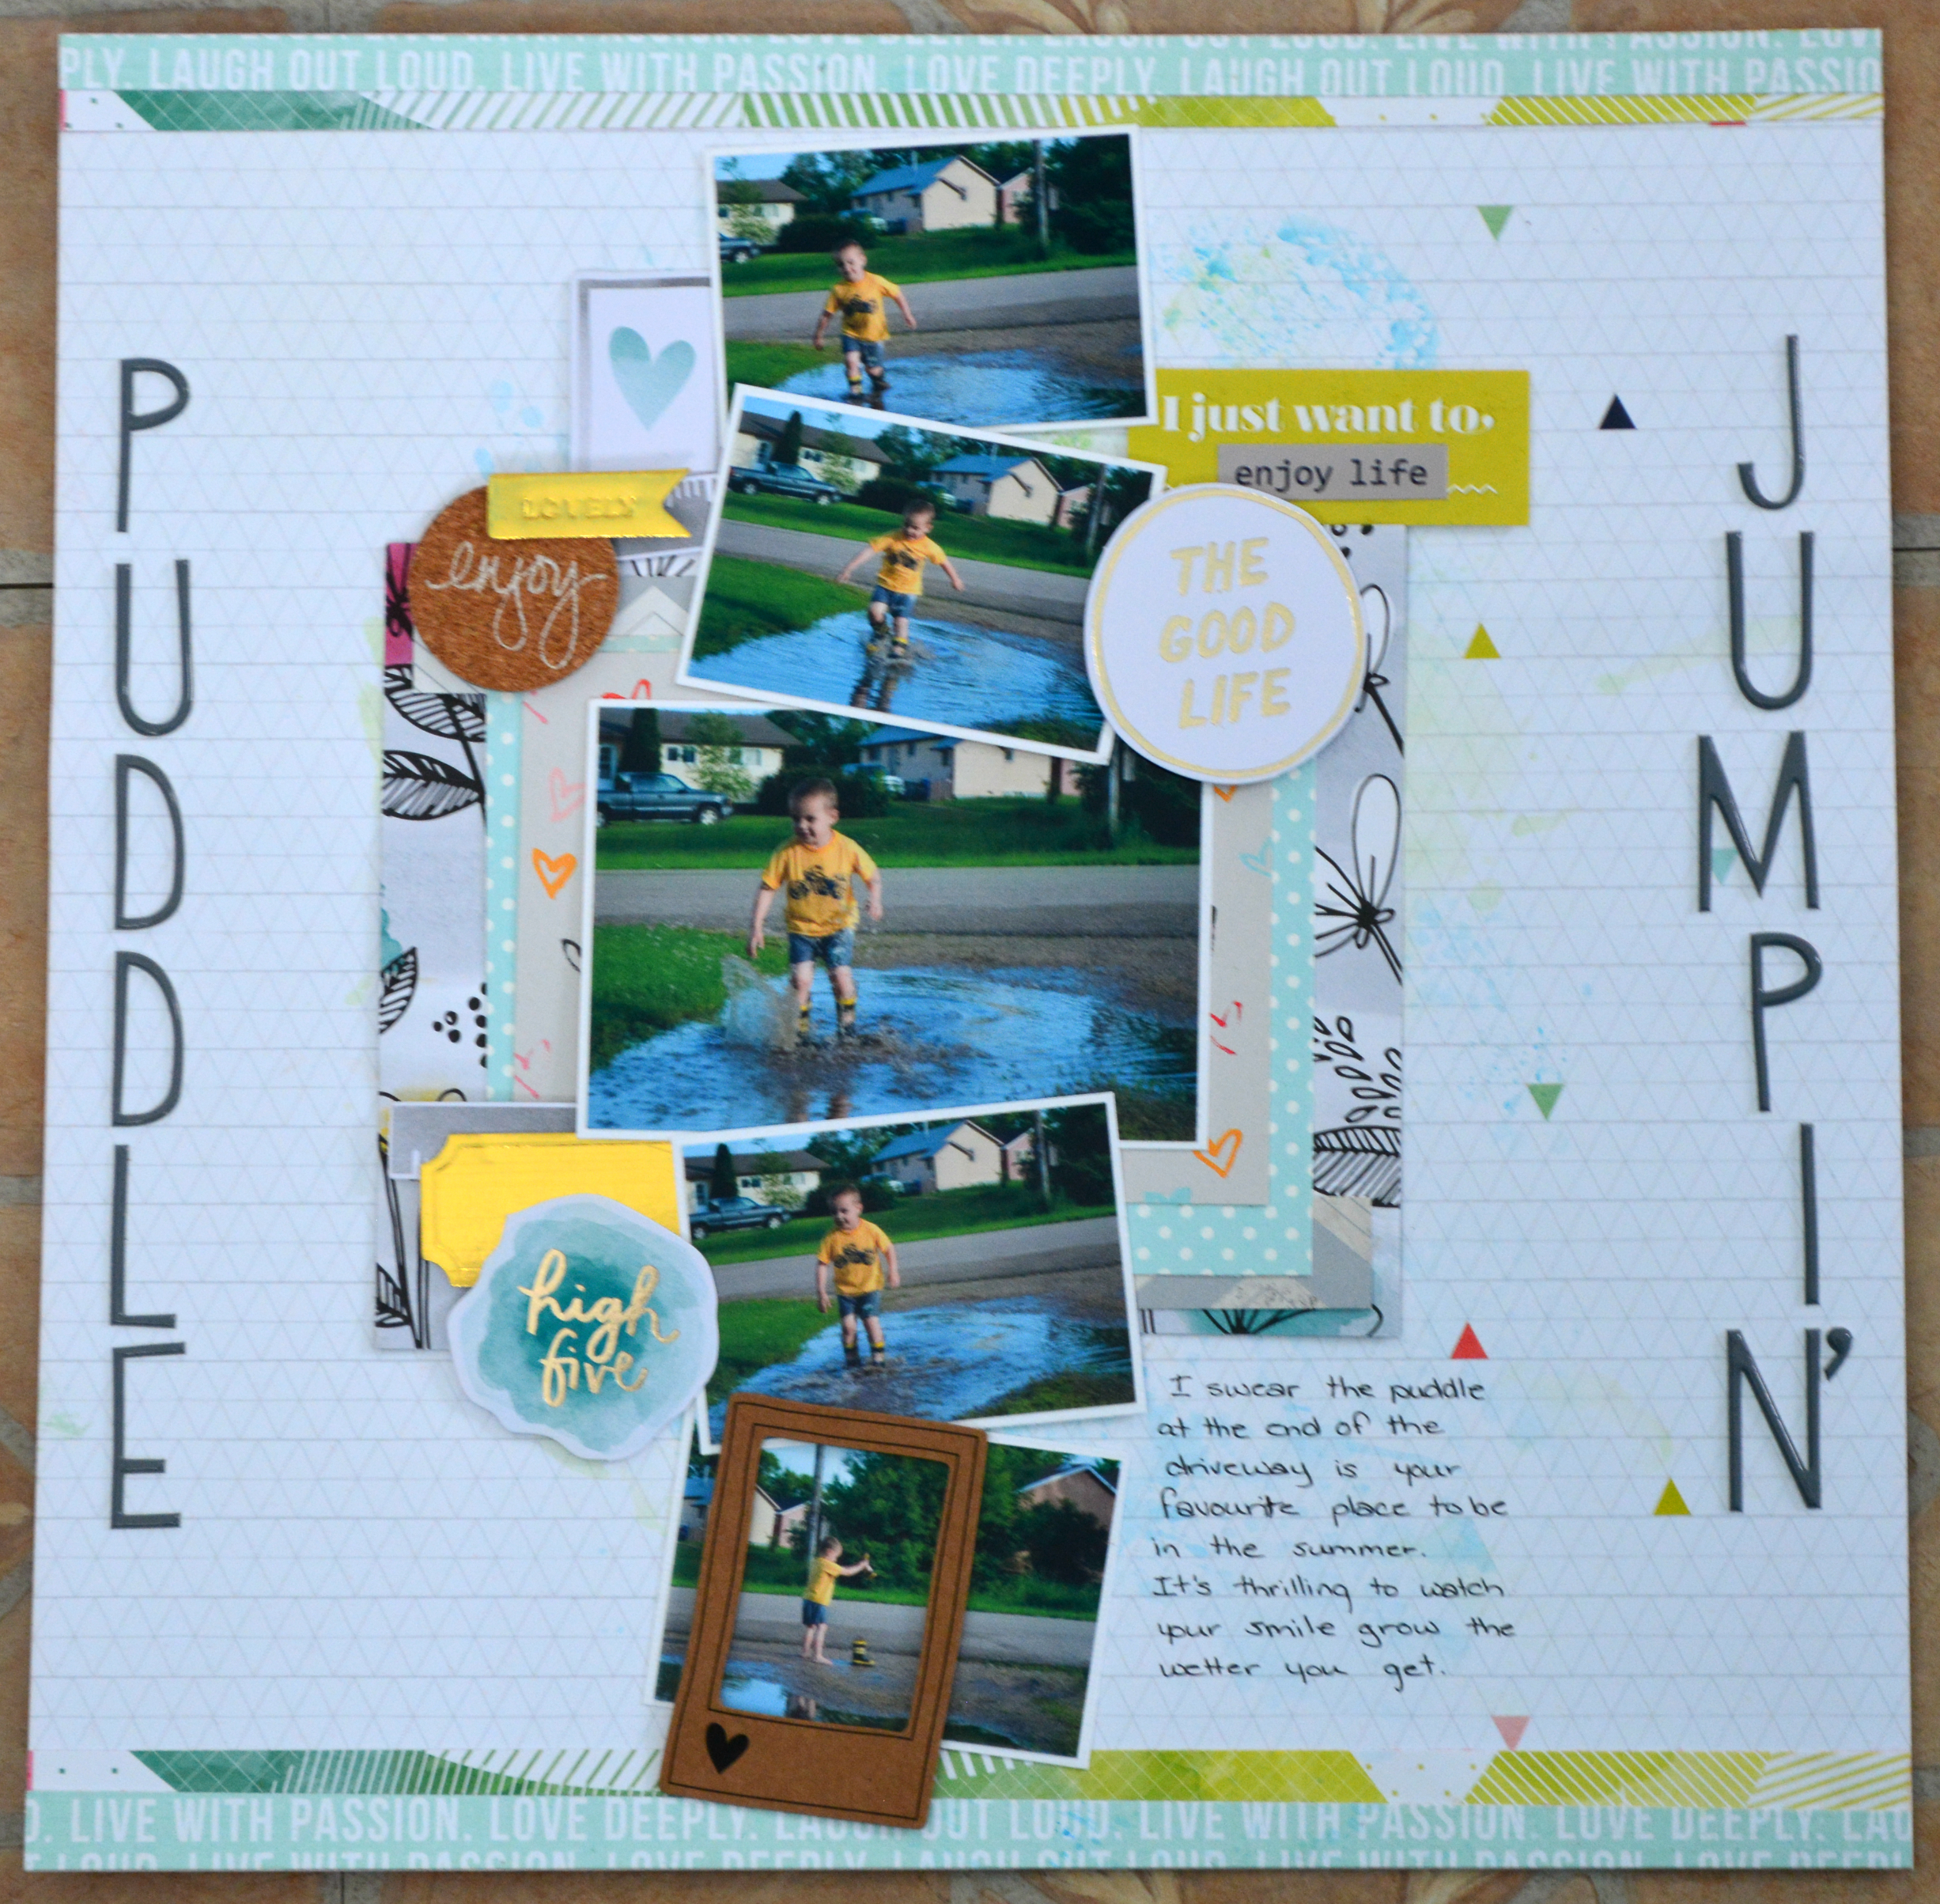
Hey everyone! Welcome to 2015, I hope this year treats you all well in whatever goals, aspirations, and just life in general. This is my first layout I have made this year. I did it yesterday before I began what I am calling the “great clean up of 2015”, but that’s another post for another day (if I ever complete the clean up).
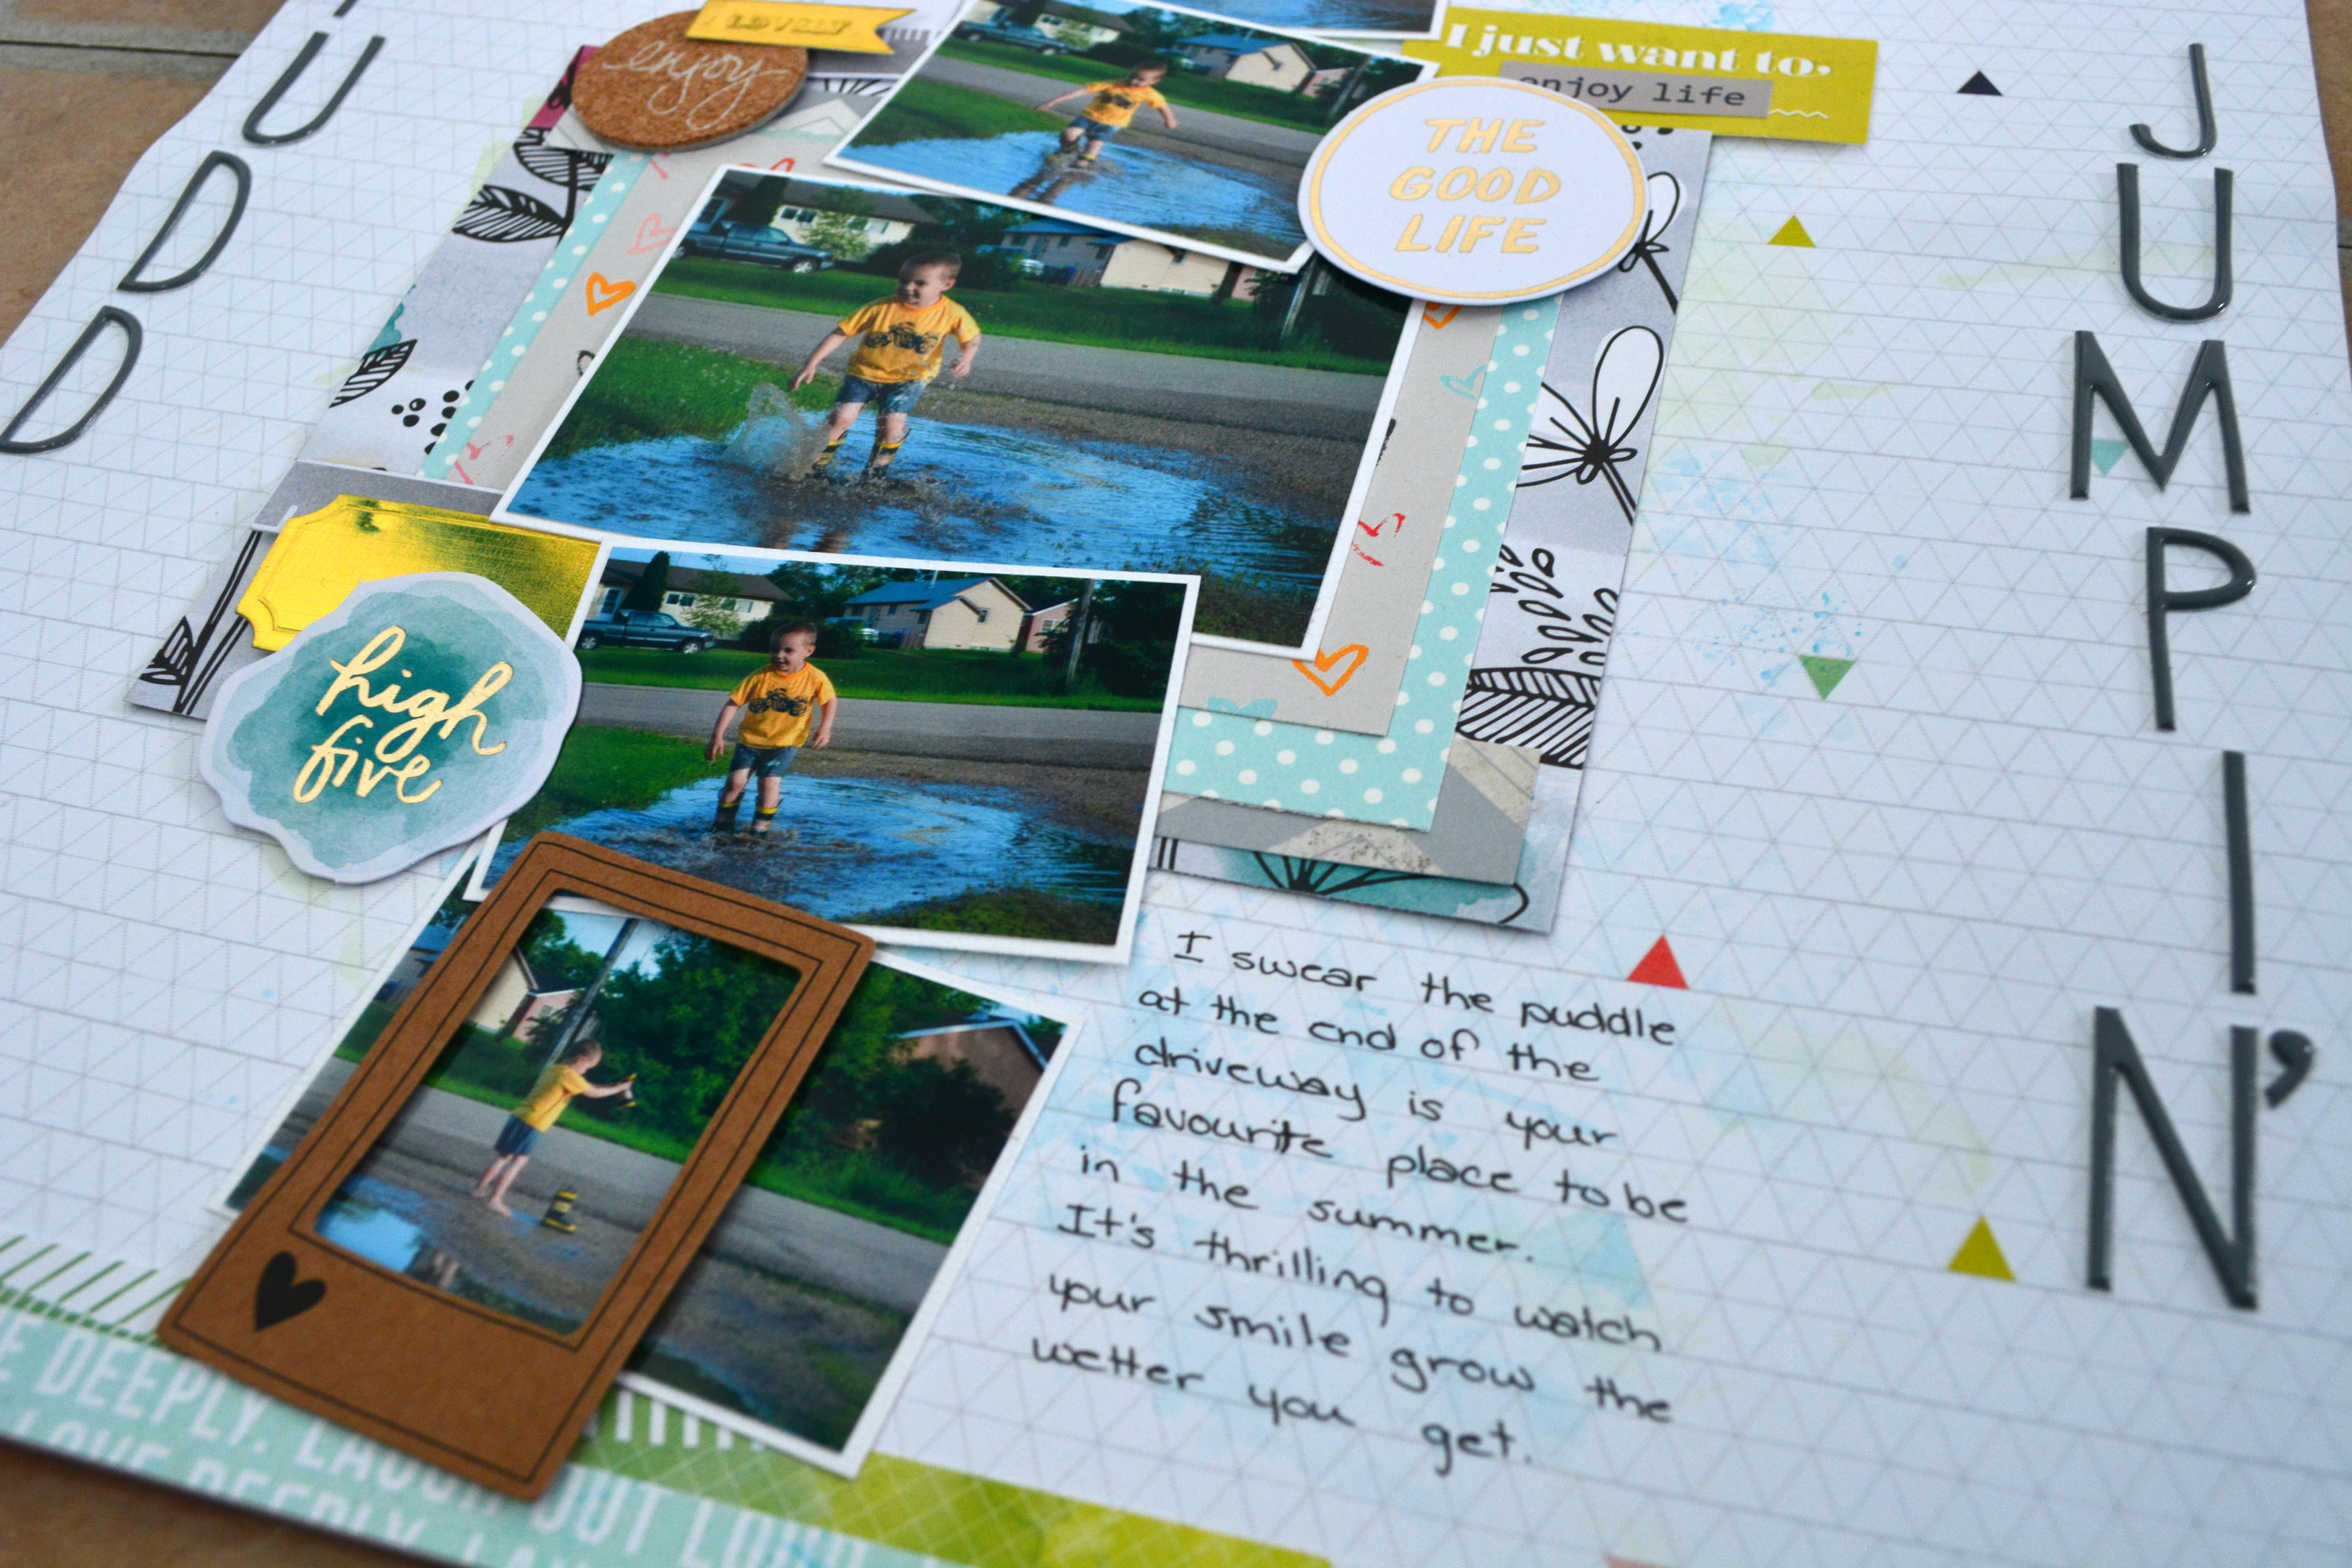
This is my son in the summer time, I have a low spot in the front of my driveway, and I honestly believe, he secretly hopes for rain so he can go out and play in the puddle.
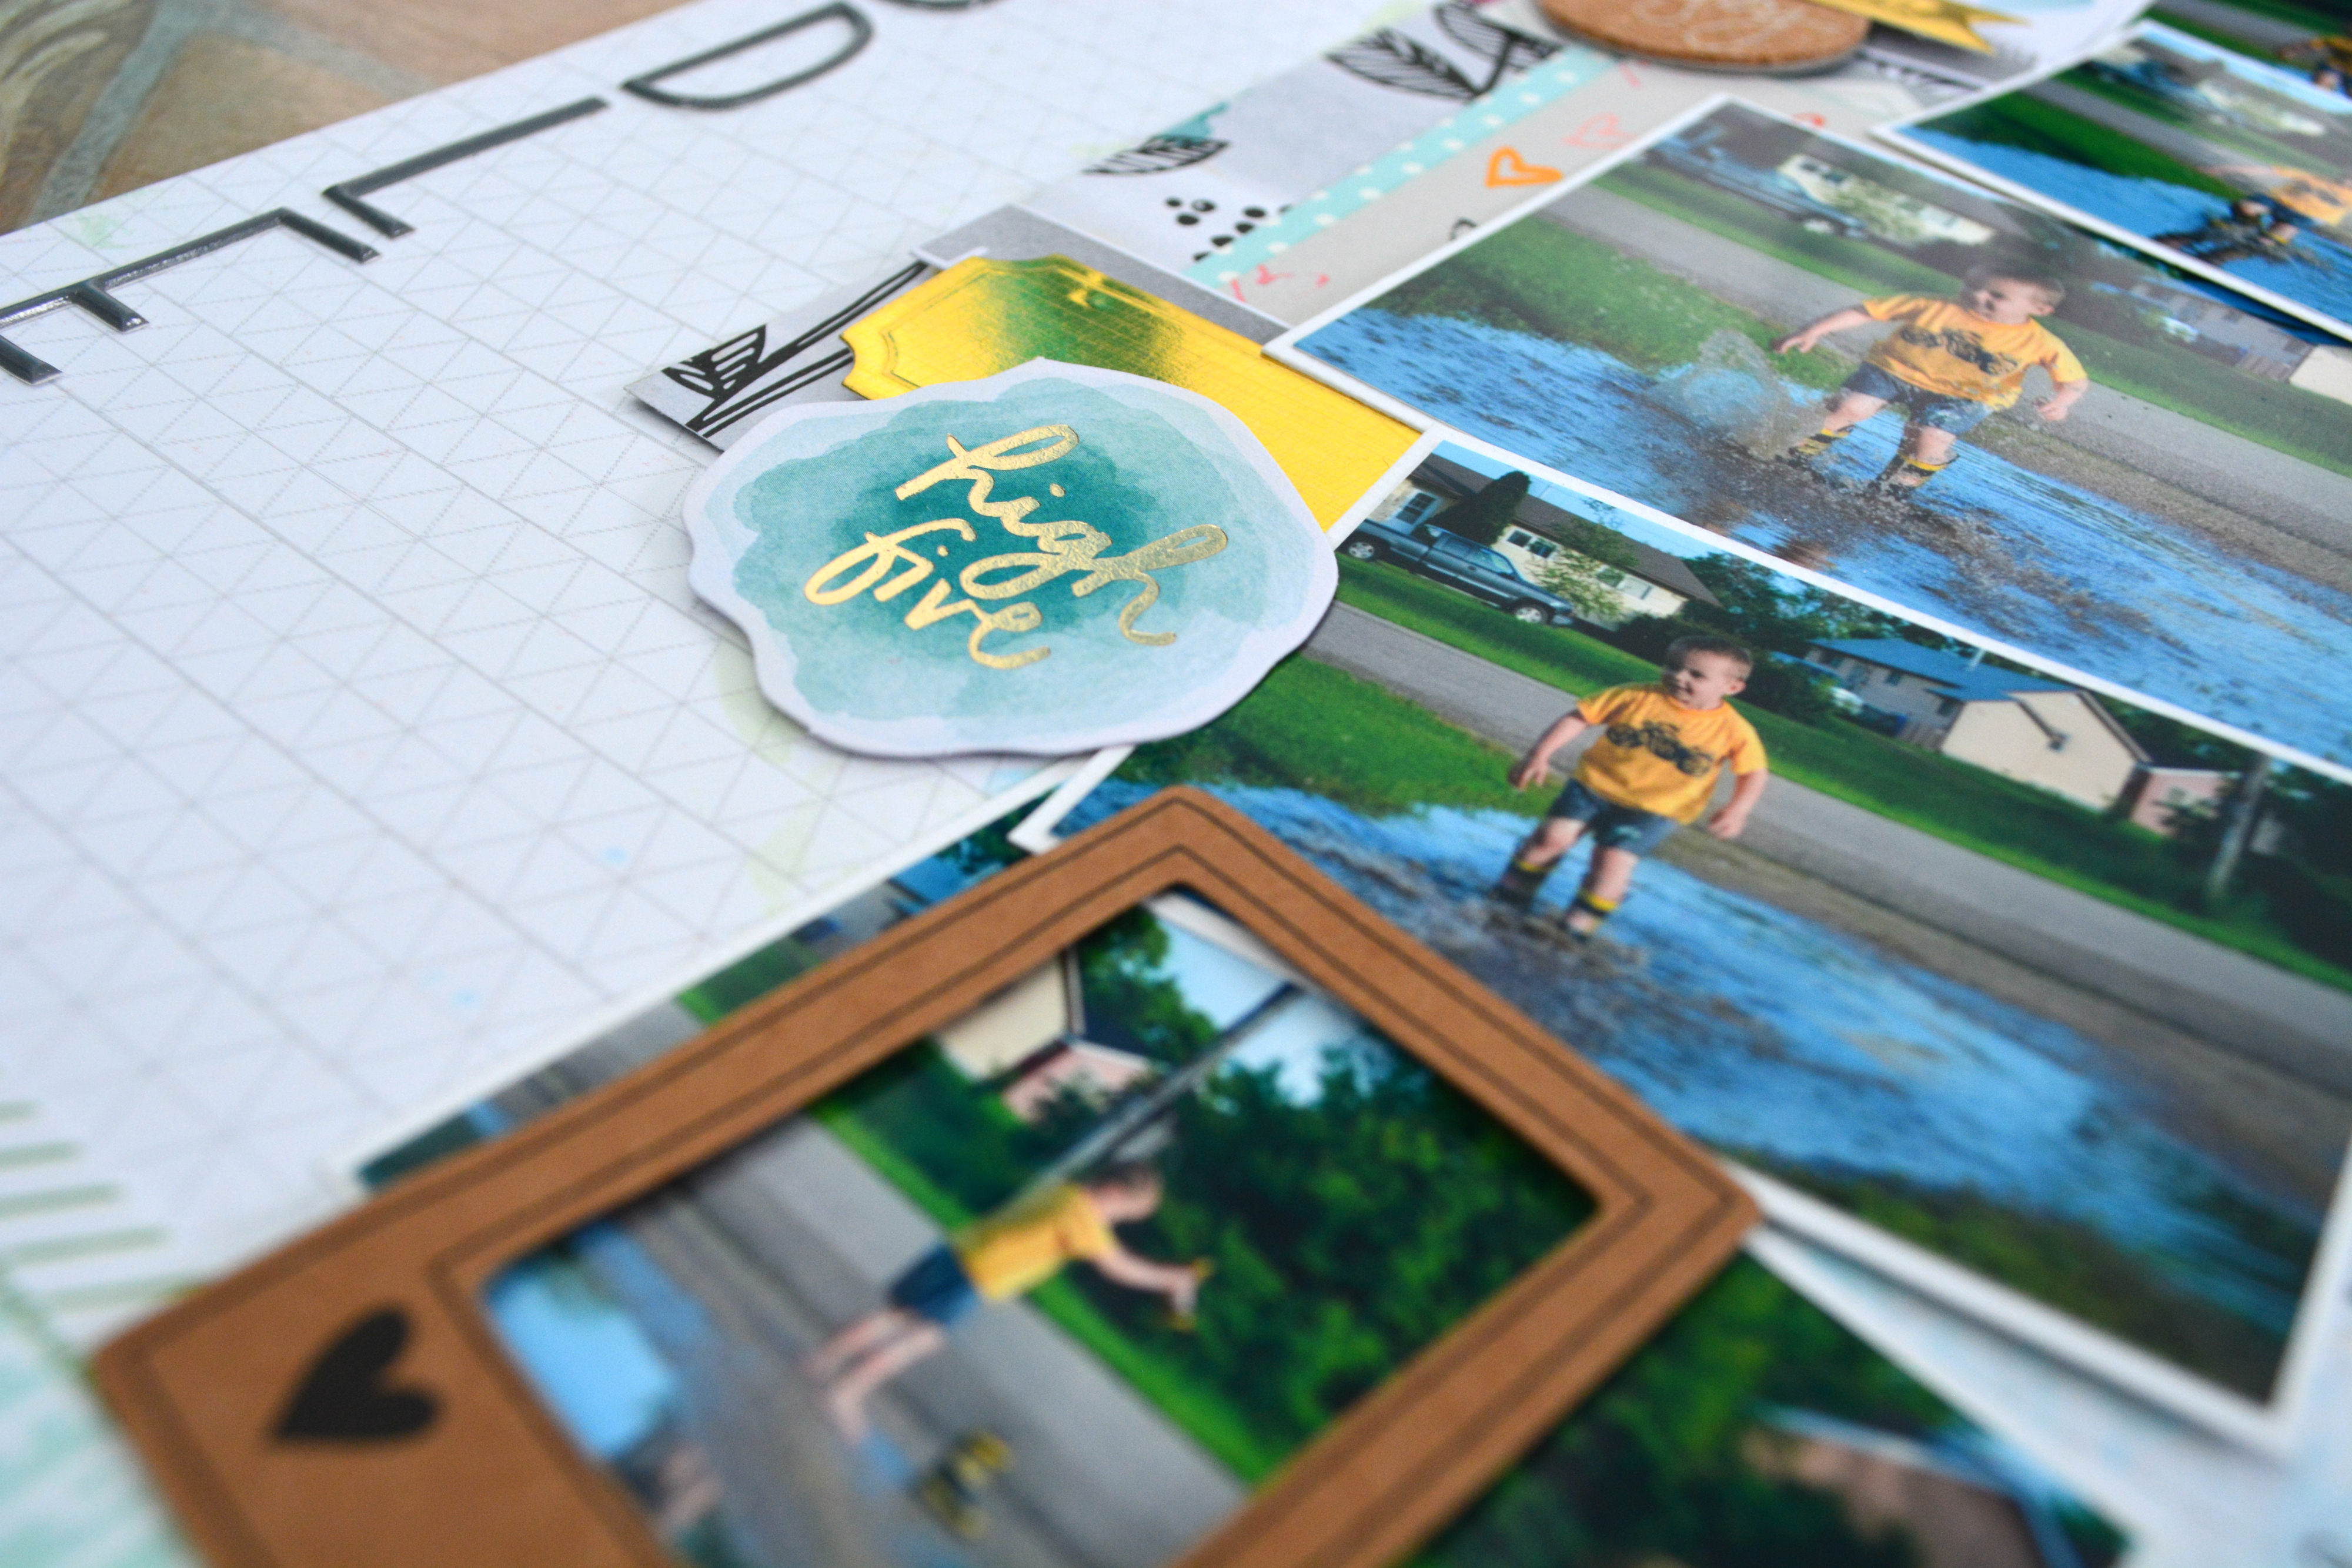
I really had fun with this layout and kept it very simple… I went into it with a goal. Aside from the 12×12 background paper, I only wanted to use scraps. Best part, I succeeded! I also got to use a bunch of my die cuts and stickers which was also exciting to me.

Products used:
Heidi Swapp – September Skies – Open air
Basic Grey – Fresh cut – Orchid Alley
Teresa Collins – Something Wonderful – Alpha paper
Gossamer Blue – On My Desk – List Maker
Carta Bella – Baby Mine – (the blue with white polka dot paper)
Amy Tangerine – Plus One – (watercolour flower paper)
Silver Chevron Paper (I think its MME scrap)
Gansai Tambi Watercolours – #51, #62
Amy Tangerine Thickers – Charcoal Rubber
Amy Tangerine – Stitched – Die Cuts
Maggie Holmes – Open Book – Die cuts
Maggie Holmes – Open Book – Sticker sheet
Shimelle – Sticker Book
Teresa Collins – Life Emporium – Alpha Stickers
Shimelle – Cork Stickers
Thanks for stopping by,
Hugz,
Jess
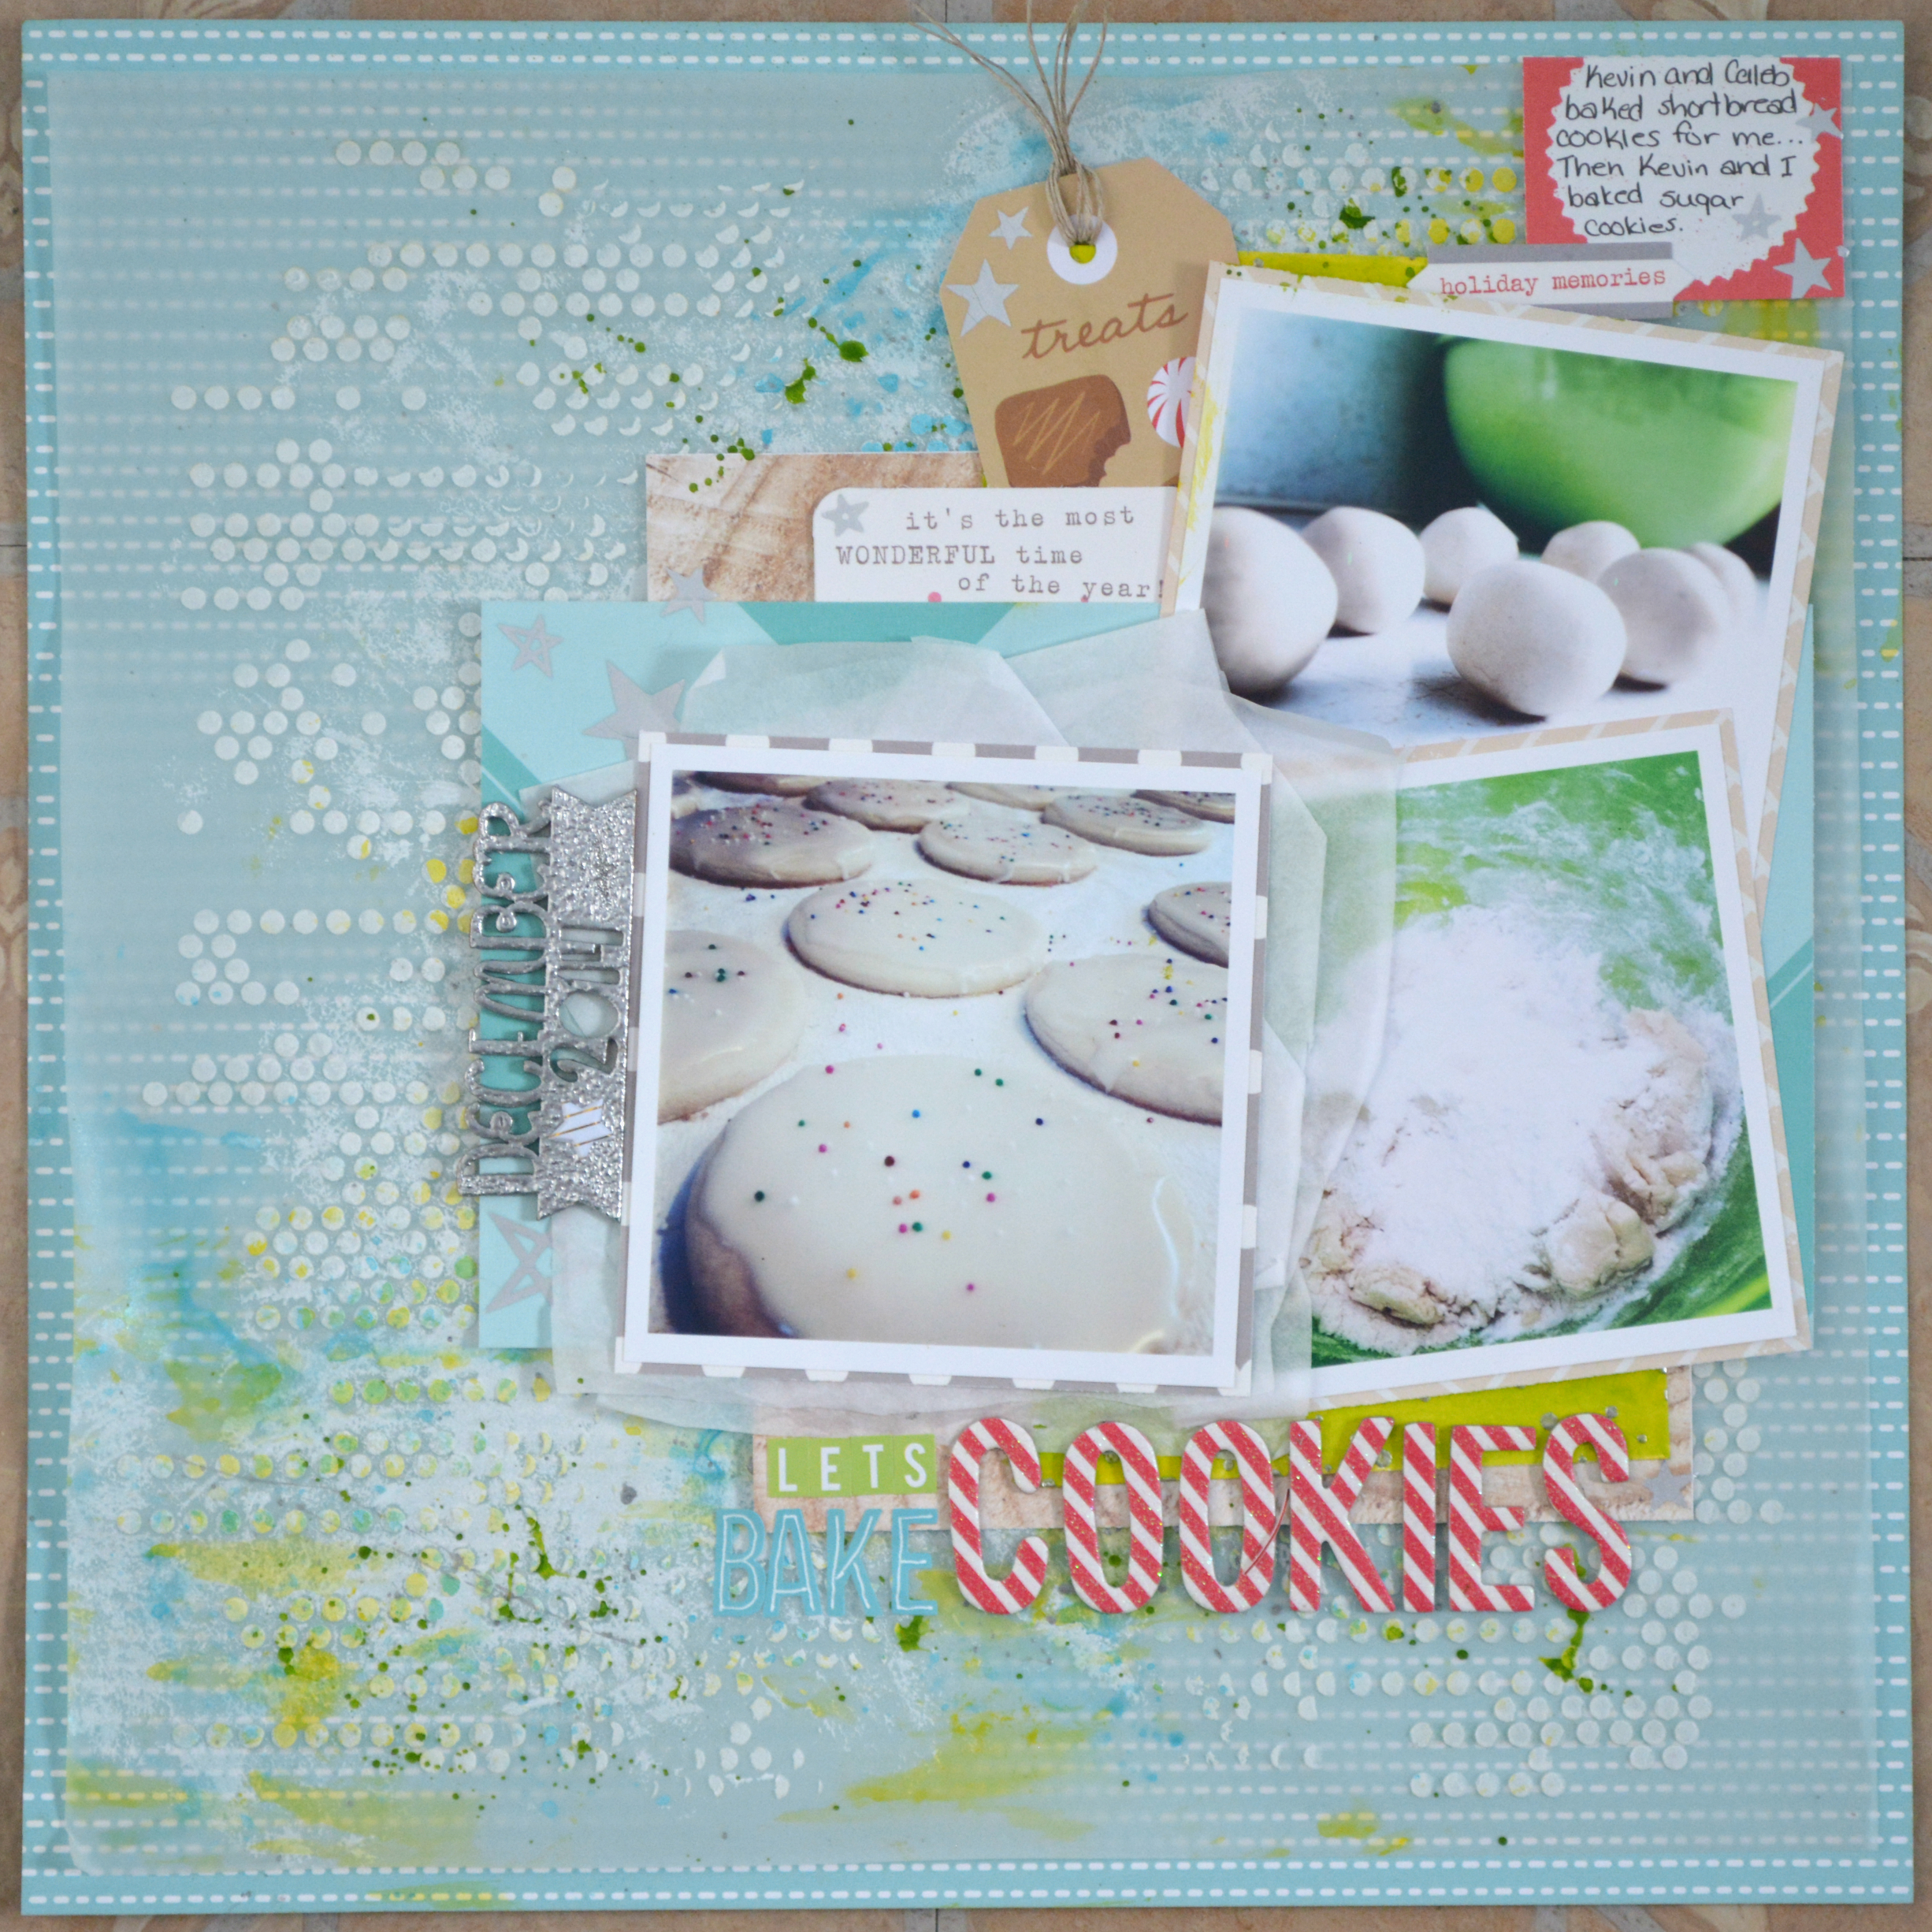
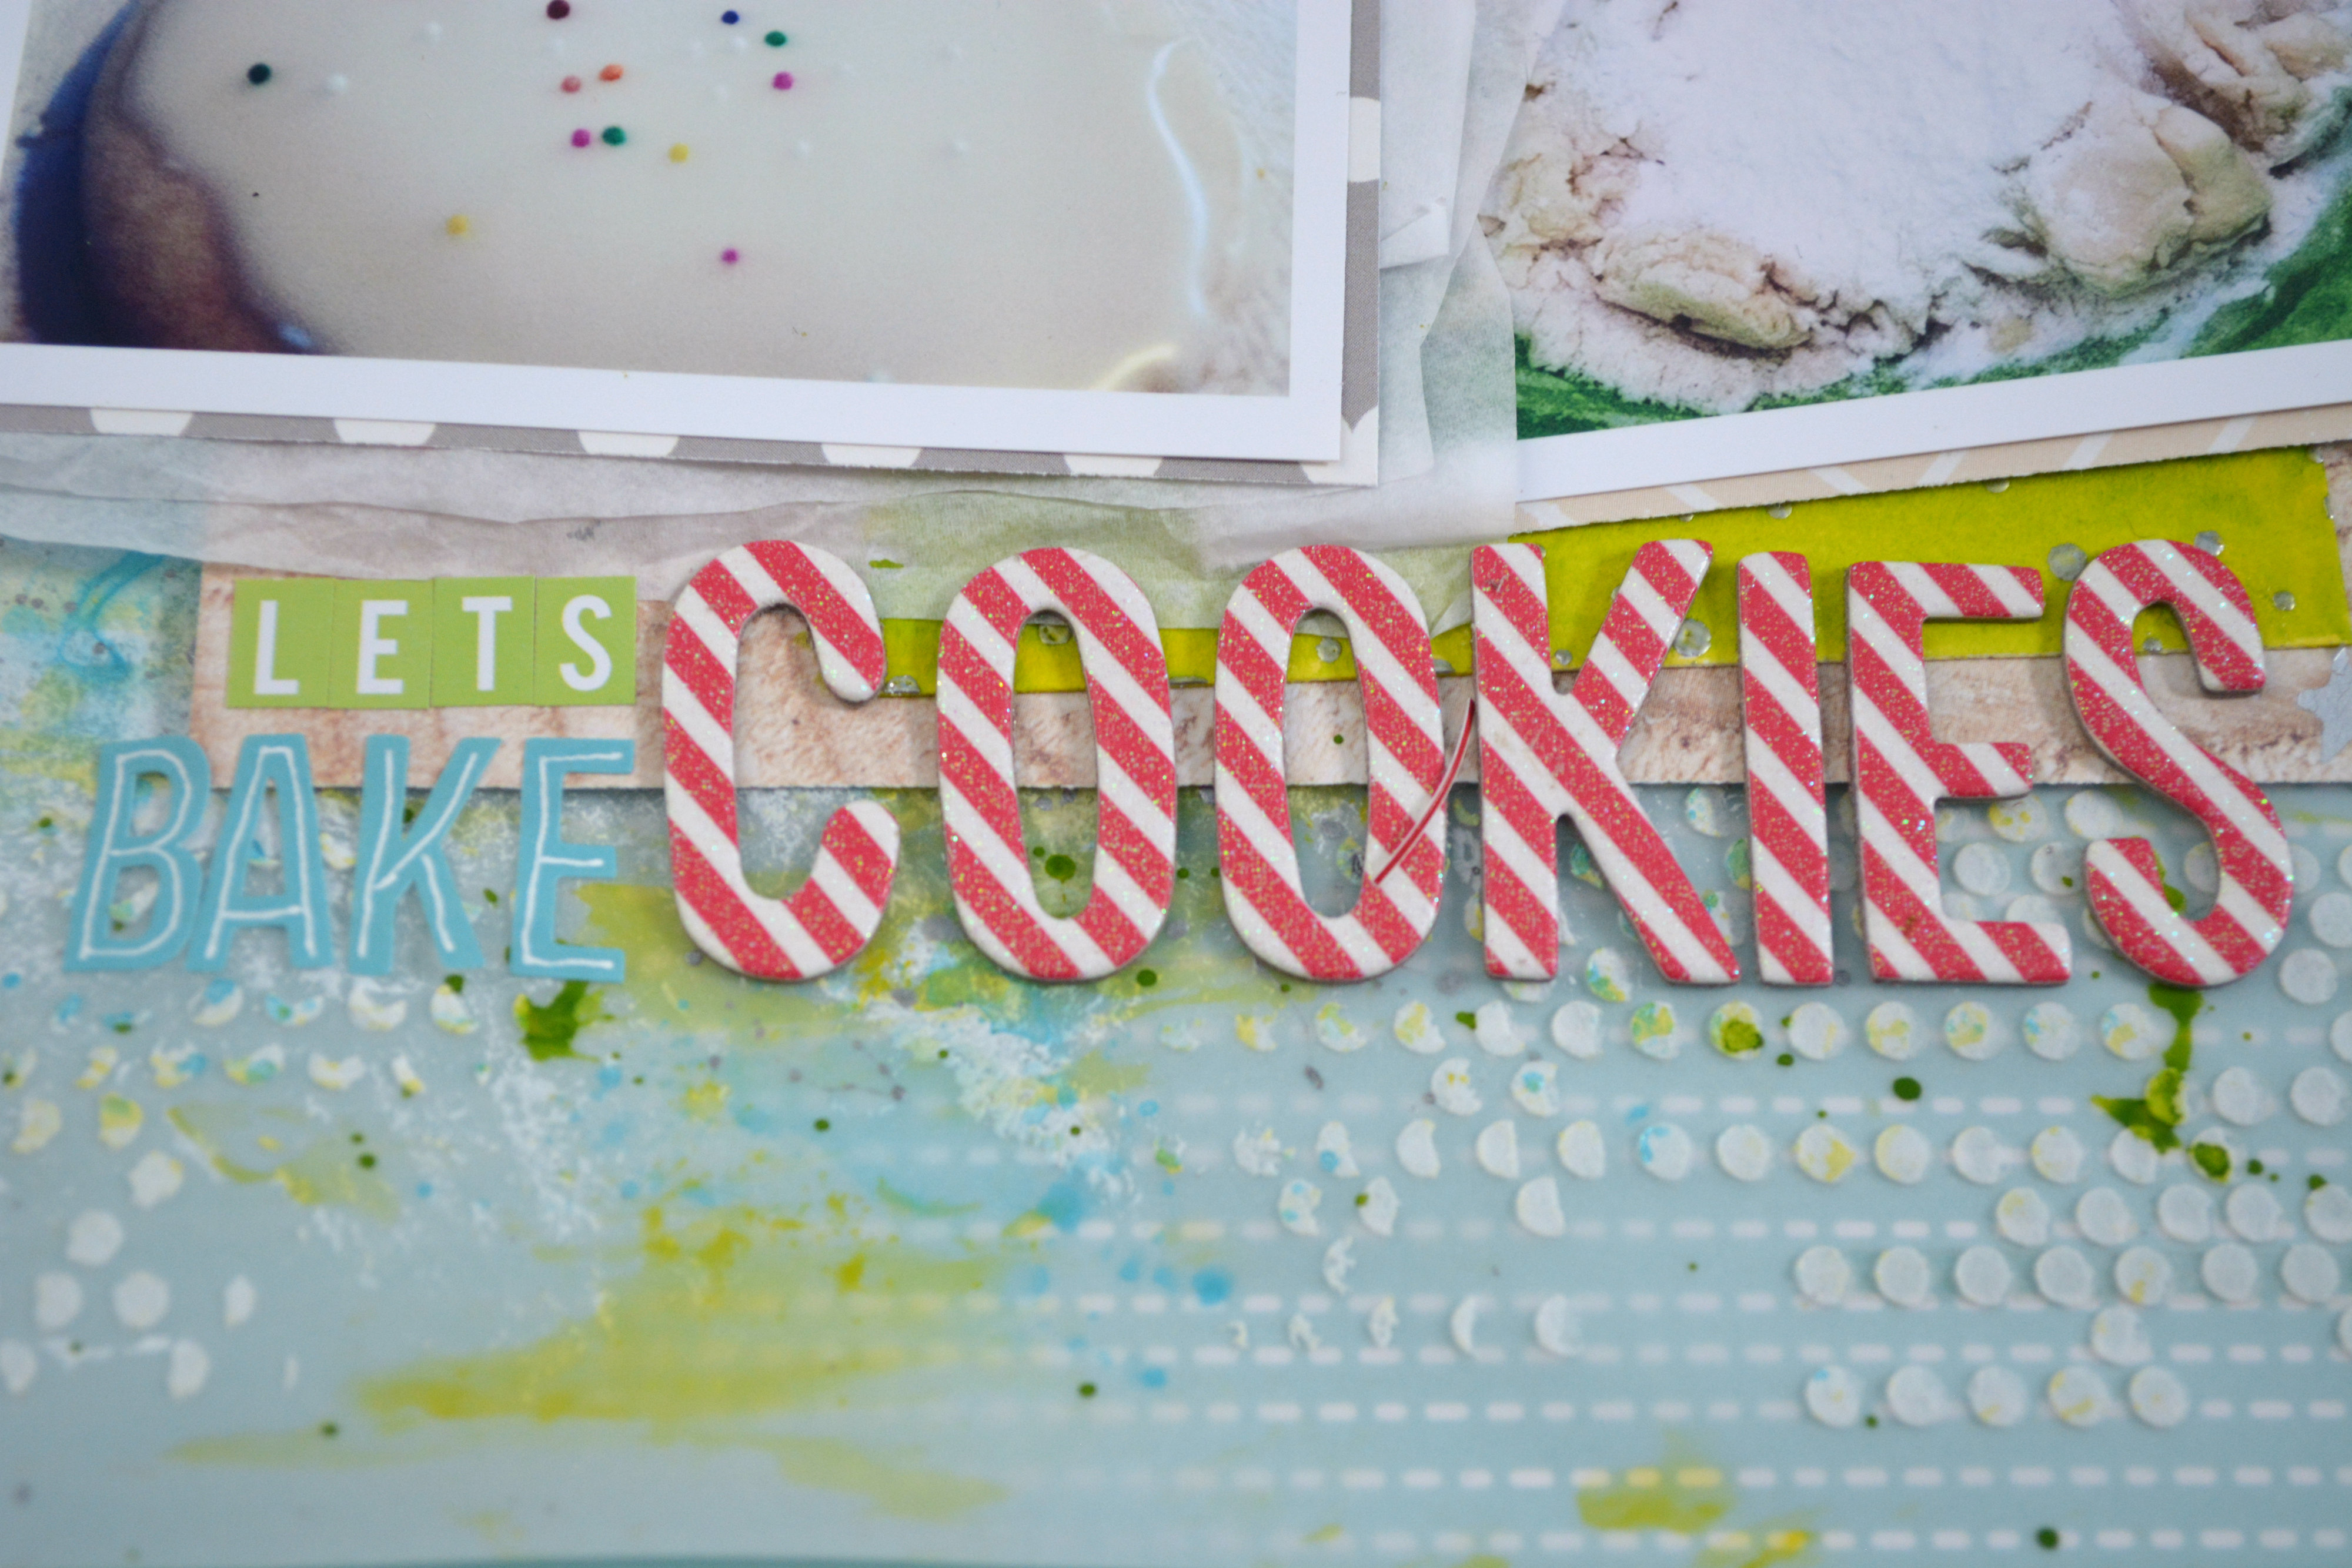
Hey everyone! Christmas is so close, and I am almost ready!! One of the last things I do to prepare is a bunch of baking and this past weekend that included a crazy amount of cookie baking (I think its my sons favorite activity). So here I am scrapbooking a few instagram pictures of the cookies we made on the weekend.
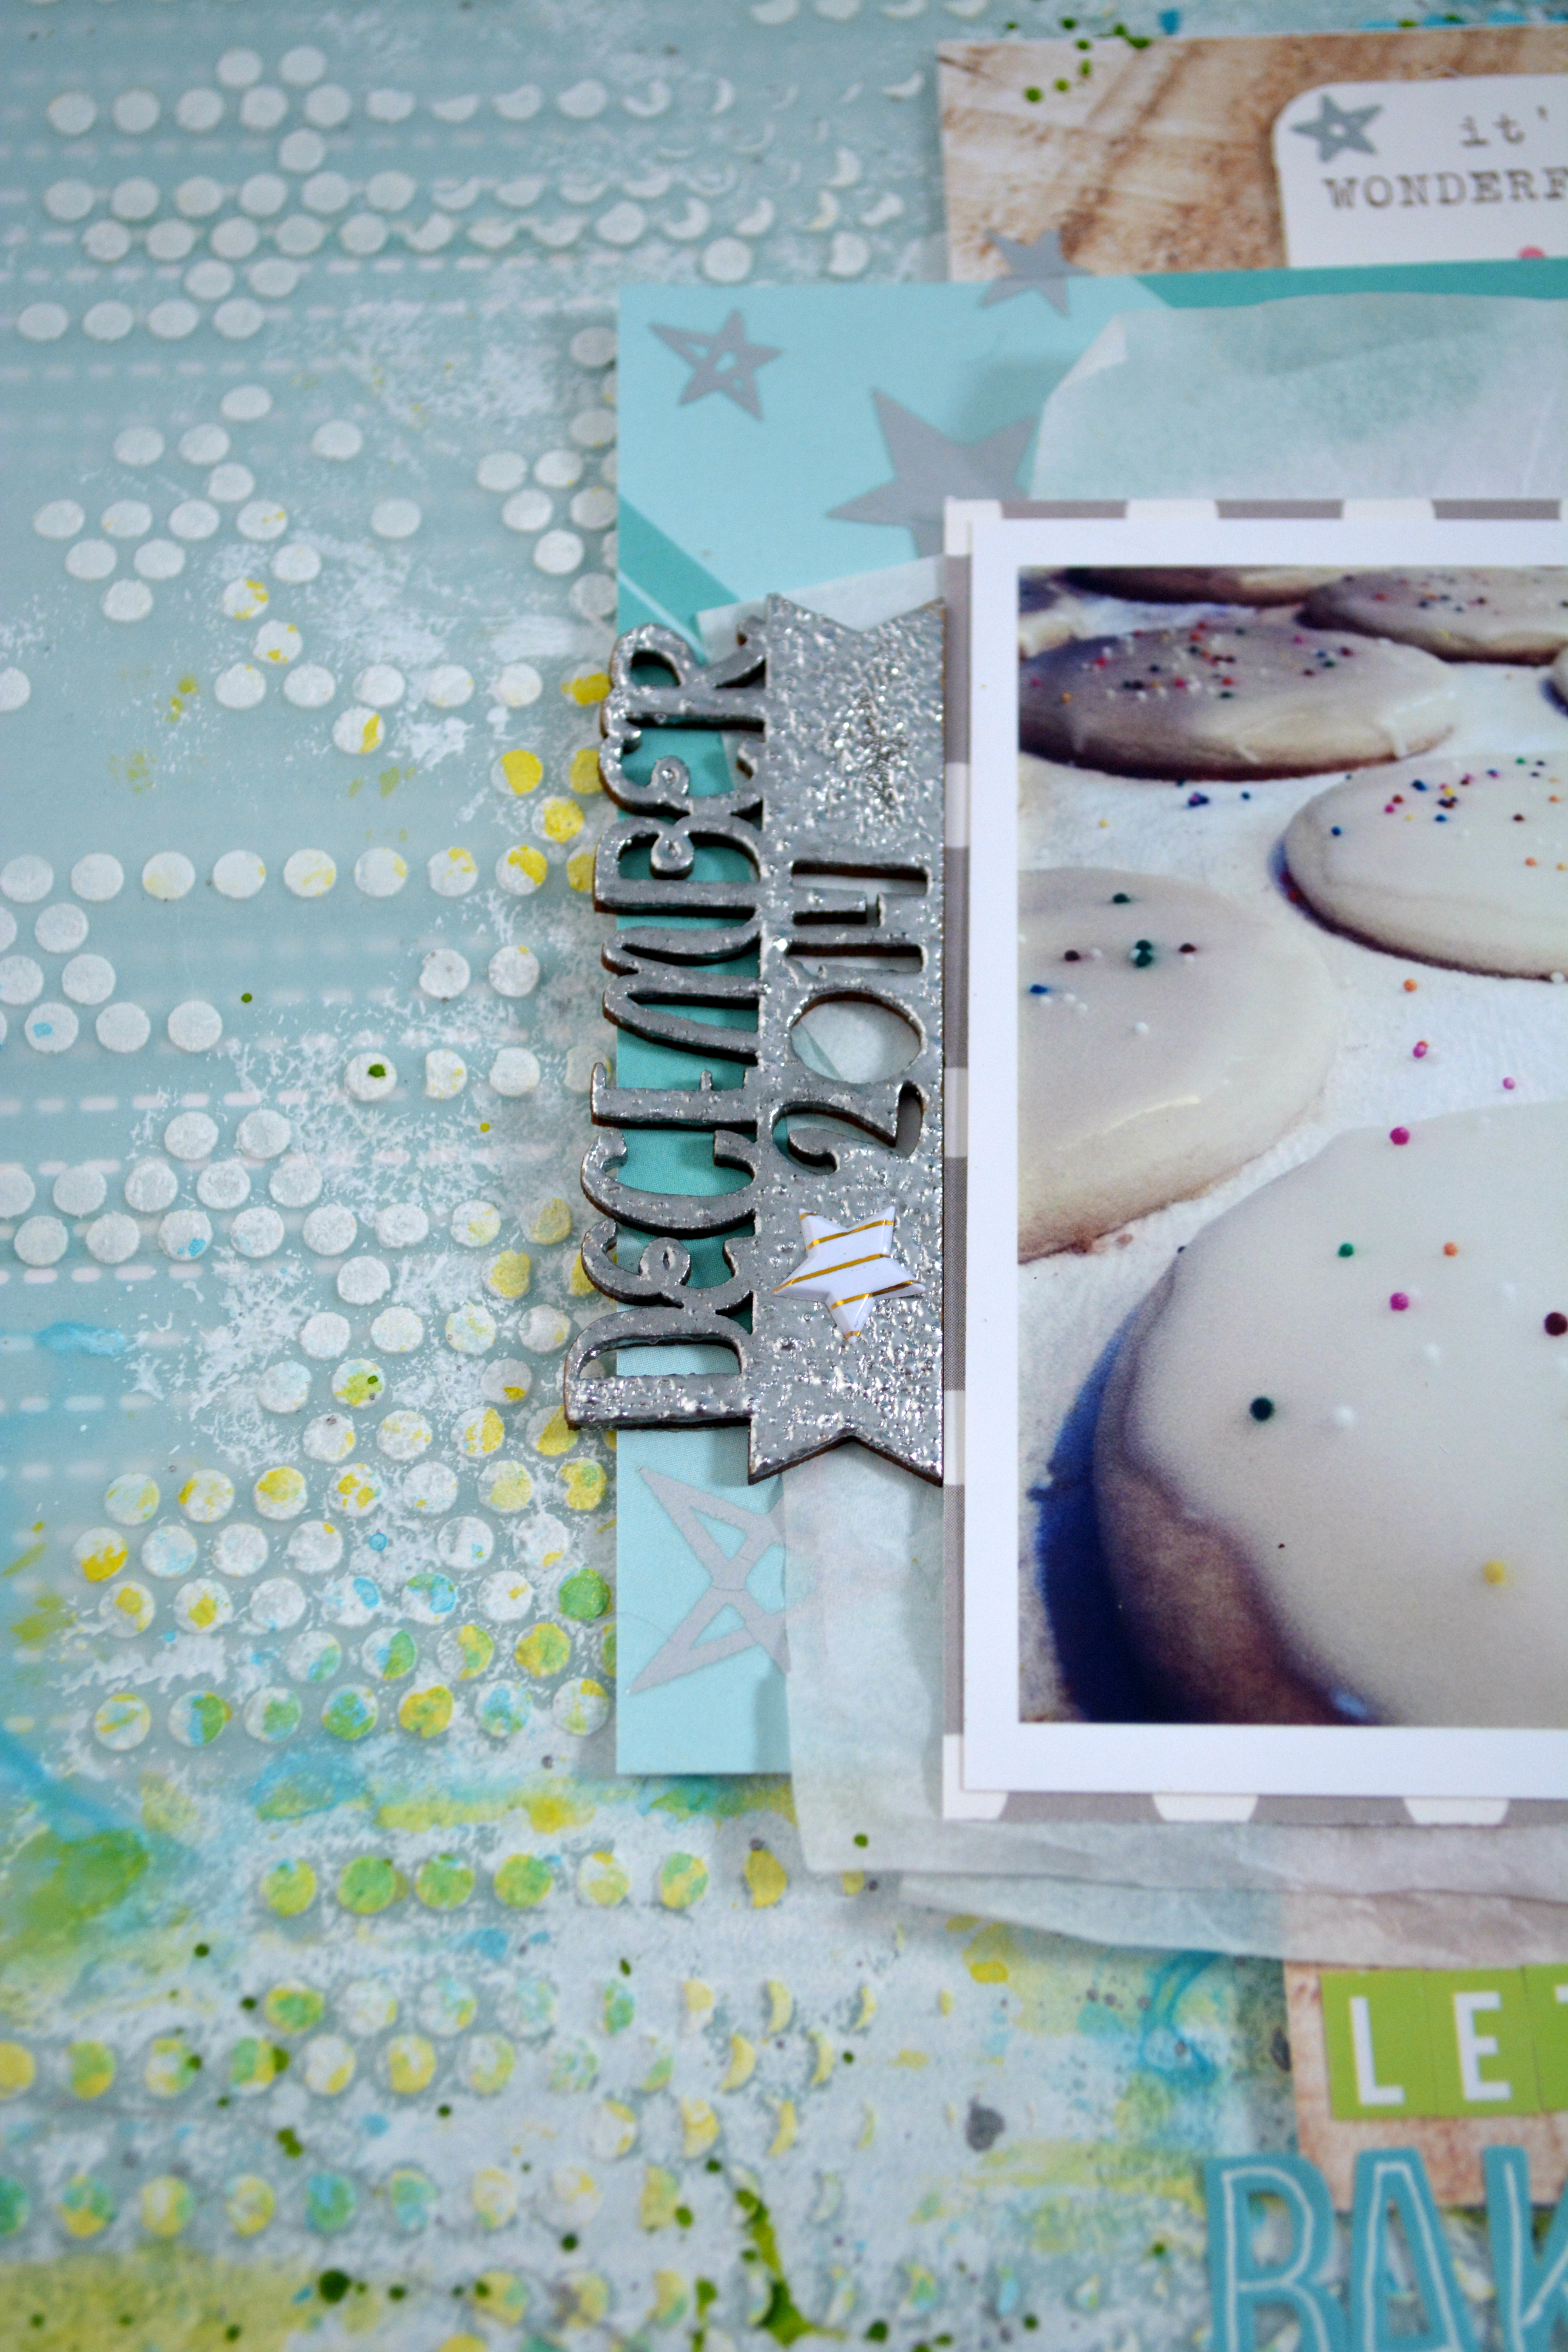
I am a subscriber to the Hip Kit Club scrapbooking kit, and on the member forum on facebook, Kimberly gave us a weekend challenge and this is the layout I did for the challenge. The recipe that needed to be used for the challenge was using an image she posted as inspiration for the layout (that is where my stenciled backround came in to play), include a minimum of three fonts in your title, use stamping on your project (this is difficult to see on my layout but on the bright green paper I stamped falling snow in versamark and embossed it in silver), include gold or silver, and use a minimum of three patterned papers.
It was a challenge for me to make sure I had everything included that is for sure! I rarely follow a recipe or sketch for my layouts, but it was fun to play along!

Products used:
Simon Says Stamp Be Joyful Stamp Set
Studio Calico Alpha Stickers Green
Simple Stories DIY Letter- Aqua
Crafters Workshop 12×12 Tiny Circles
White Tissue Paper
Thanks for stopping by
Hugz,
Jess
Hey everyone! I have recently signed up for the Hip Kit Club monthly kits, Being as though I live in Canada, I have opted for shipping two kits together to save a few dollars, which means that I have just received the October and November kits from them (I actually got them a couple of weeks ago but have just started playing with them
I really do love these kits so far, there is a process video at the end of this blog post.
Is it sad, that at the time of writing this blog post, I am only 3 layouts into these 2 kits and I can not wait to get my hand on the December and January kits.

So this is my first layout using the November Shake it off kit and add on from Scraptastic. I really do love this kit, but being in Canada, these kits seem to take forever to get to me… like 1 1/2 weeks longer then another kit club I subscribe to that shipped 3 days after this one. Oh well I ❤ it regardless.
Aside from the kit and add-on, things added from my stash were Canson 140lbs watercolour paper, my Smash book roller date stamp, Lindy’s Stamp Gang sprays in a coral and a yellow (I don’t have the colours beside me at the moment but if you would like to know just leave me a comment and I will get them for you, they were both Flat Fabio’s), as well as I cut down one of the polka dot acetate dividers from PL, and finally some beloved enamel dots from my stash.
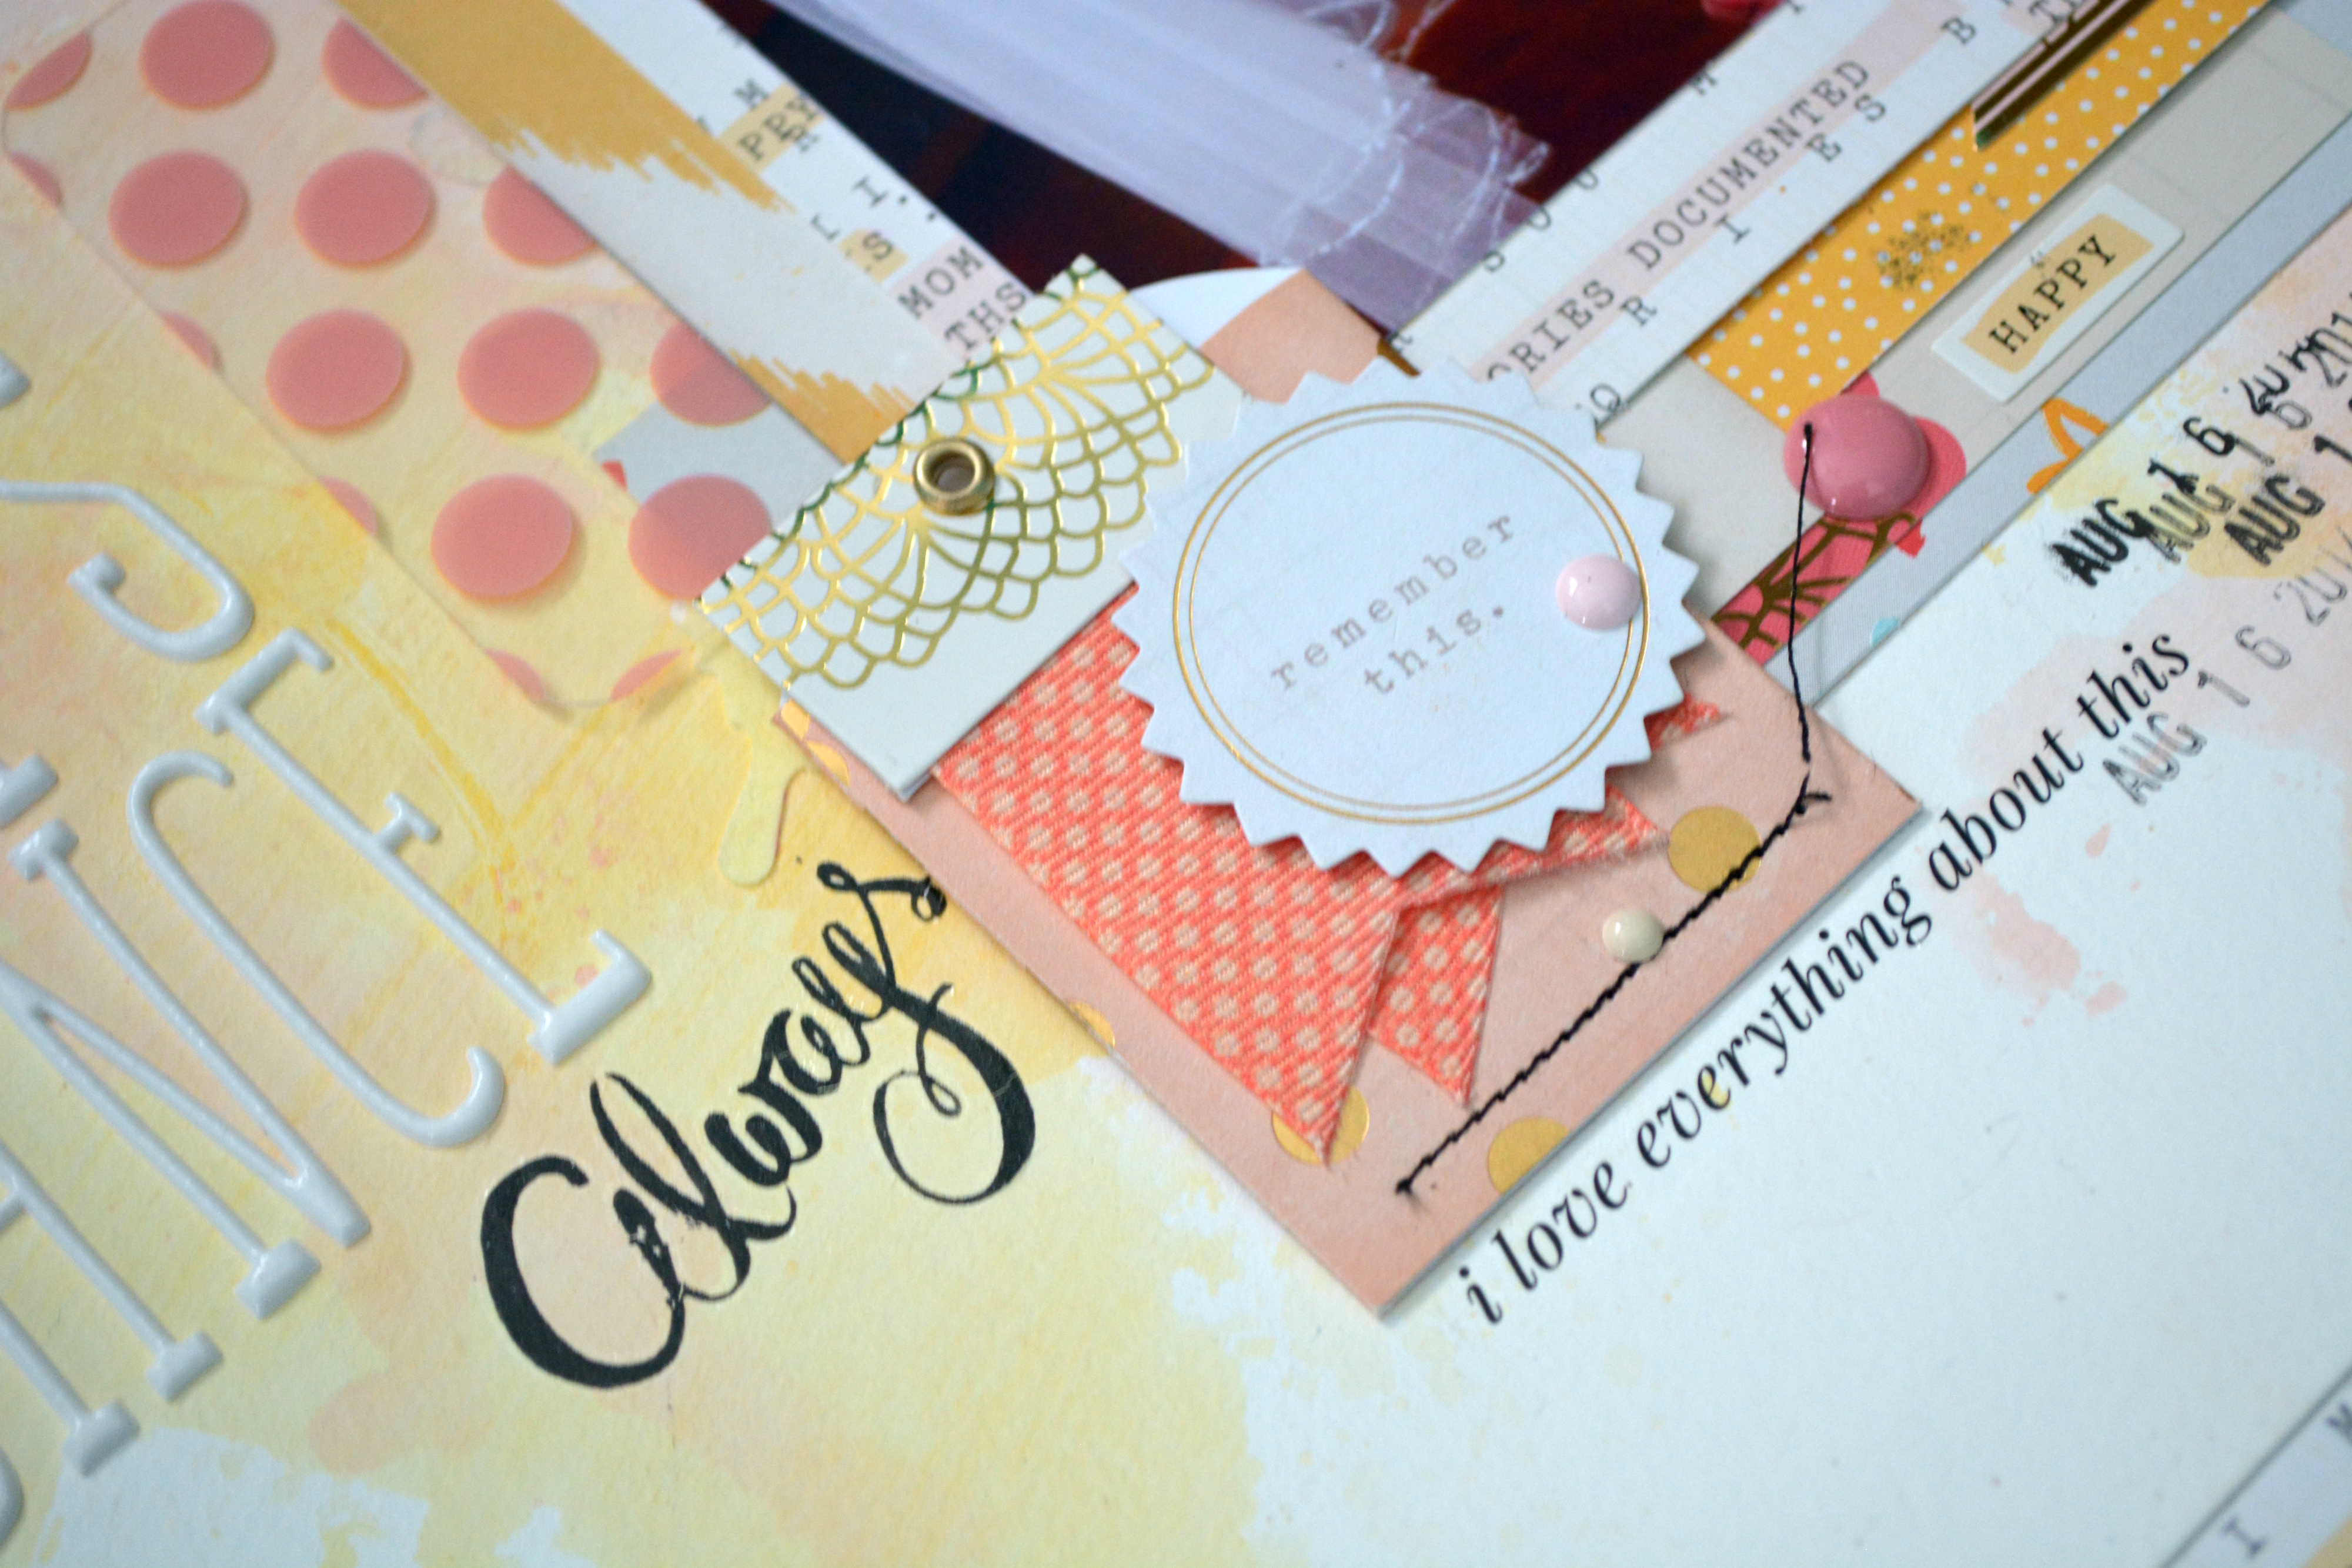
I love taking things apart, like that stitched pocket here, I pulled the tag out of it, took the remember this off of the front added one of the fabric banner pieces and then put the remember this back on the front. Layers make me happy even if they are simple.
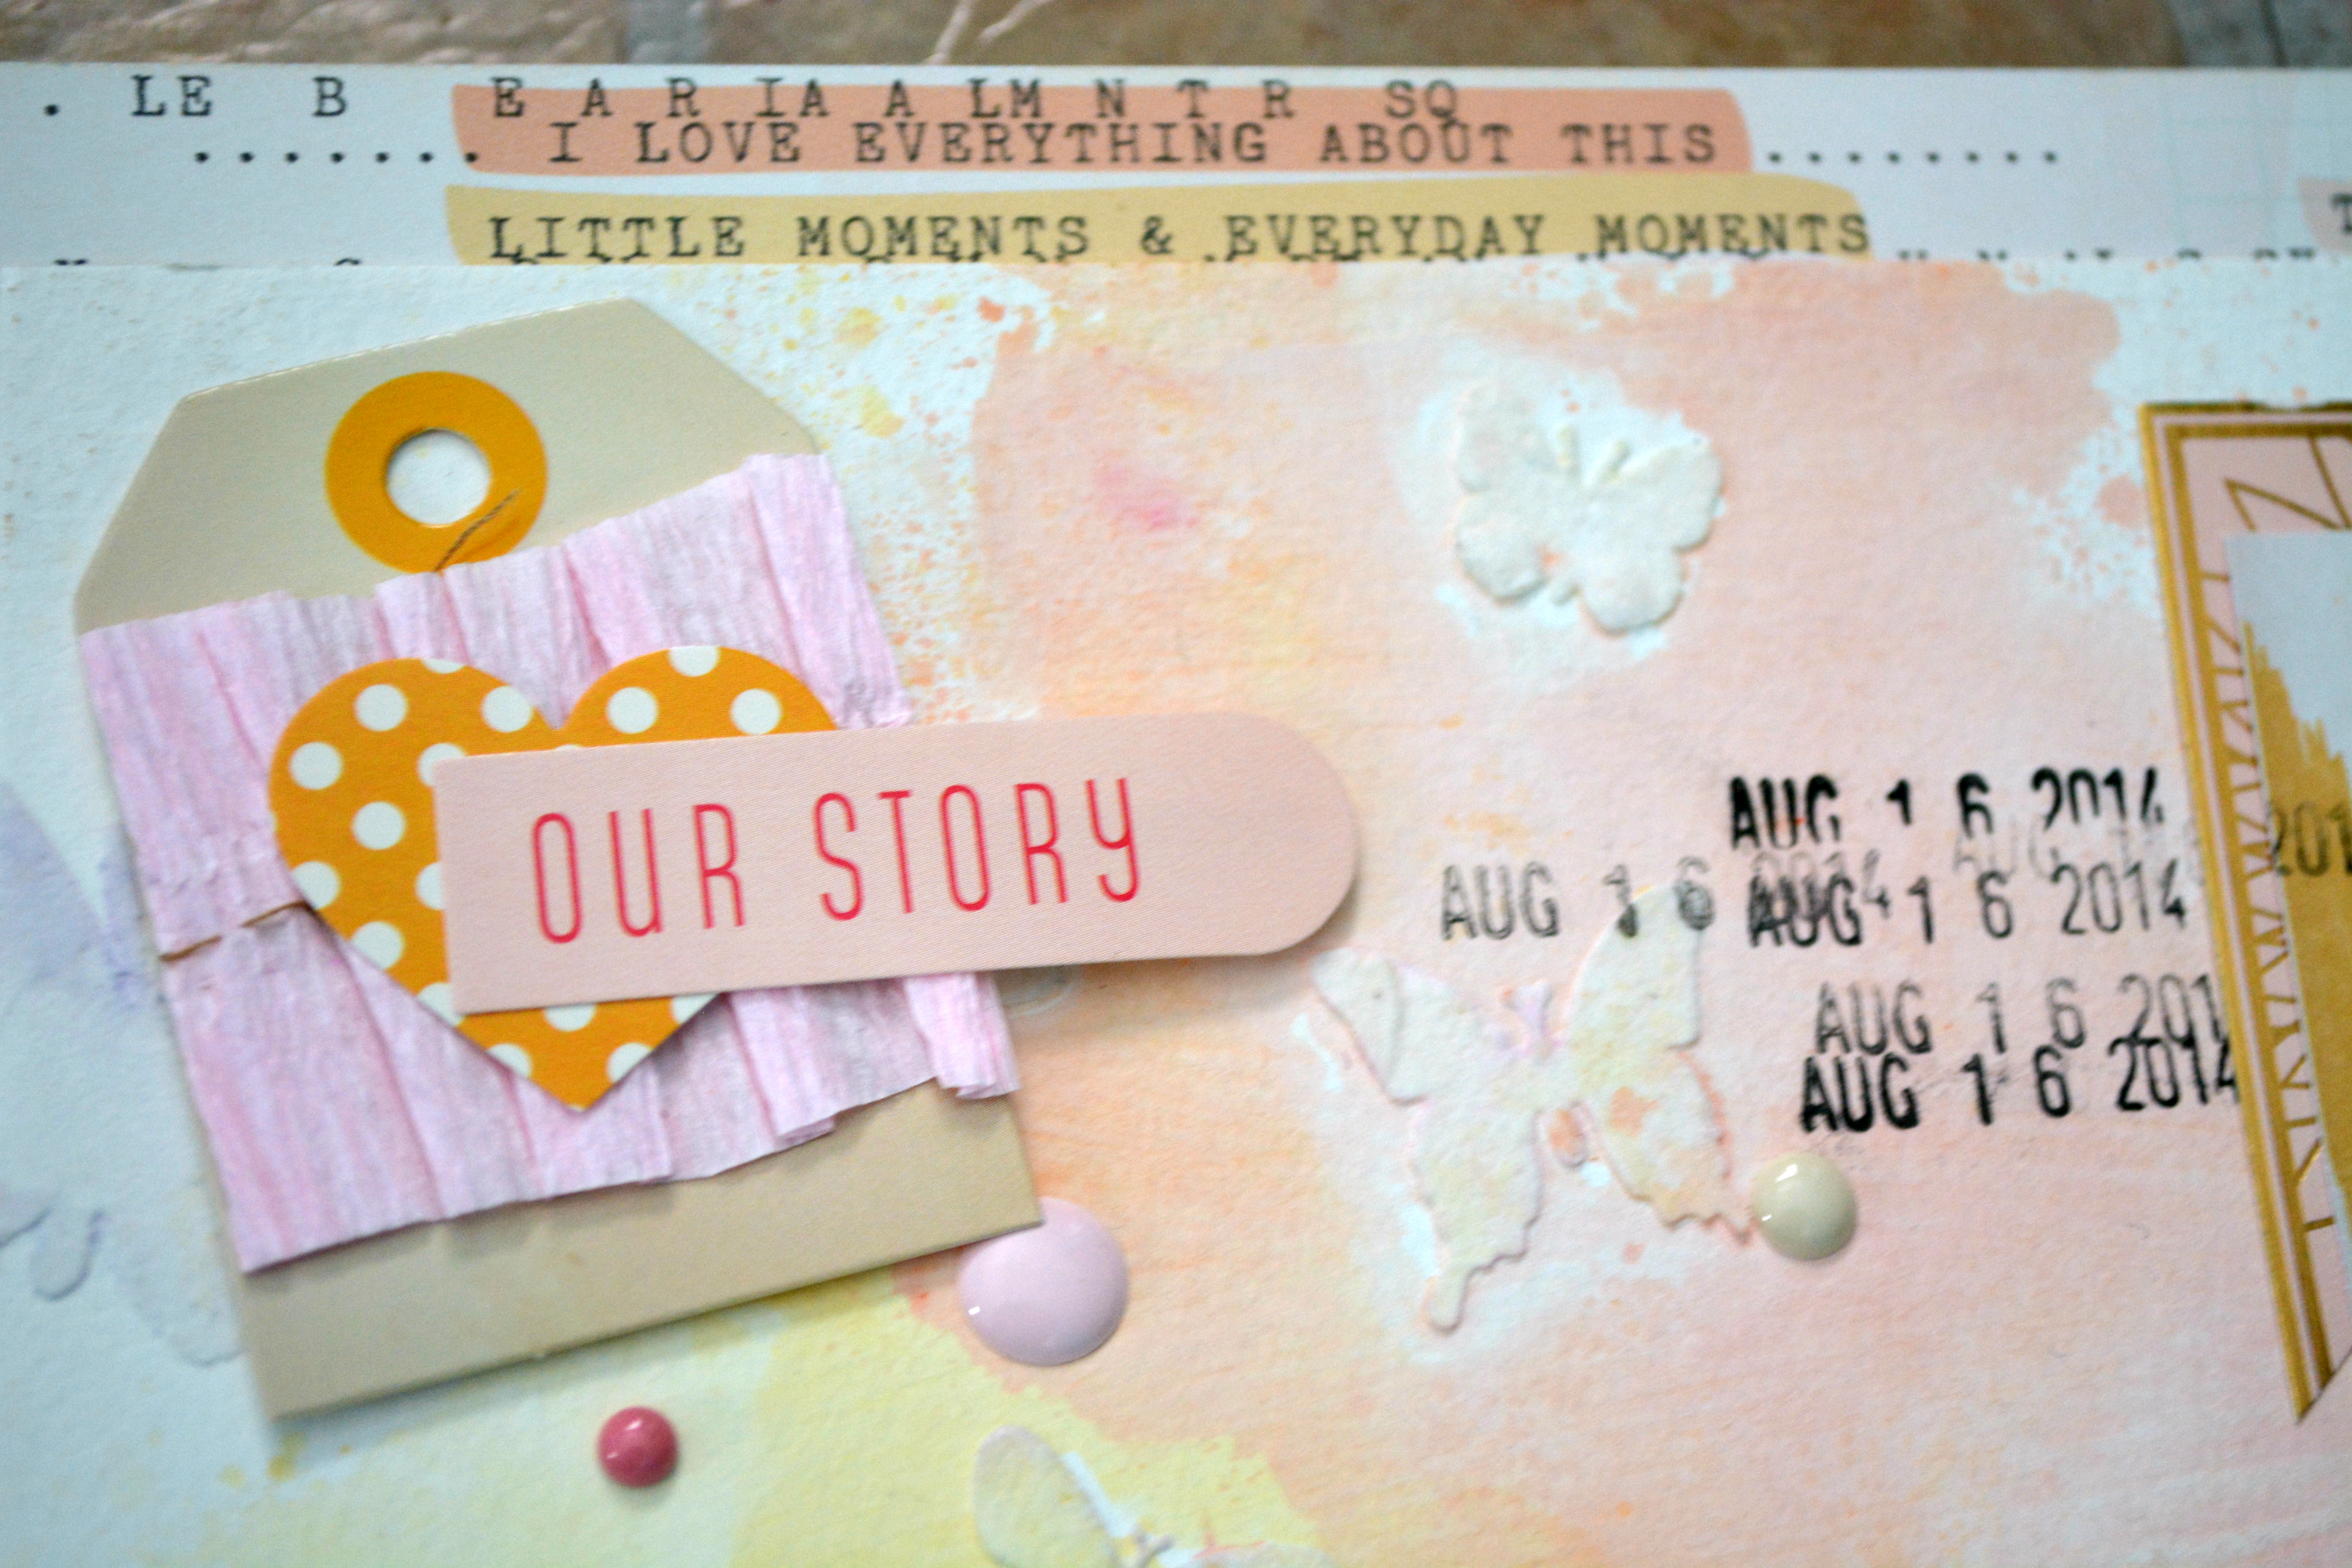
In the background here you can see that I started with some Golden Light Molding paste, and a butterfly stencil from prima.
This little tag with the crate paper on it was ever so cute but it was too tall for what I wanted… easy fix! Just cut it in half and glue it back together the crate paper hides the joint perfectly, later a few stickers from the sticker sheet and it is done!
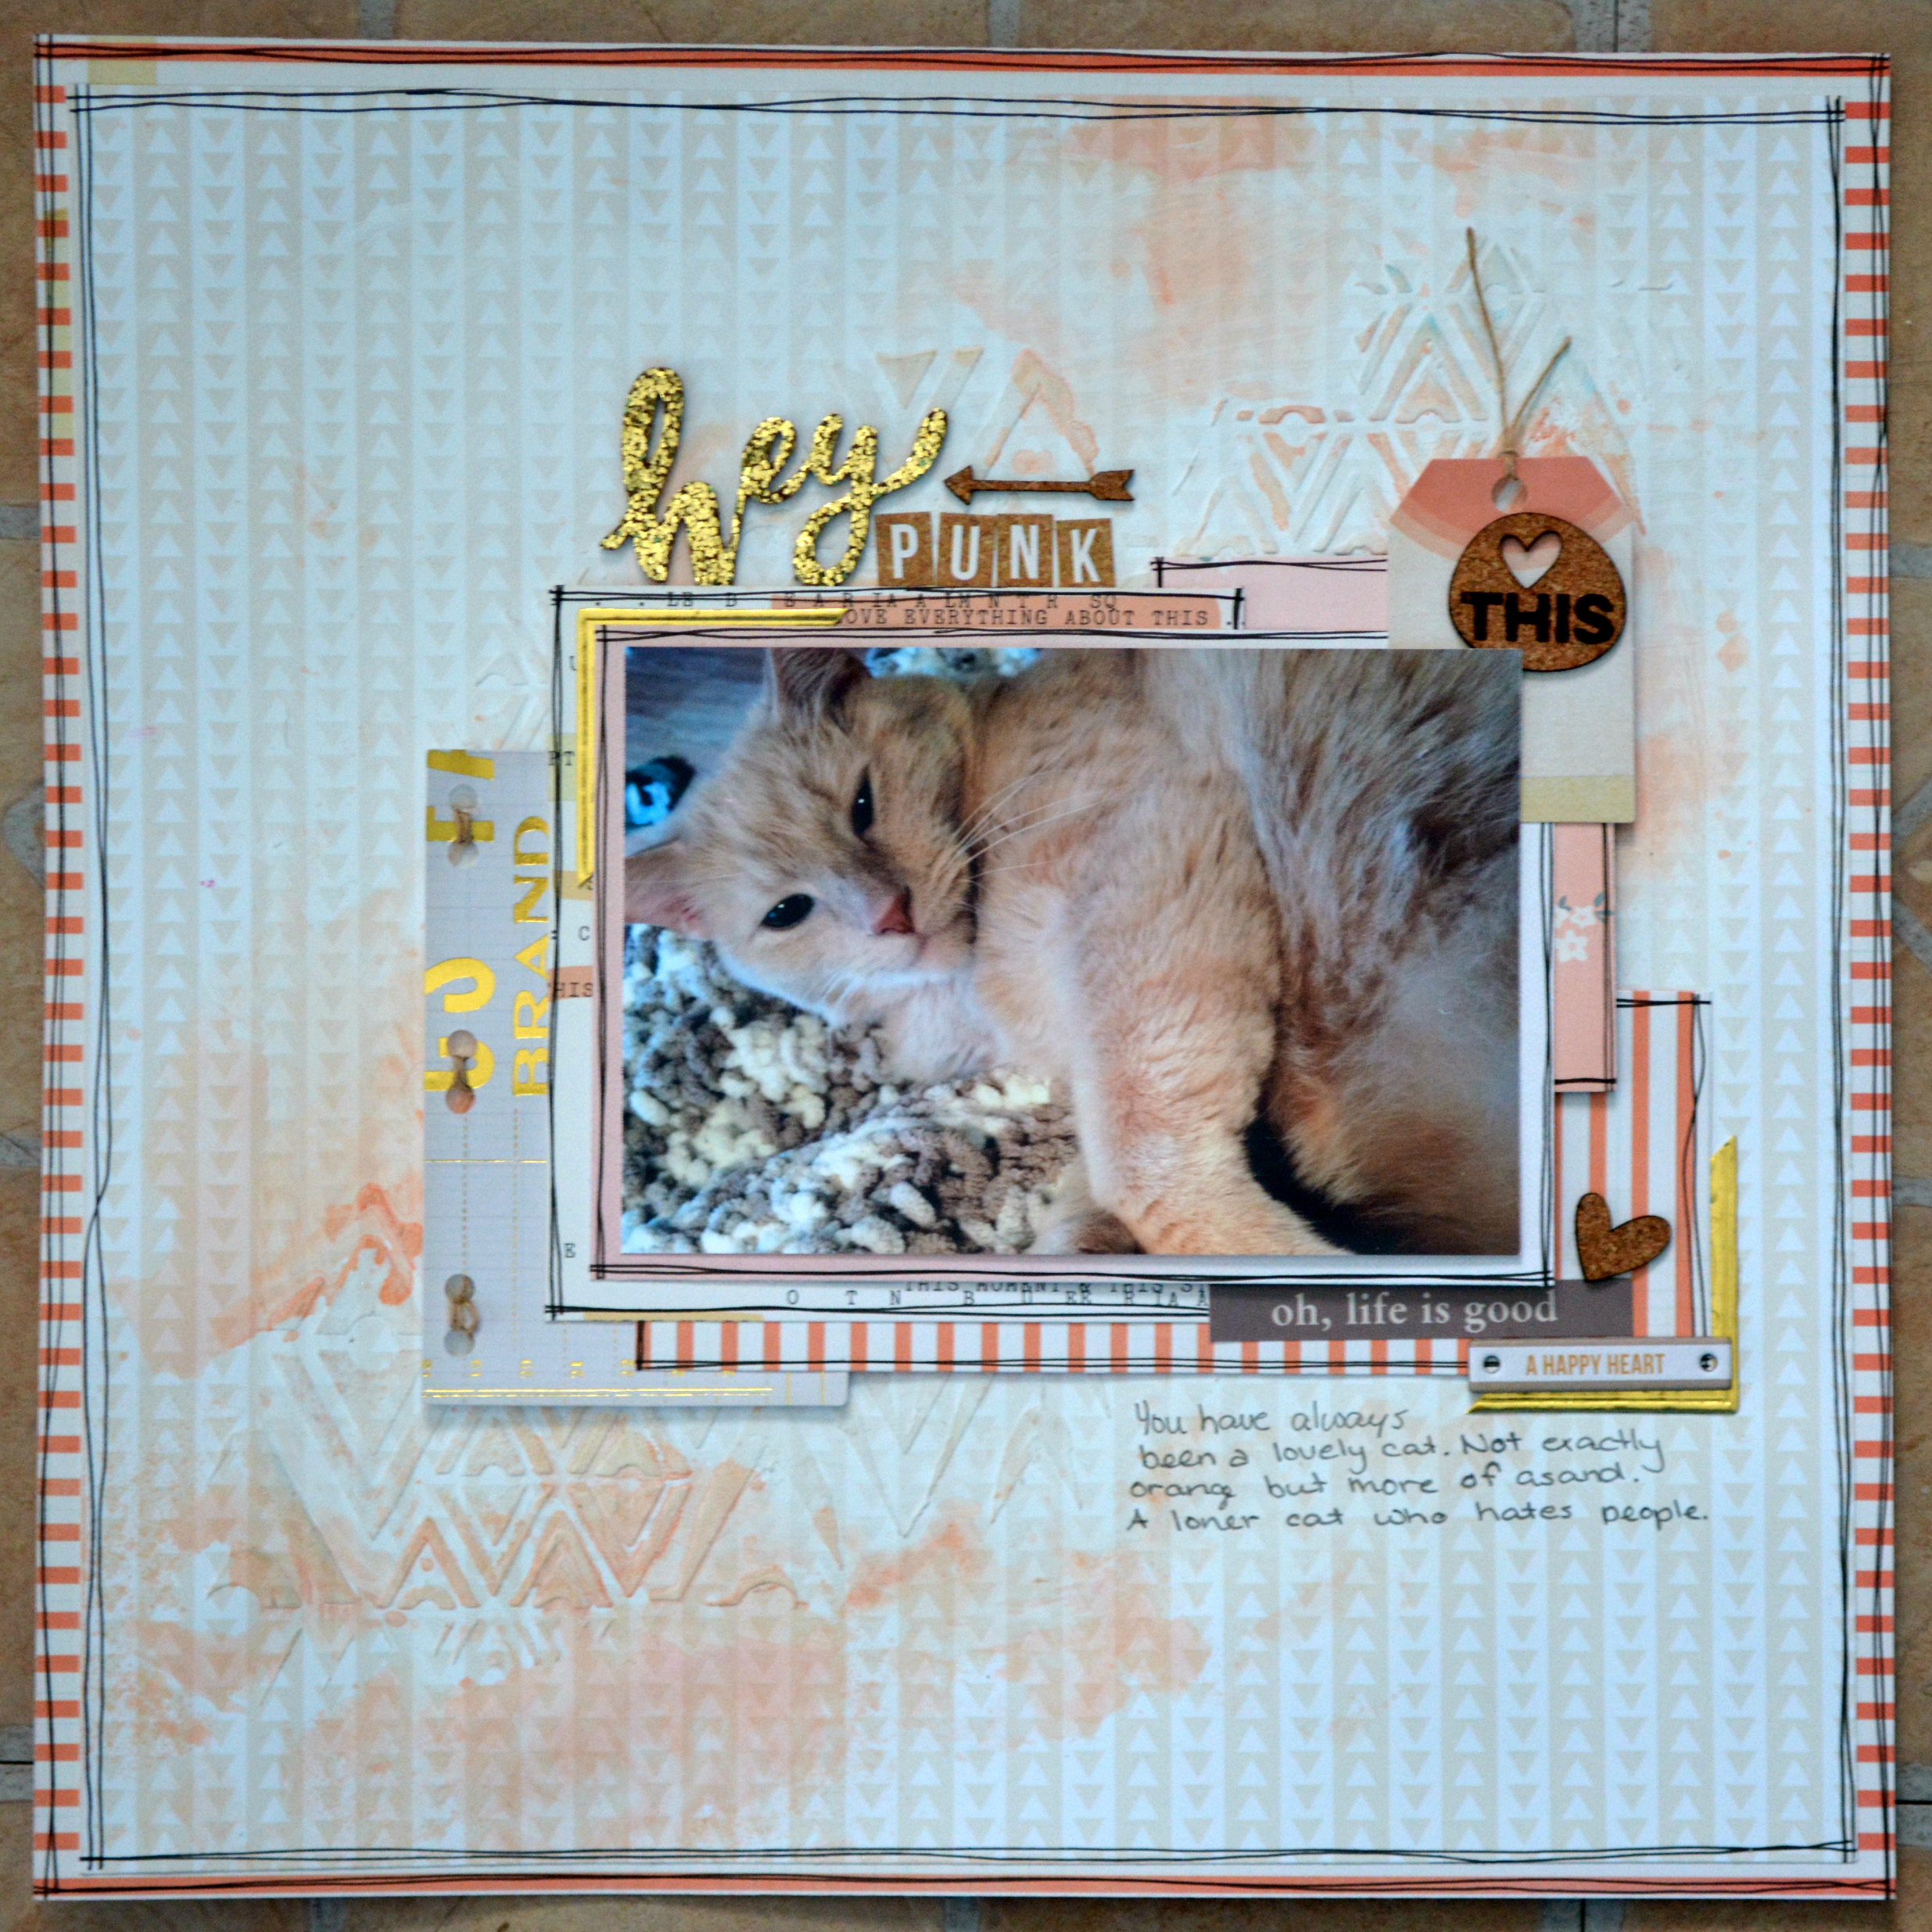
I have been working on these pages for a while now, my little sister got married in August and I have been slowly completing layouts for her book. That is why, unlike most of my layouts, there is no journaling on this page, I leave that for her to do.
