Die Cutting for Christmas Cards- Susan

JESS BLOG CHRISTMASHi everyone! Susan here, taking over Jess’s blog, you can find my blog here. Jess is a wonderful card maker and I have learned so much from her U Stream Classes. Today’s focus is on using digital die cutters for Christmas cards. I have used my Silhouerre Cameo for this card.

For this card I selected the Silhouette file Nested Poinsettia (Design ID #15148) and resiced it for the front of an A2 card. I then used my Cameo to cut it on some Neenah Solar White cardstock. Once I had all the flowers cut I colored each with Copic Markers. I followed Sandy Allnock’s tutorial on colouring poinsettias here. She was using a stamped image but I wanted mine to be dimensional.

I used R12 on all the flowers which are really leaves by the way! And then proceeded to color them in with the darkest being on the bottom. To achieve this I used R32, R35, R39 and R89. Once finished I sketched the leaf veins with a fine line black pen. I adhered the flower together using Glossy Accents and then added silver glass beads to the center with Glossy Accents.

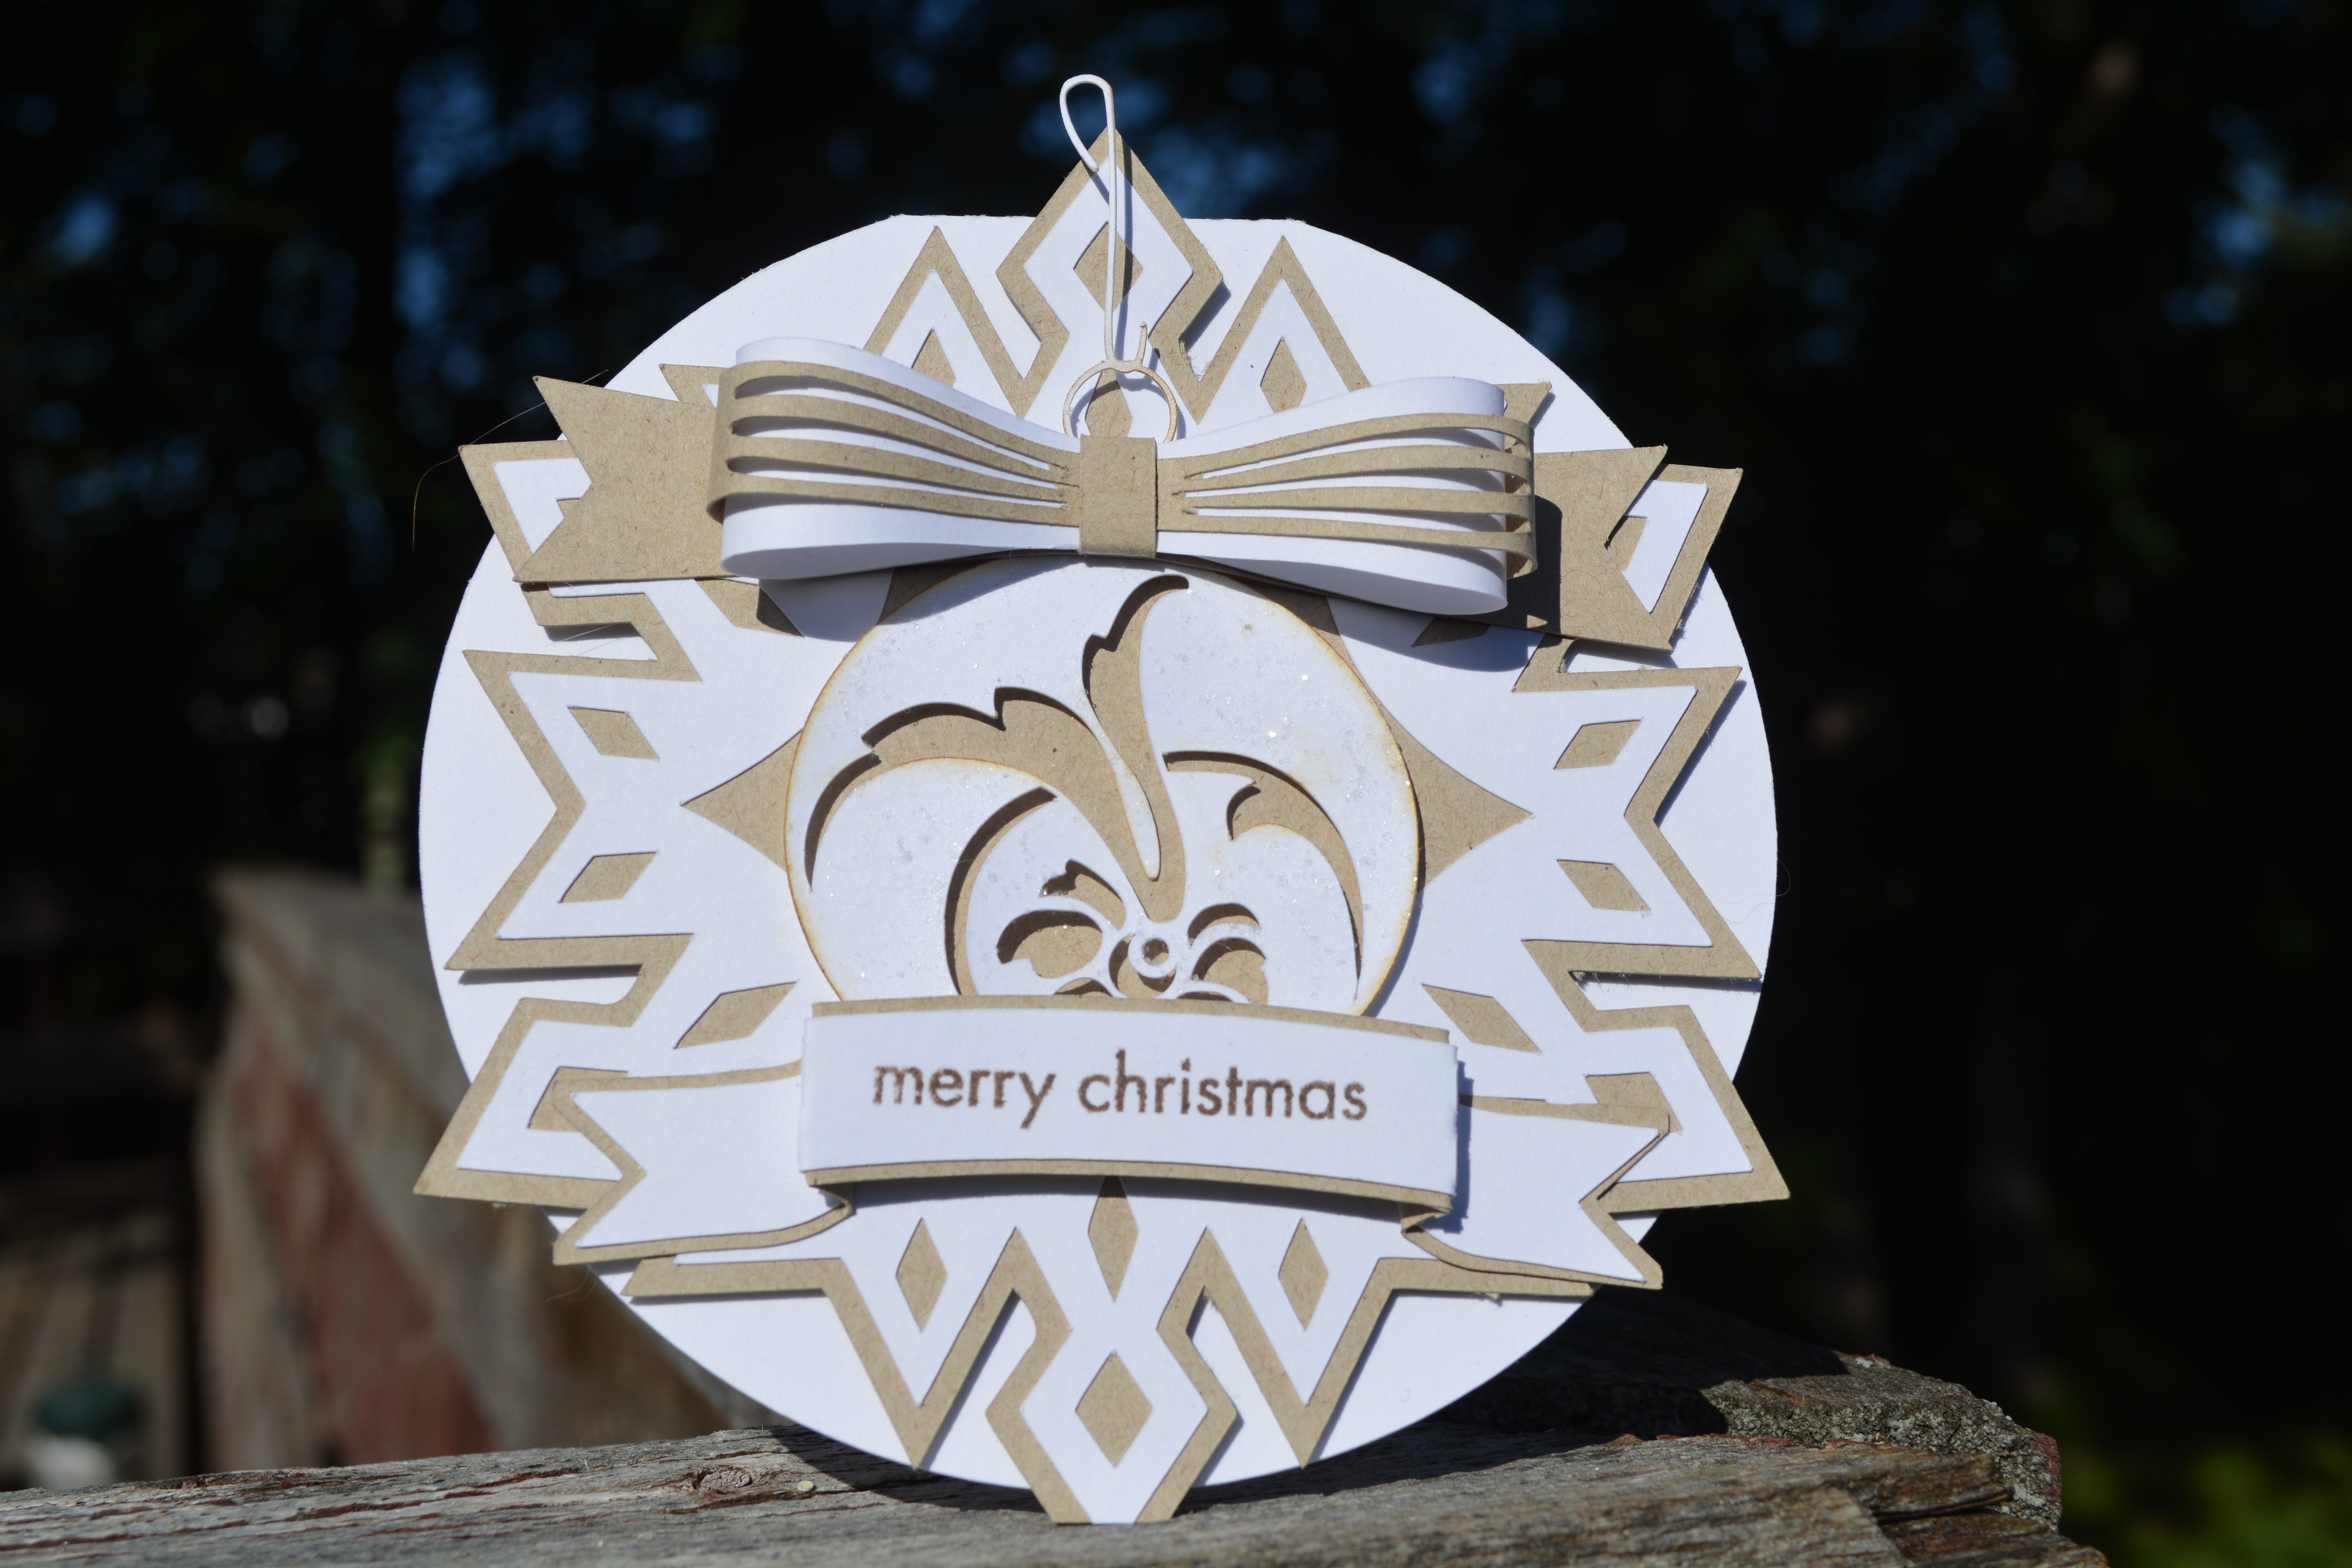
I embossed the back later of the card with a Life Style Crafts embossing folder – I think it is called Links. I die cut a circle out of another panel of Neenah Solar white using My Favorite Things Circle Stax dies – I LOVE those! I adhered the front panel to the back panel using some foam tape.

The sentiment is from Simon Says Stamp Big Holiday Wishes and the sequins from Pretty Pink Posh!

Thank you to Jess for having me on her blog and thanks for looking. I hope this inspires you to use your digital die cutting tool for your Christmas cards. It makes quick work of die cutting lots of pieces!


October full of Christmas…

Hey everyone, welcome to the month of October, this month is all about Christmas on my blog. Not only Christmas but out electronic die cutters as well. I know many of us that have these machines in our stash, some of us use them faithfully. Others, like myself, don’t use them nearly enough. So myself, with the help of some of my friends, hope to inspire you to get those Christmas cards made, and those machines uncovered, dusted and let them cut like crazy for you.

DSC_0059


Here we go, I personally use a Silhouette Cameo, so all the cut files for my first card this month come directly from the silhouette store. I started with the circle card file cutting it in white, I then found a pretty layered snowflake and cut that so it just slightly over hung on the card base. Continuing working that machine hard I found a fun little ornament to use, and a pretty bow to top the ornament off. the banner is a layered banner where I stamped a very simple merry christmas sentiment that is from a Hero arts set ( CL343).

DSC_0060


As much as this card looks full and layered it really did come together quickly, no inking, minimal stamping, just later all the pieces togehter and adhere them to the card.

DSC_0061


Thanks for stopping by,

Hugz,

Jess

Going to the Chapel

DSC_0047

Here I went again using some patterned paper, I have some seriously ancient paper pads in my stash. This is an old DCWV paper pad, I have had it for ages, all the patterned paper and the flocked flower stickers came from that paper pad. (I can not remember the name of the pad if you would like to know just leave me a comment and I will find the name of it for you.

DSC_0049I really did love those flocked flowers, and I think they look very classic on this card. I also used red and black cardstock (I believe they are Bazzil Cardshoppe cardstock) just to add to the richness of the card.

The sentiment was embossed with black embossing powder and the stamp it’s self is a CC Designs set called Wedding Labels.

DSC_0050

Thanks for stopping by

Hugz

Jess

Graphic 45 Birthday card

DSC_0066

So a while ago I was thinking about how I have been been making so many cards lately, but yet I have used virtually no patterned paper. If you know me at all through twitter, or when I use to do Ustream shows, you would know that I have a ridiculous amount of patterned paper. So I went digging and pulled out some of my old patterned paper, this is a graphic 45 8×8 pad, I can’t remember off hand what collectons I used, but if you really want to know I will dig around and find out for you.

DSC_0067I did a bunch of different layers of paper on here, I used the small banner punch for the banner along the top, the lace punch along the bottom is a Martha Stewart punch.

DSC_0068

Making this card, reminded me why I love patterned paper, the simplicity of using nothing but patterned paper and a simple Happy Birthday stamp set. I guess that means I need to keep making more cards and try and get through some of the paper I have, that should only take me 5-10 years haha!

Thanks for stopping by

Hugz

Jess

Oh, Hello There

DSC_0069


Hey everyone, back with another card! This time it is from the Simon Says Stamp September Card kit. I really loved the stamp set that came with this kit, all the individual book stamps, as well as other elements, and the shelves themselves.

DSC_0070


I used various ink colours, some from Simon Says stamp, Hero Arts Shadow Ink, and the Prima chalk inks. (sorry I did not keep track of what colours)

DSC_0071


Its a very simple looking card, that has a ton of stamping in it.

Thanks for stopping by and having a look

Hugz

Jess

R.I.P Dear Vagabond

Well the other day I was using my beloved die cutting machine. and quit working with a die half way through it. I eventually got the die out, the machine will move about 1/4 inch every 5 or so minutes. 

The unfortunate part is that I have had my machine for about 3 years, therefore no warranty left of it, so I am out of luck with it. It was a wonderful run, I loved that machine. I do believe it should have lasted longer then it did, but there is nothing I can do about it.

So for the time being, till I buy myself a Big Shot or a Cuttlebug or something more portable, I will give my Accucut Grandemark some serious love. It needs it anyway. So happy I have that larger machine.  

Thanks for stopping by, 

Will be back with a new card for you all tomorrow

Hugz, 

Jess

Sunflower’s and watercolor

DSC_0075


Here is a fun little watercolour card I made, I used a sunflower stamp, I have no idea who makes it, it is actually for doing pottery. I embossed with white embossing powder and coloured it, in a watercolour fashion, using distress inks. (mustard seed, wild honey, dried marigold, ripe persimmon, crushed olive, and peeled paint).


DSC_0076


I then added splatters on the background with mustard seed, and ripe persimmon. it is layered on a terracotta orange cardstock base with a chocolate brown mat (not sure whose card stocks they are probably Paper Trey Ink).

DSC_0077


The sentiment is from a Simon Says Stamp Set called Birthday Messages 3×4, and is stamped in Wendi Vecchi Archival Ink in the colour Potting Soil


Thanks for stopping by

Hugz

Jess

Hey Girl

DSC_0044


Here is a fun quick and simple card I made this afternoon, using come Faber-Castell Gelato’s and some Pink Paisley Die cuts and vellum.

DSC_0045


A close up of the center of the card, I love this little trick, left over die cuts that are white on the back, you love the shape but not the pattern anymore, flip them over, use the white side, and love them again!

DSC_0046


Thanks for stopping by,

Hugz,

Jess

Surprise…

surprise...


Hey everyone I am here today to share a layout with you all, this is a little bit different of a share from me, you all usually get to see cards I make and things of that nature. But, I am also an active scrapbooker and Project Lifer, I have decided that once in a while I will start sharing layouts, or PL pages with you on my blog. Don’t worry it wont be as frequent as cards, and now that summer is coming to an end my blog will be alot more active.  I am not going to explain a lot about this layout as there is a video for this layout.


DSC_0033

DSC_0034


Avery Elle Many Thanks

avery elle thank you 1


I started with a piece of Ranger Watercolour paper cut to 4×5 1/4, and use Distress Ink in the colours, Peacock Feathers, Picked Raspberry, and Squeezed Lemonade. I put the inkpads on a ranger craft sheet and sprayed with water, after drying the first layer of colour, I tapped the piece back in the water to add some further layers, increasing the watercolour effect.


Avery Elle THank you 2


Then on a white panned I stamped the Thank you sentiment from the Avery Elle set, the for everything is from a SSS set called Life is a Journey.


Avery Elle Thank you 3


I then made a bow on the front of the card using May Arts Turquoise Twill Stripes ribbon. Added a few enamel dots from my stash in similar colours, put it all on a white card base and the card was complete! Quick and simple.

Thanks for stopping by,

Hugz,

Jess