2015 Week 1

DSC_0003


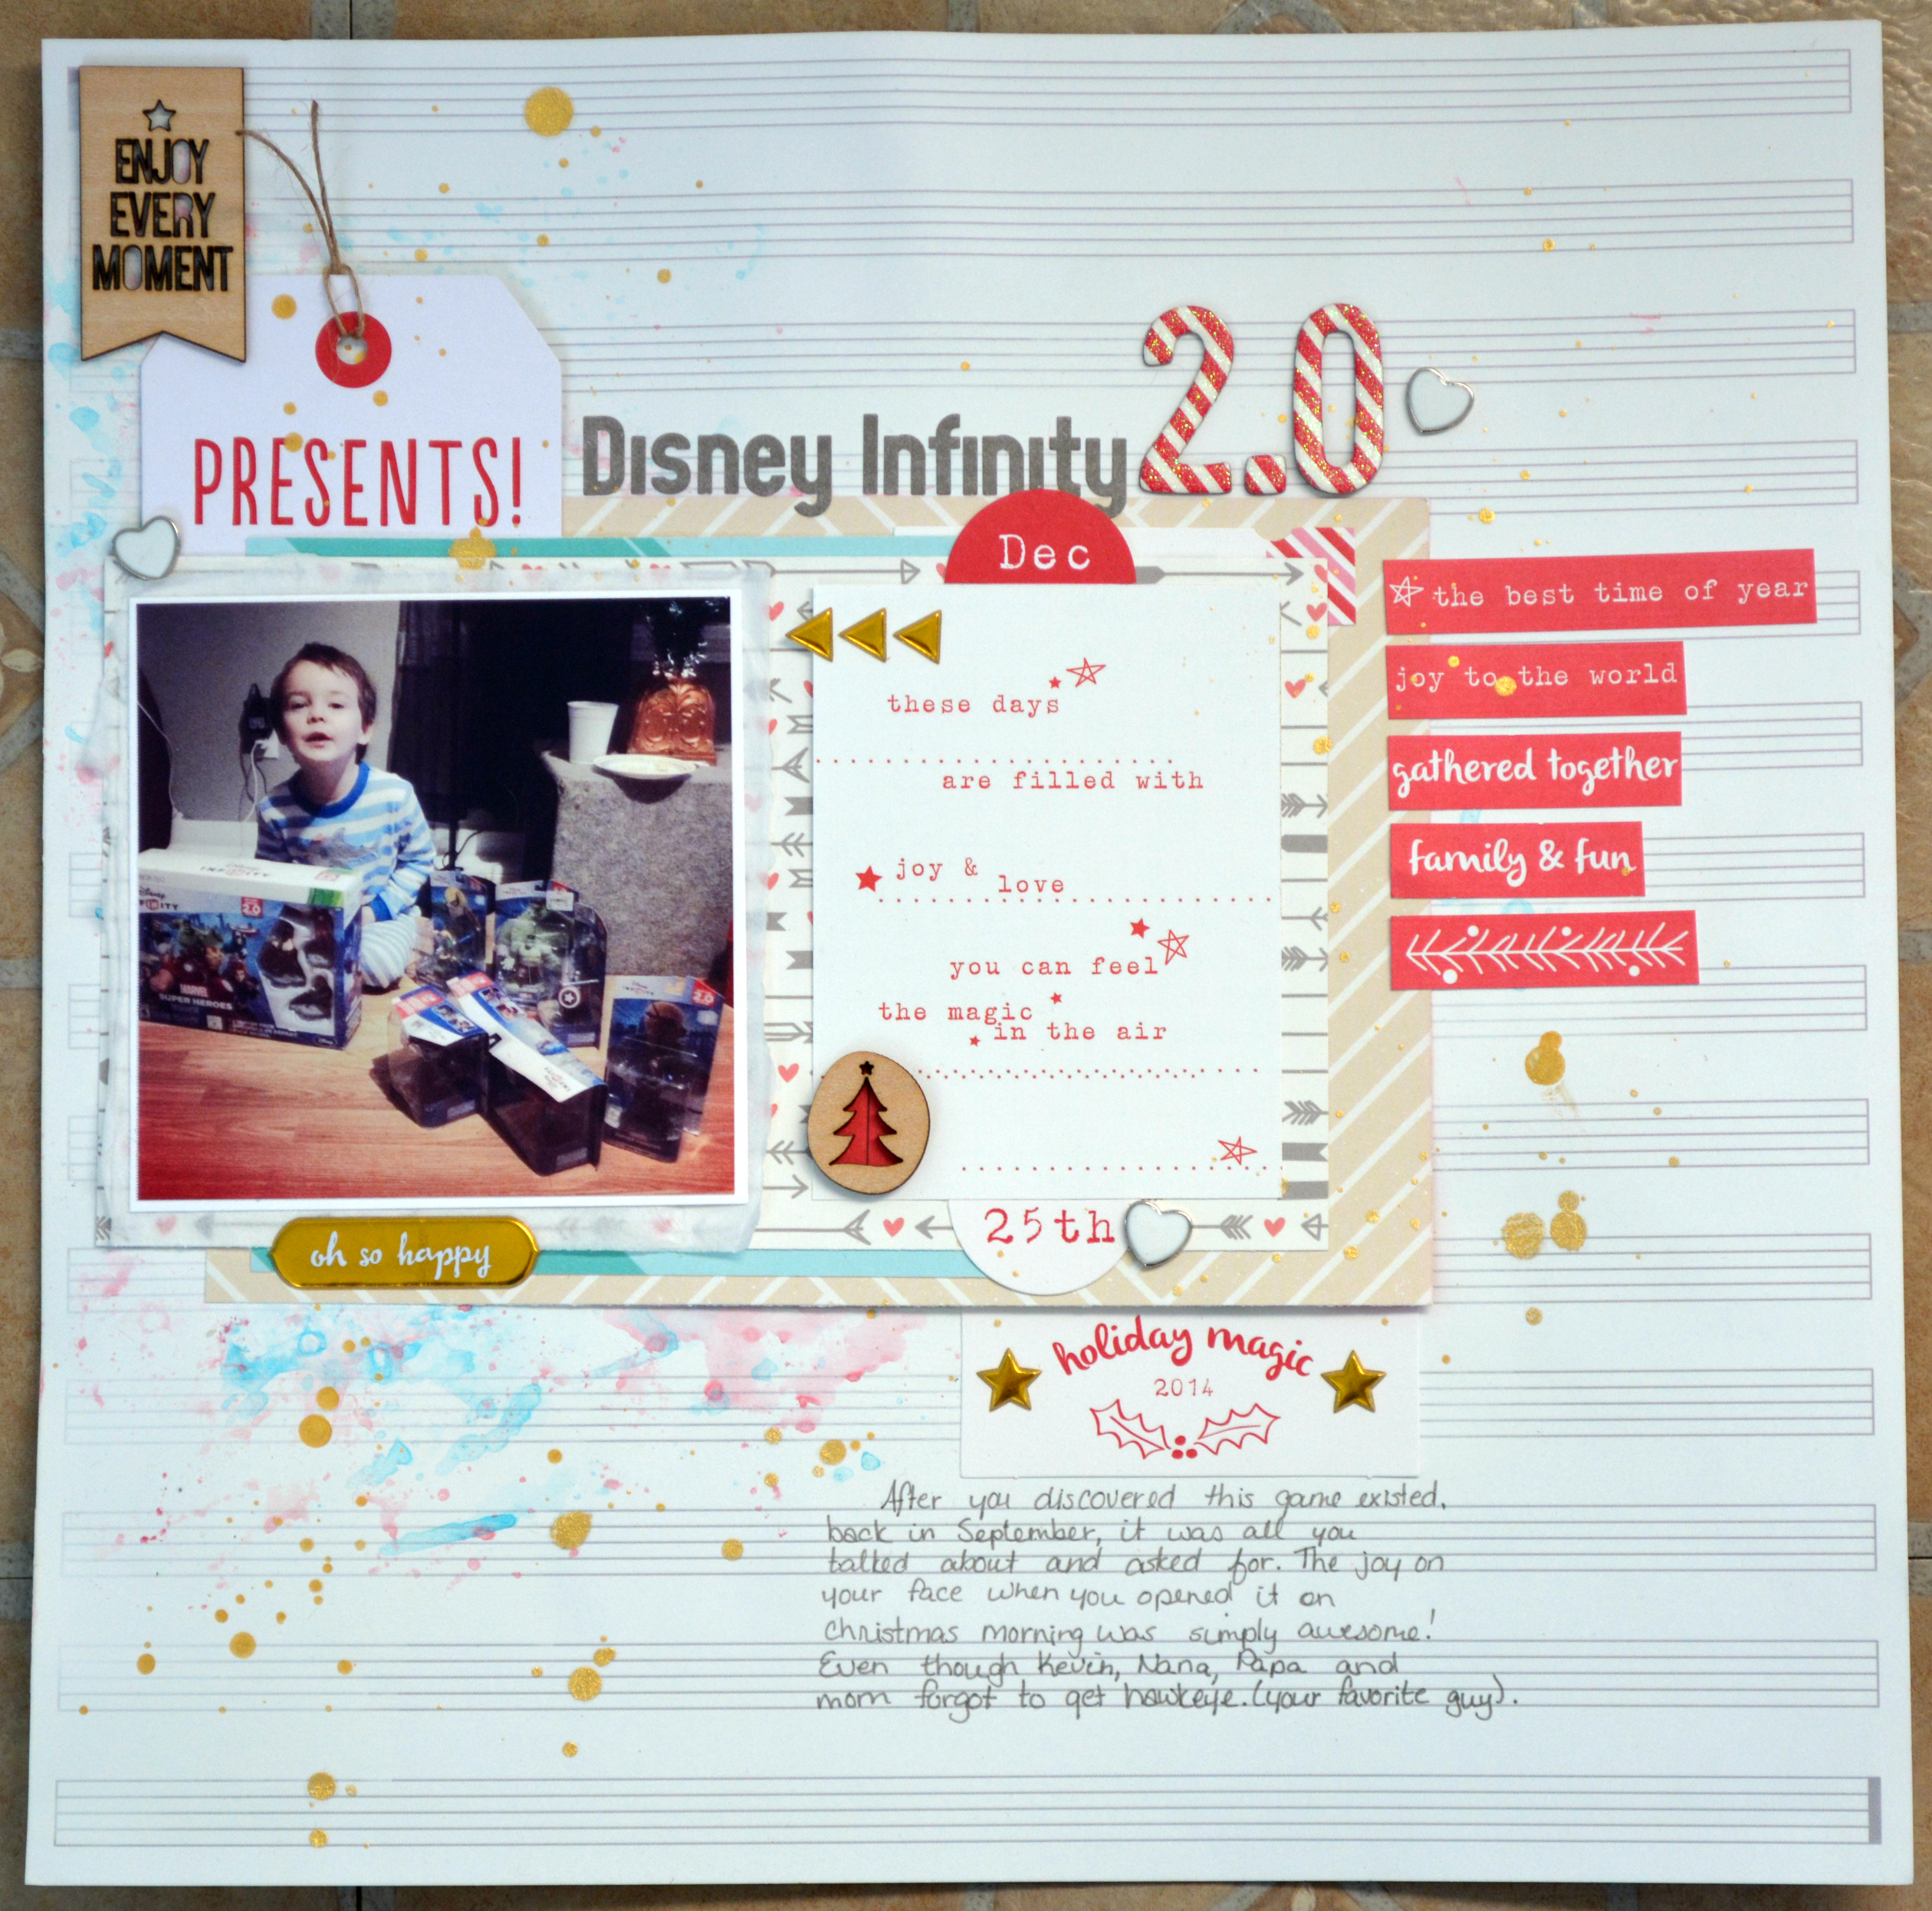
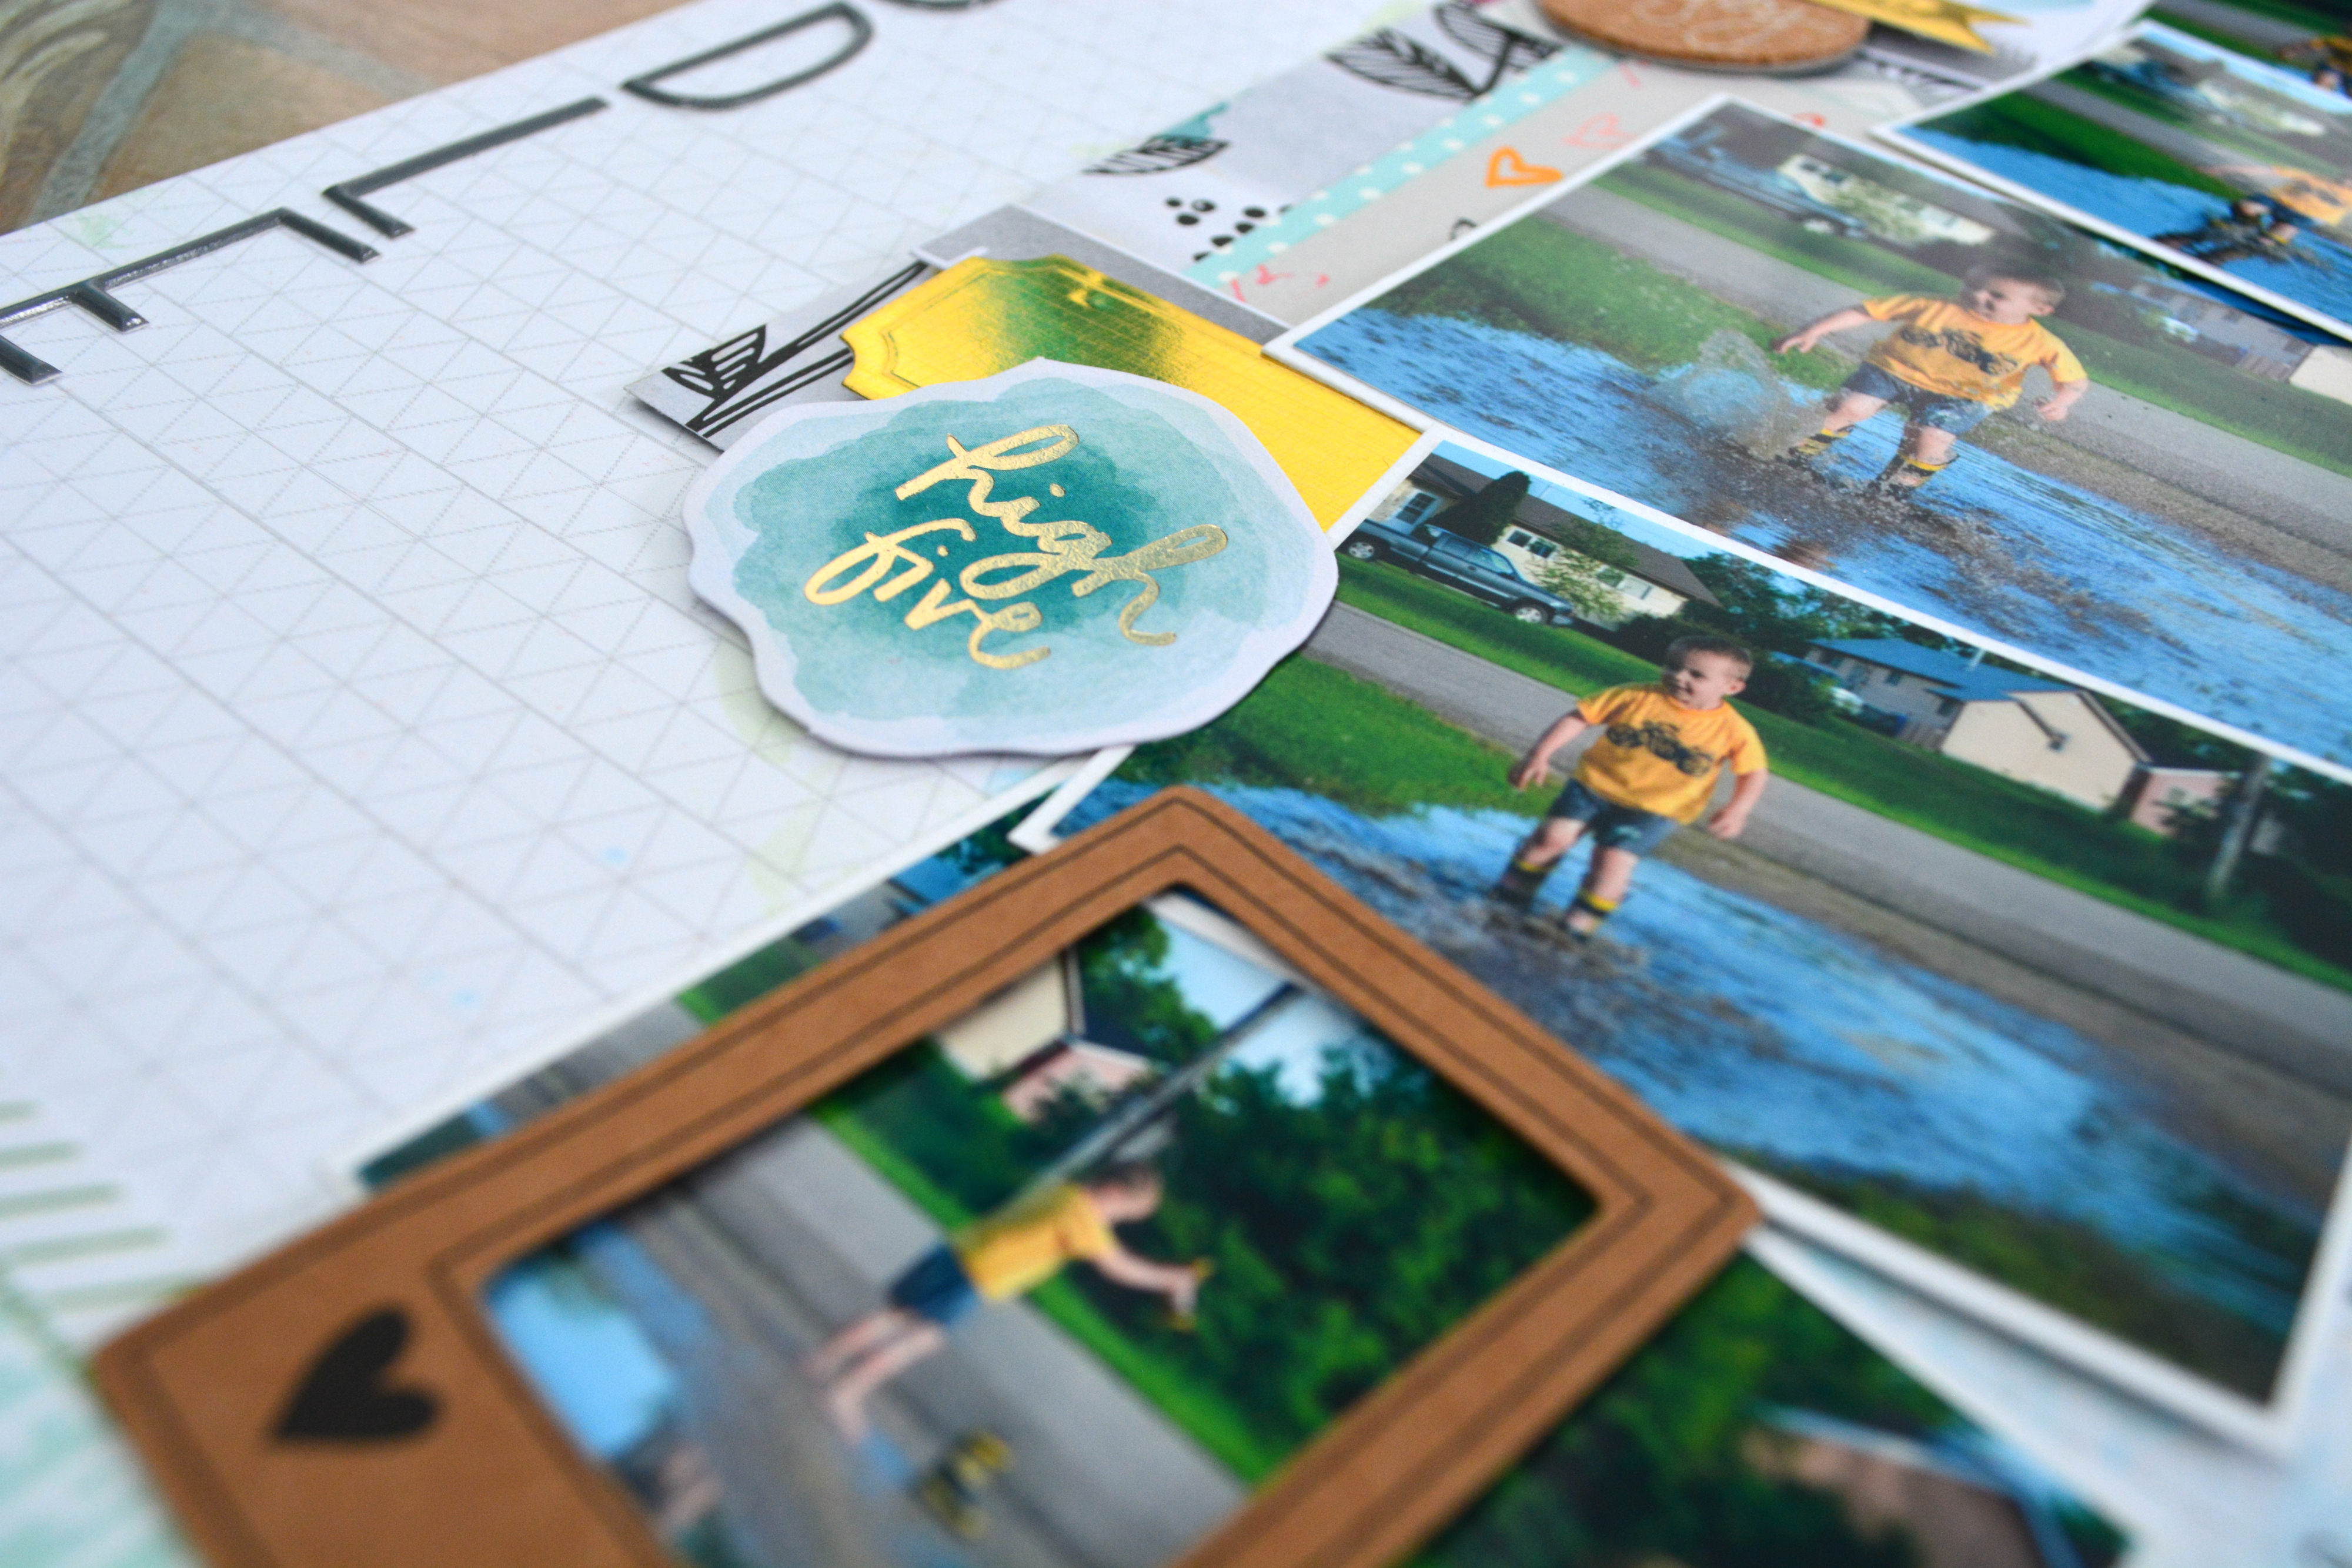
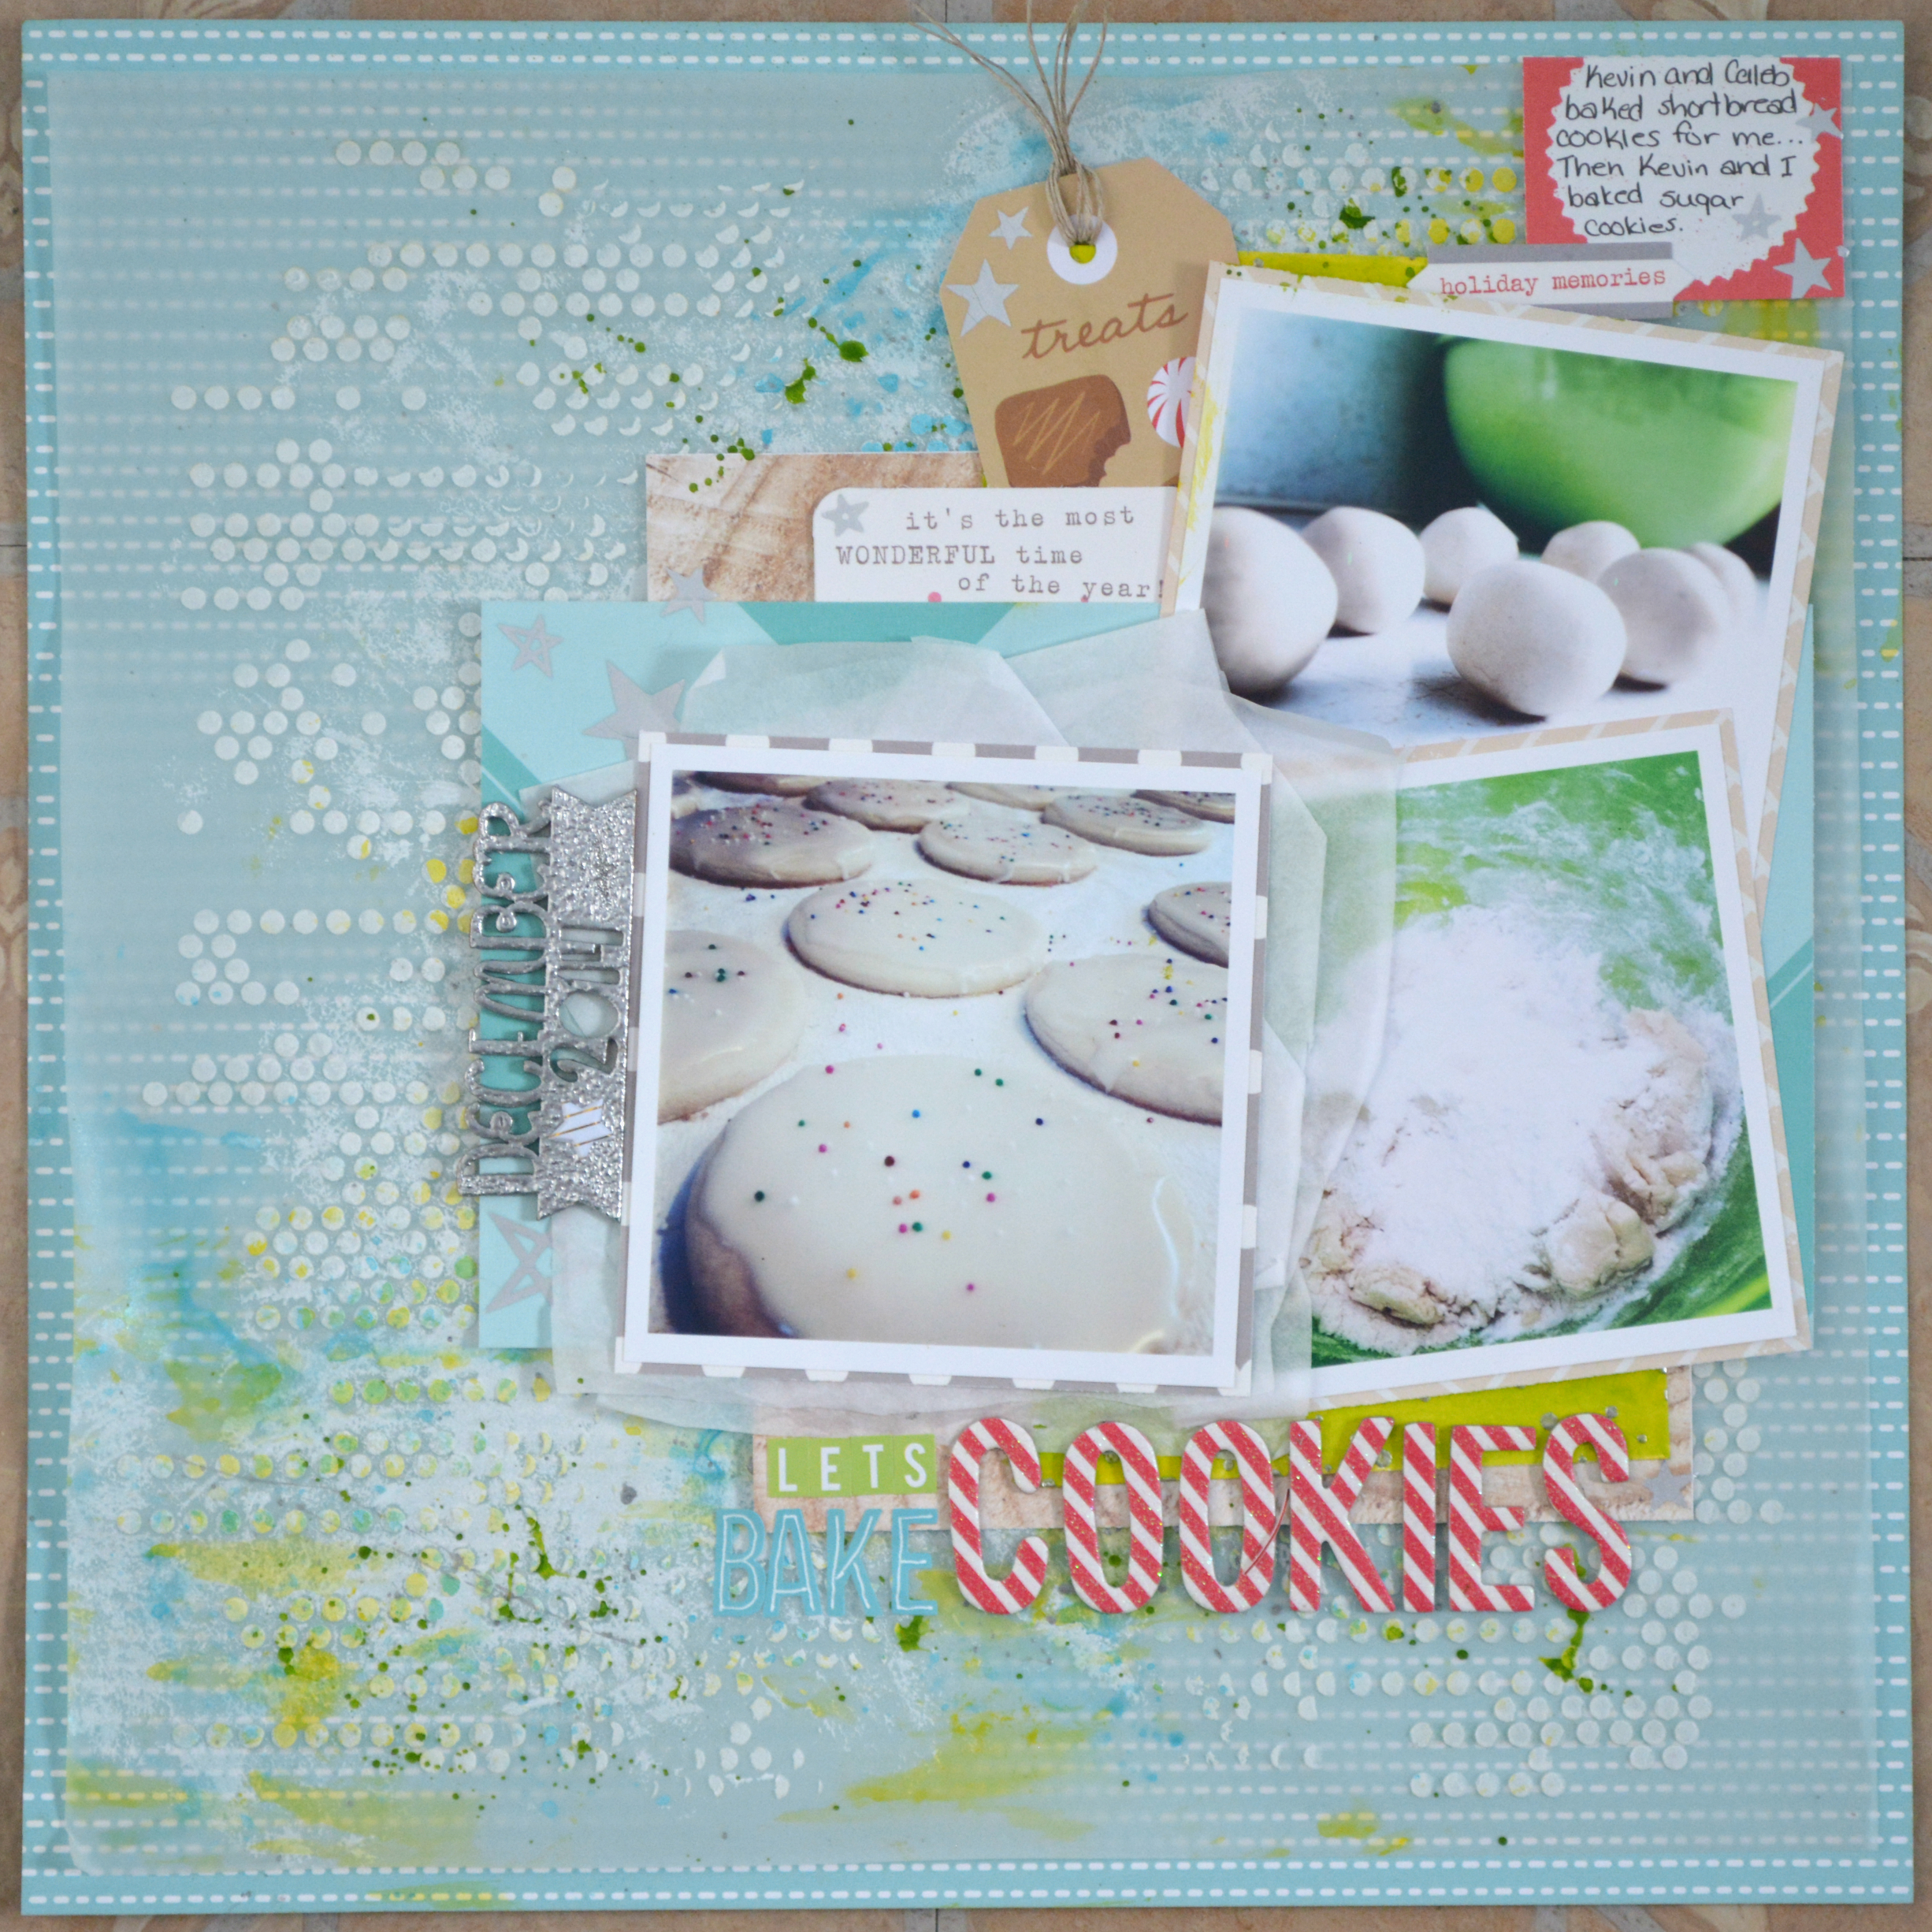
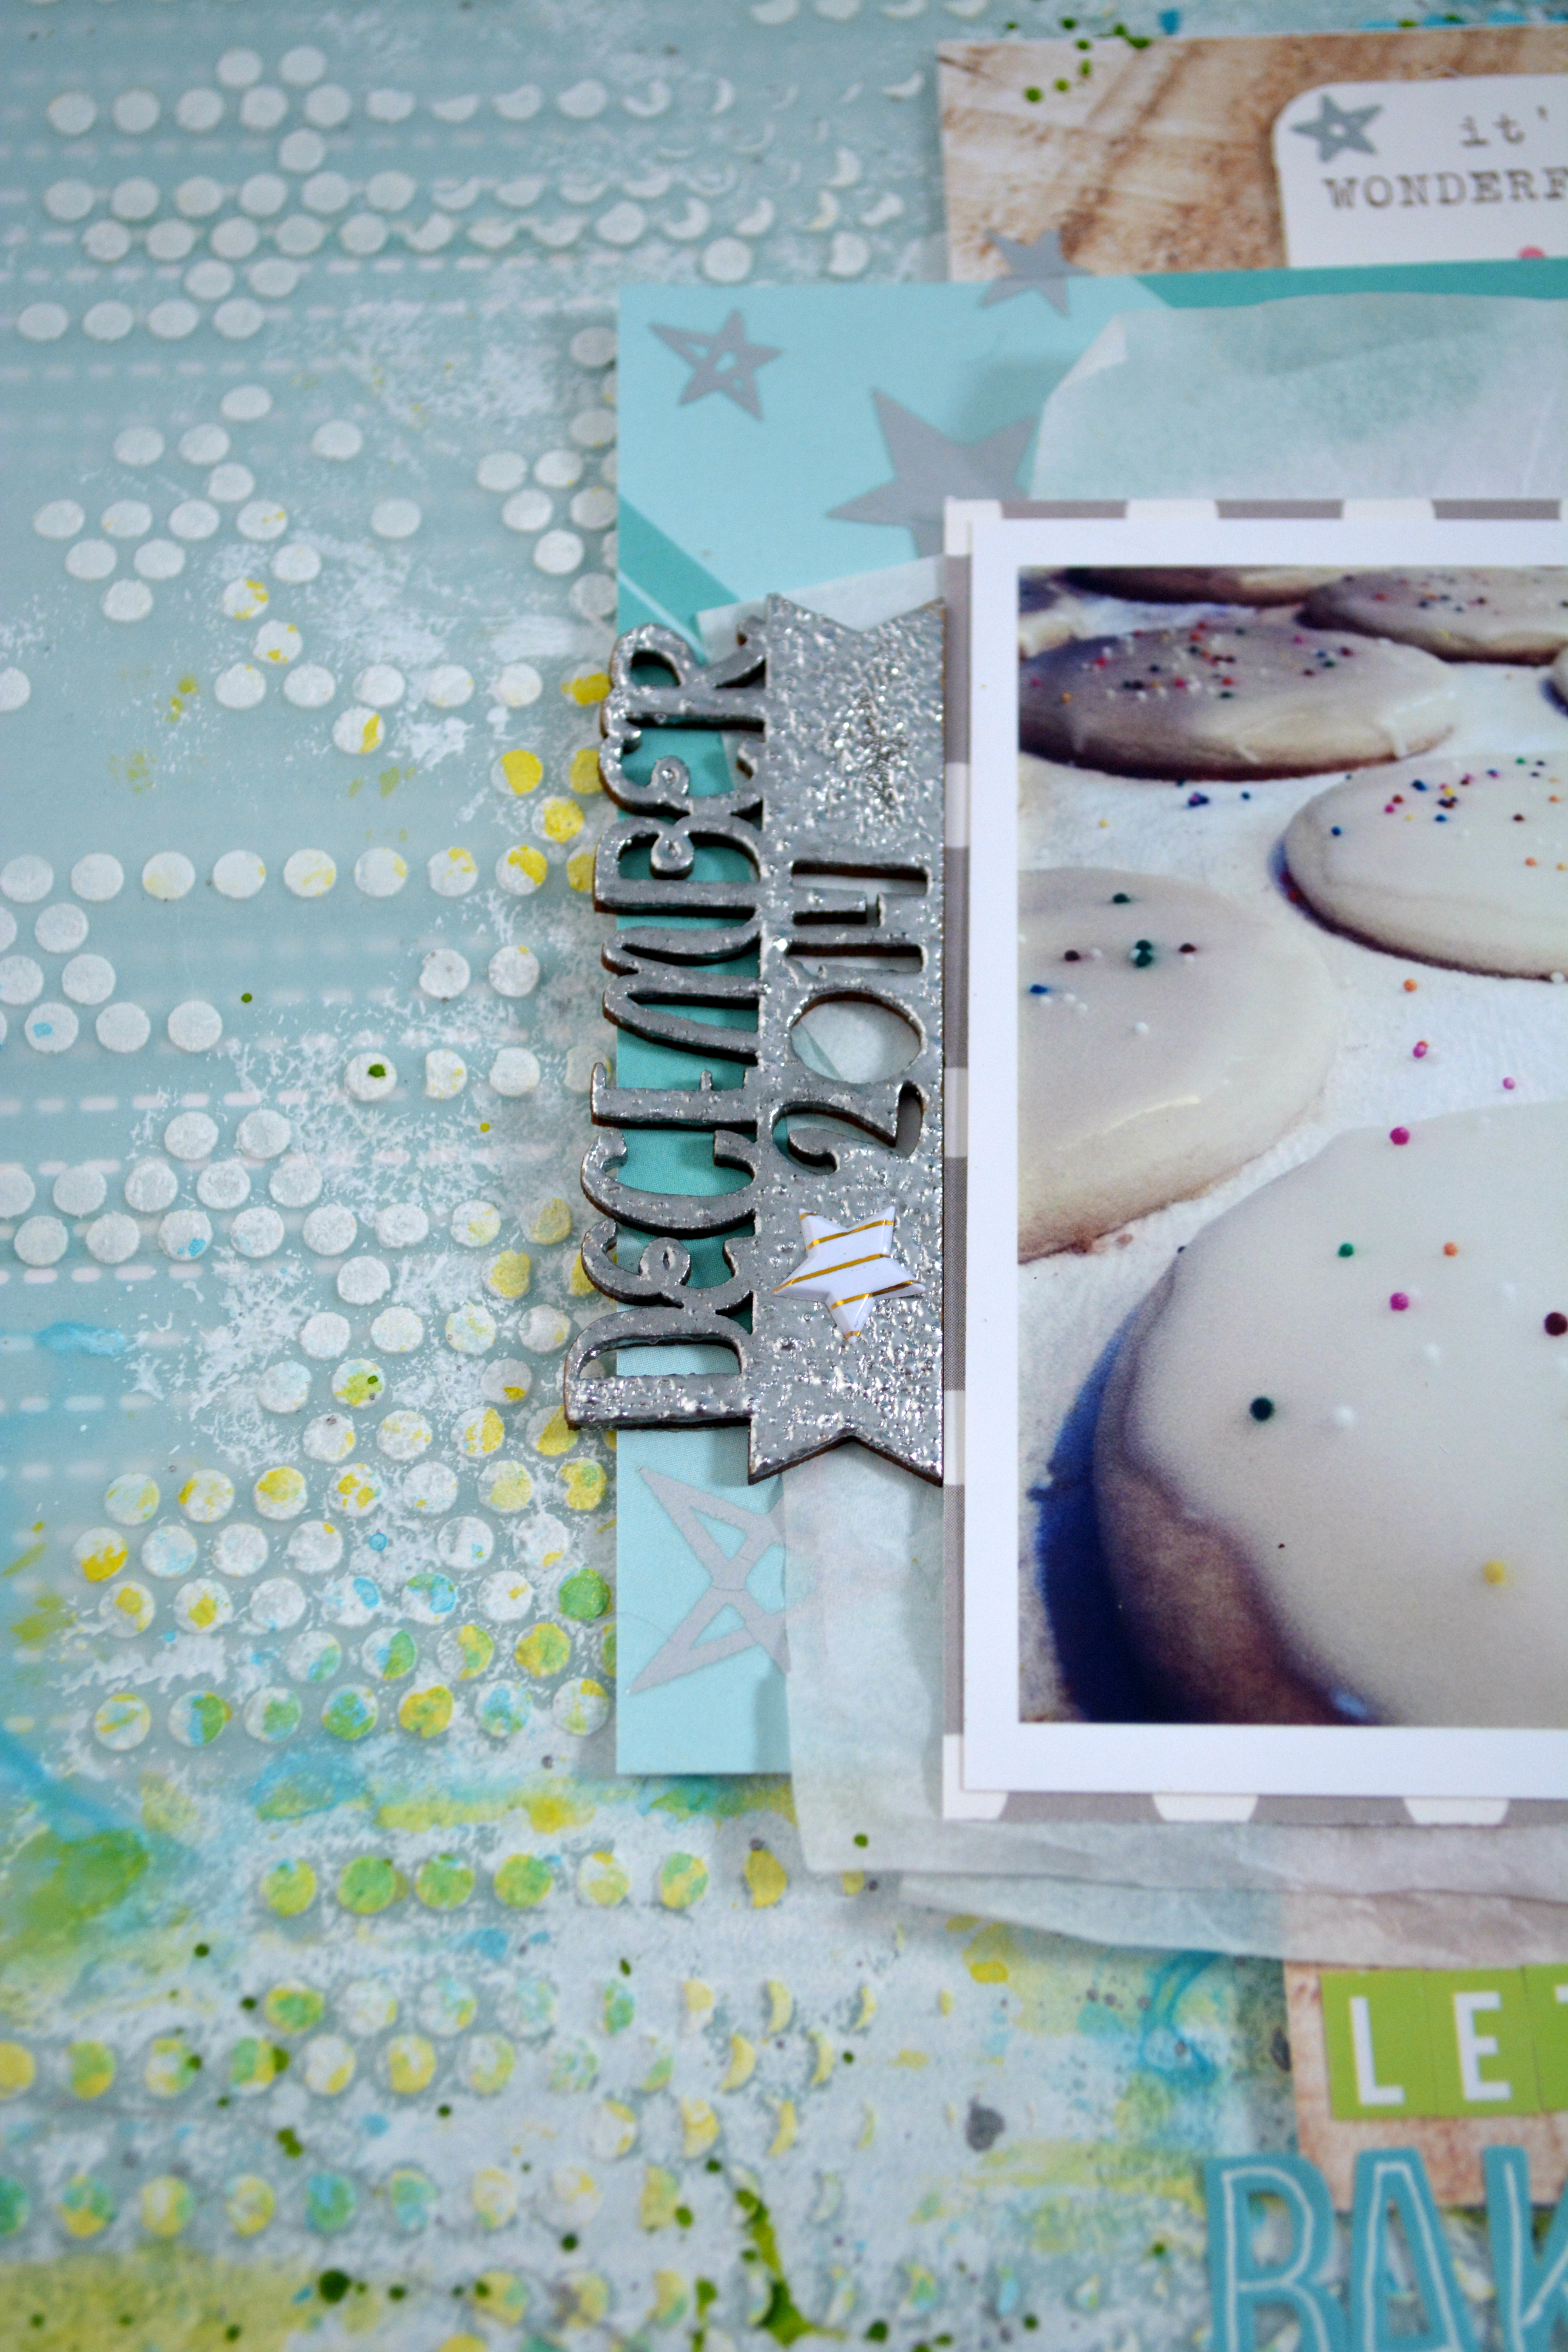
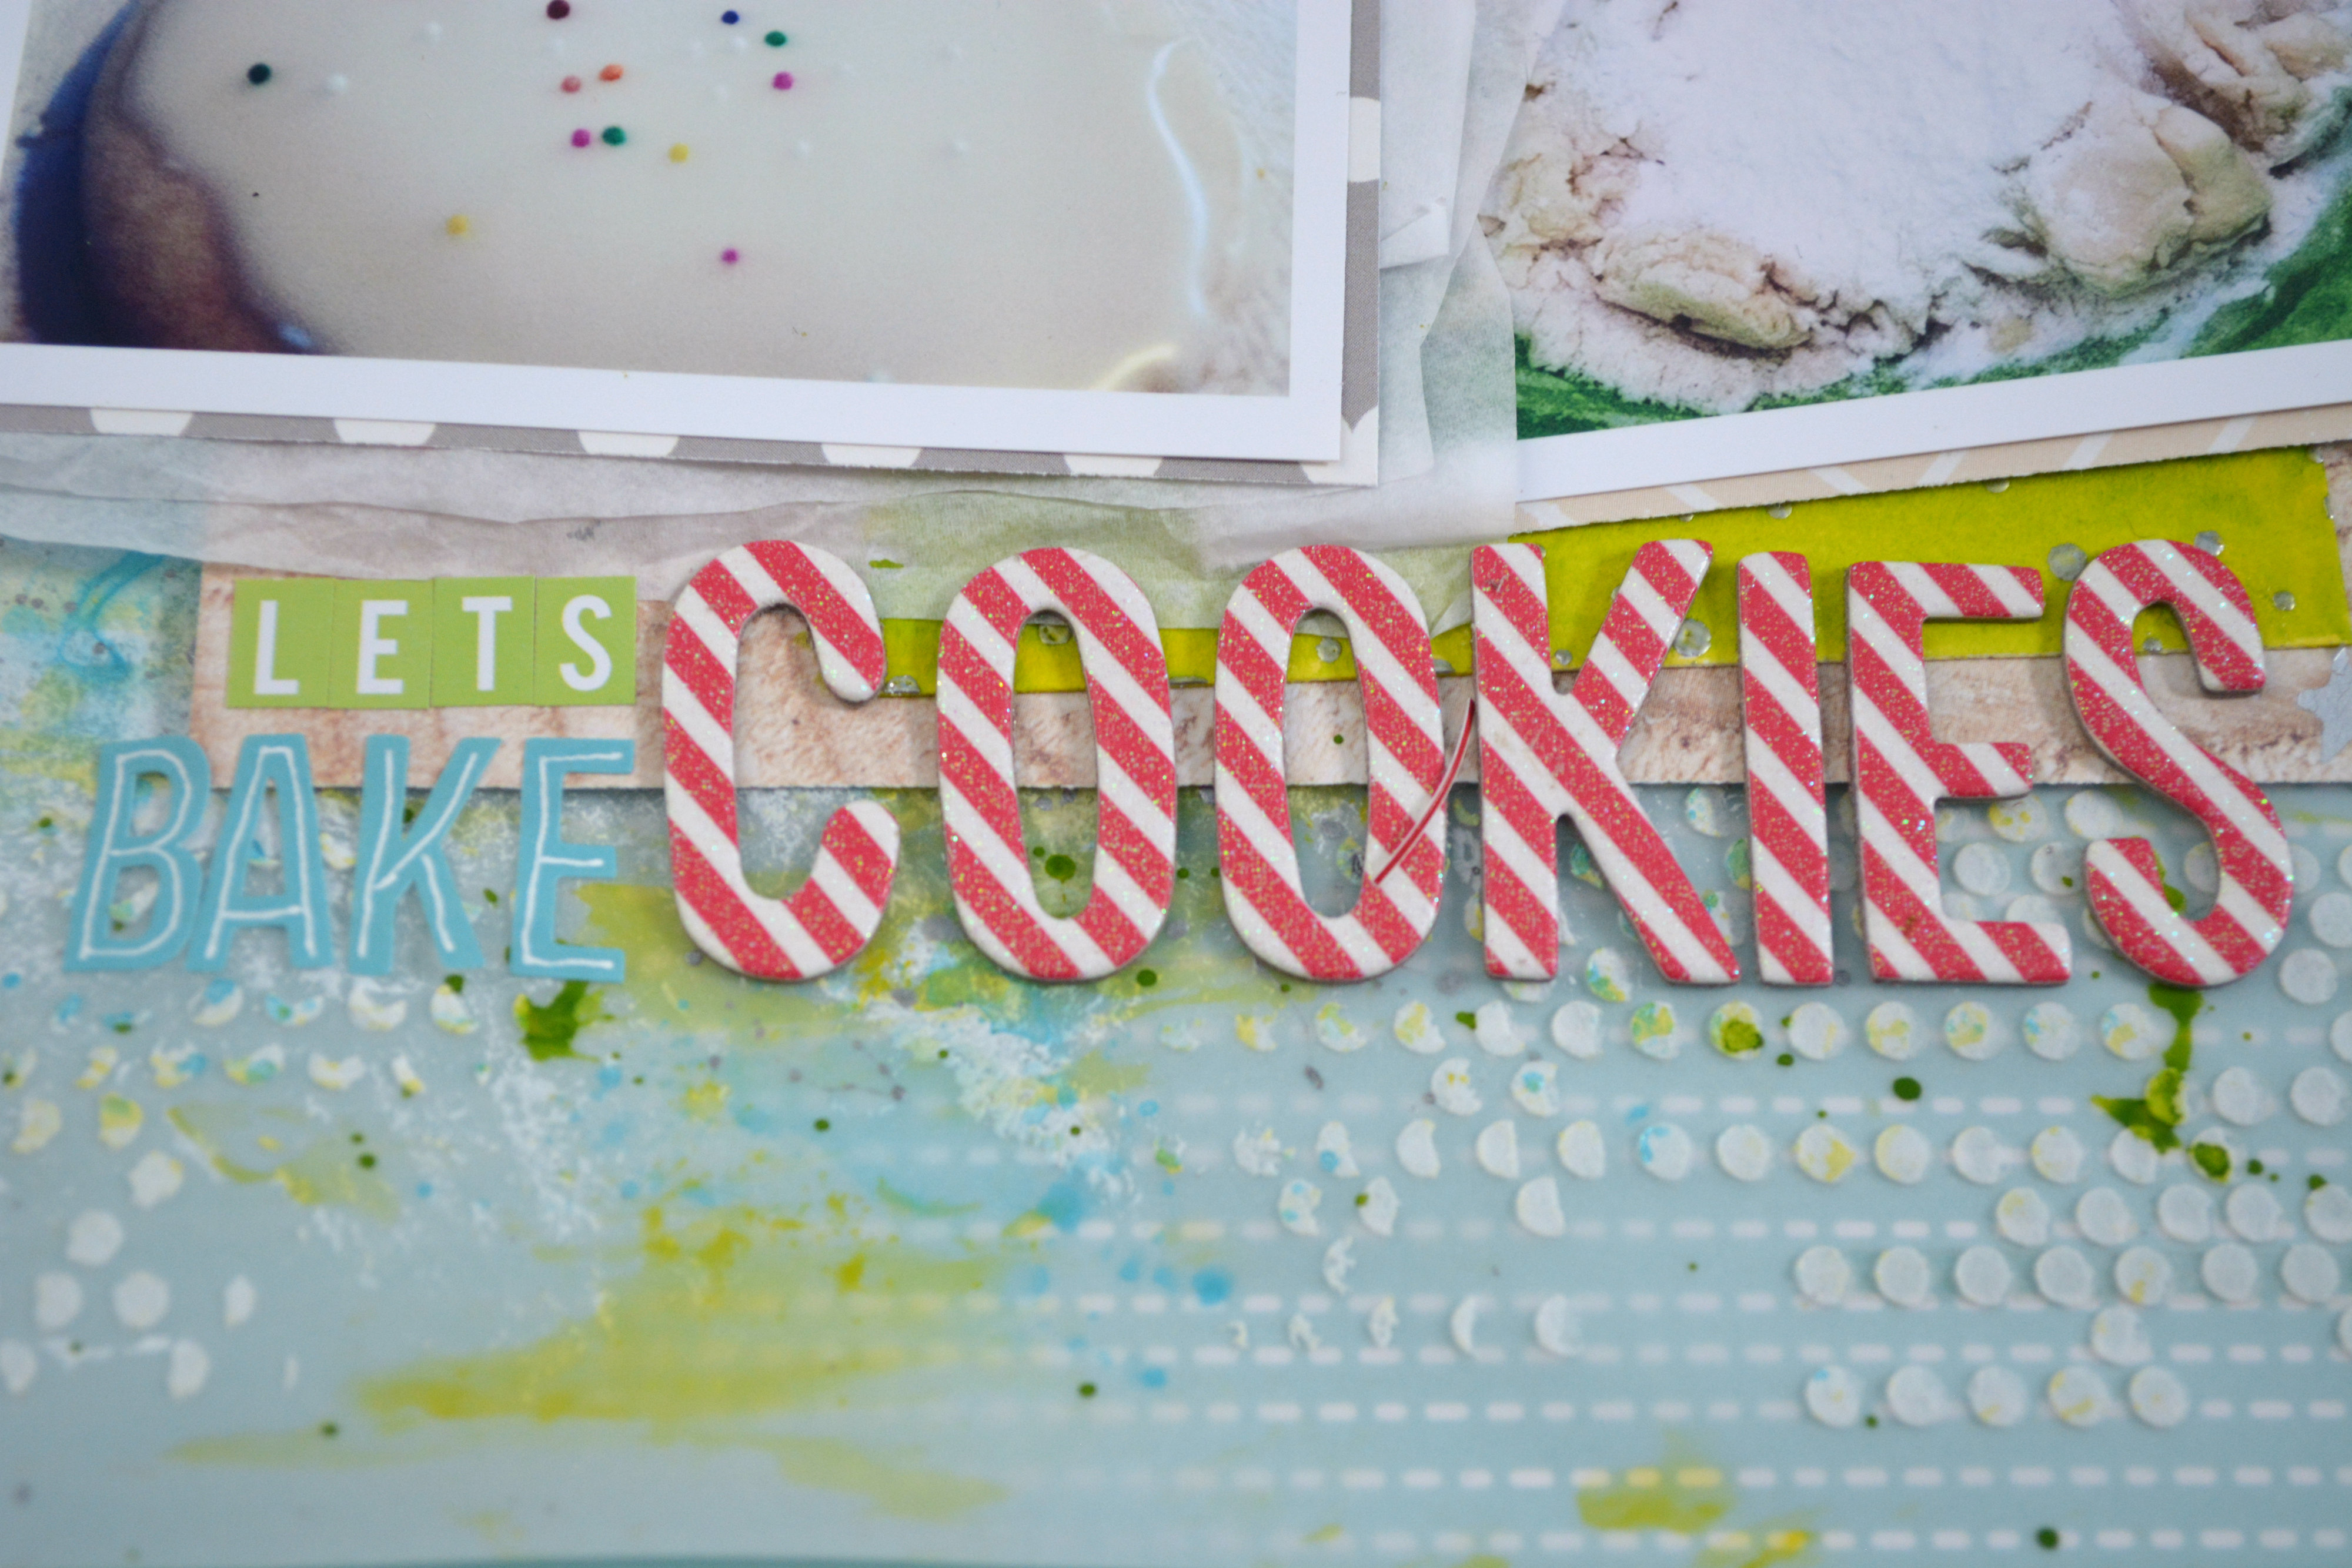
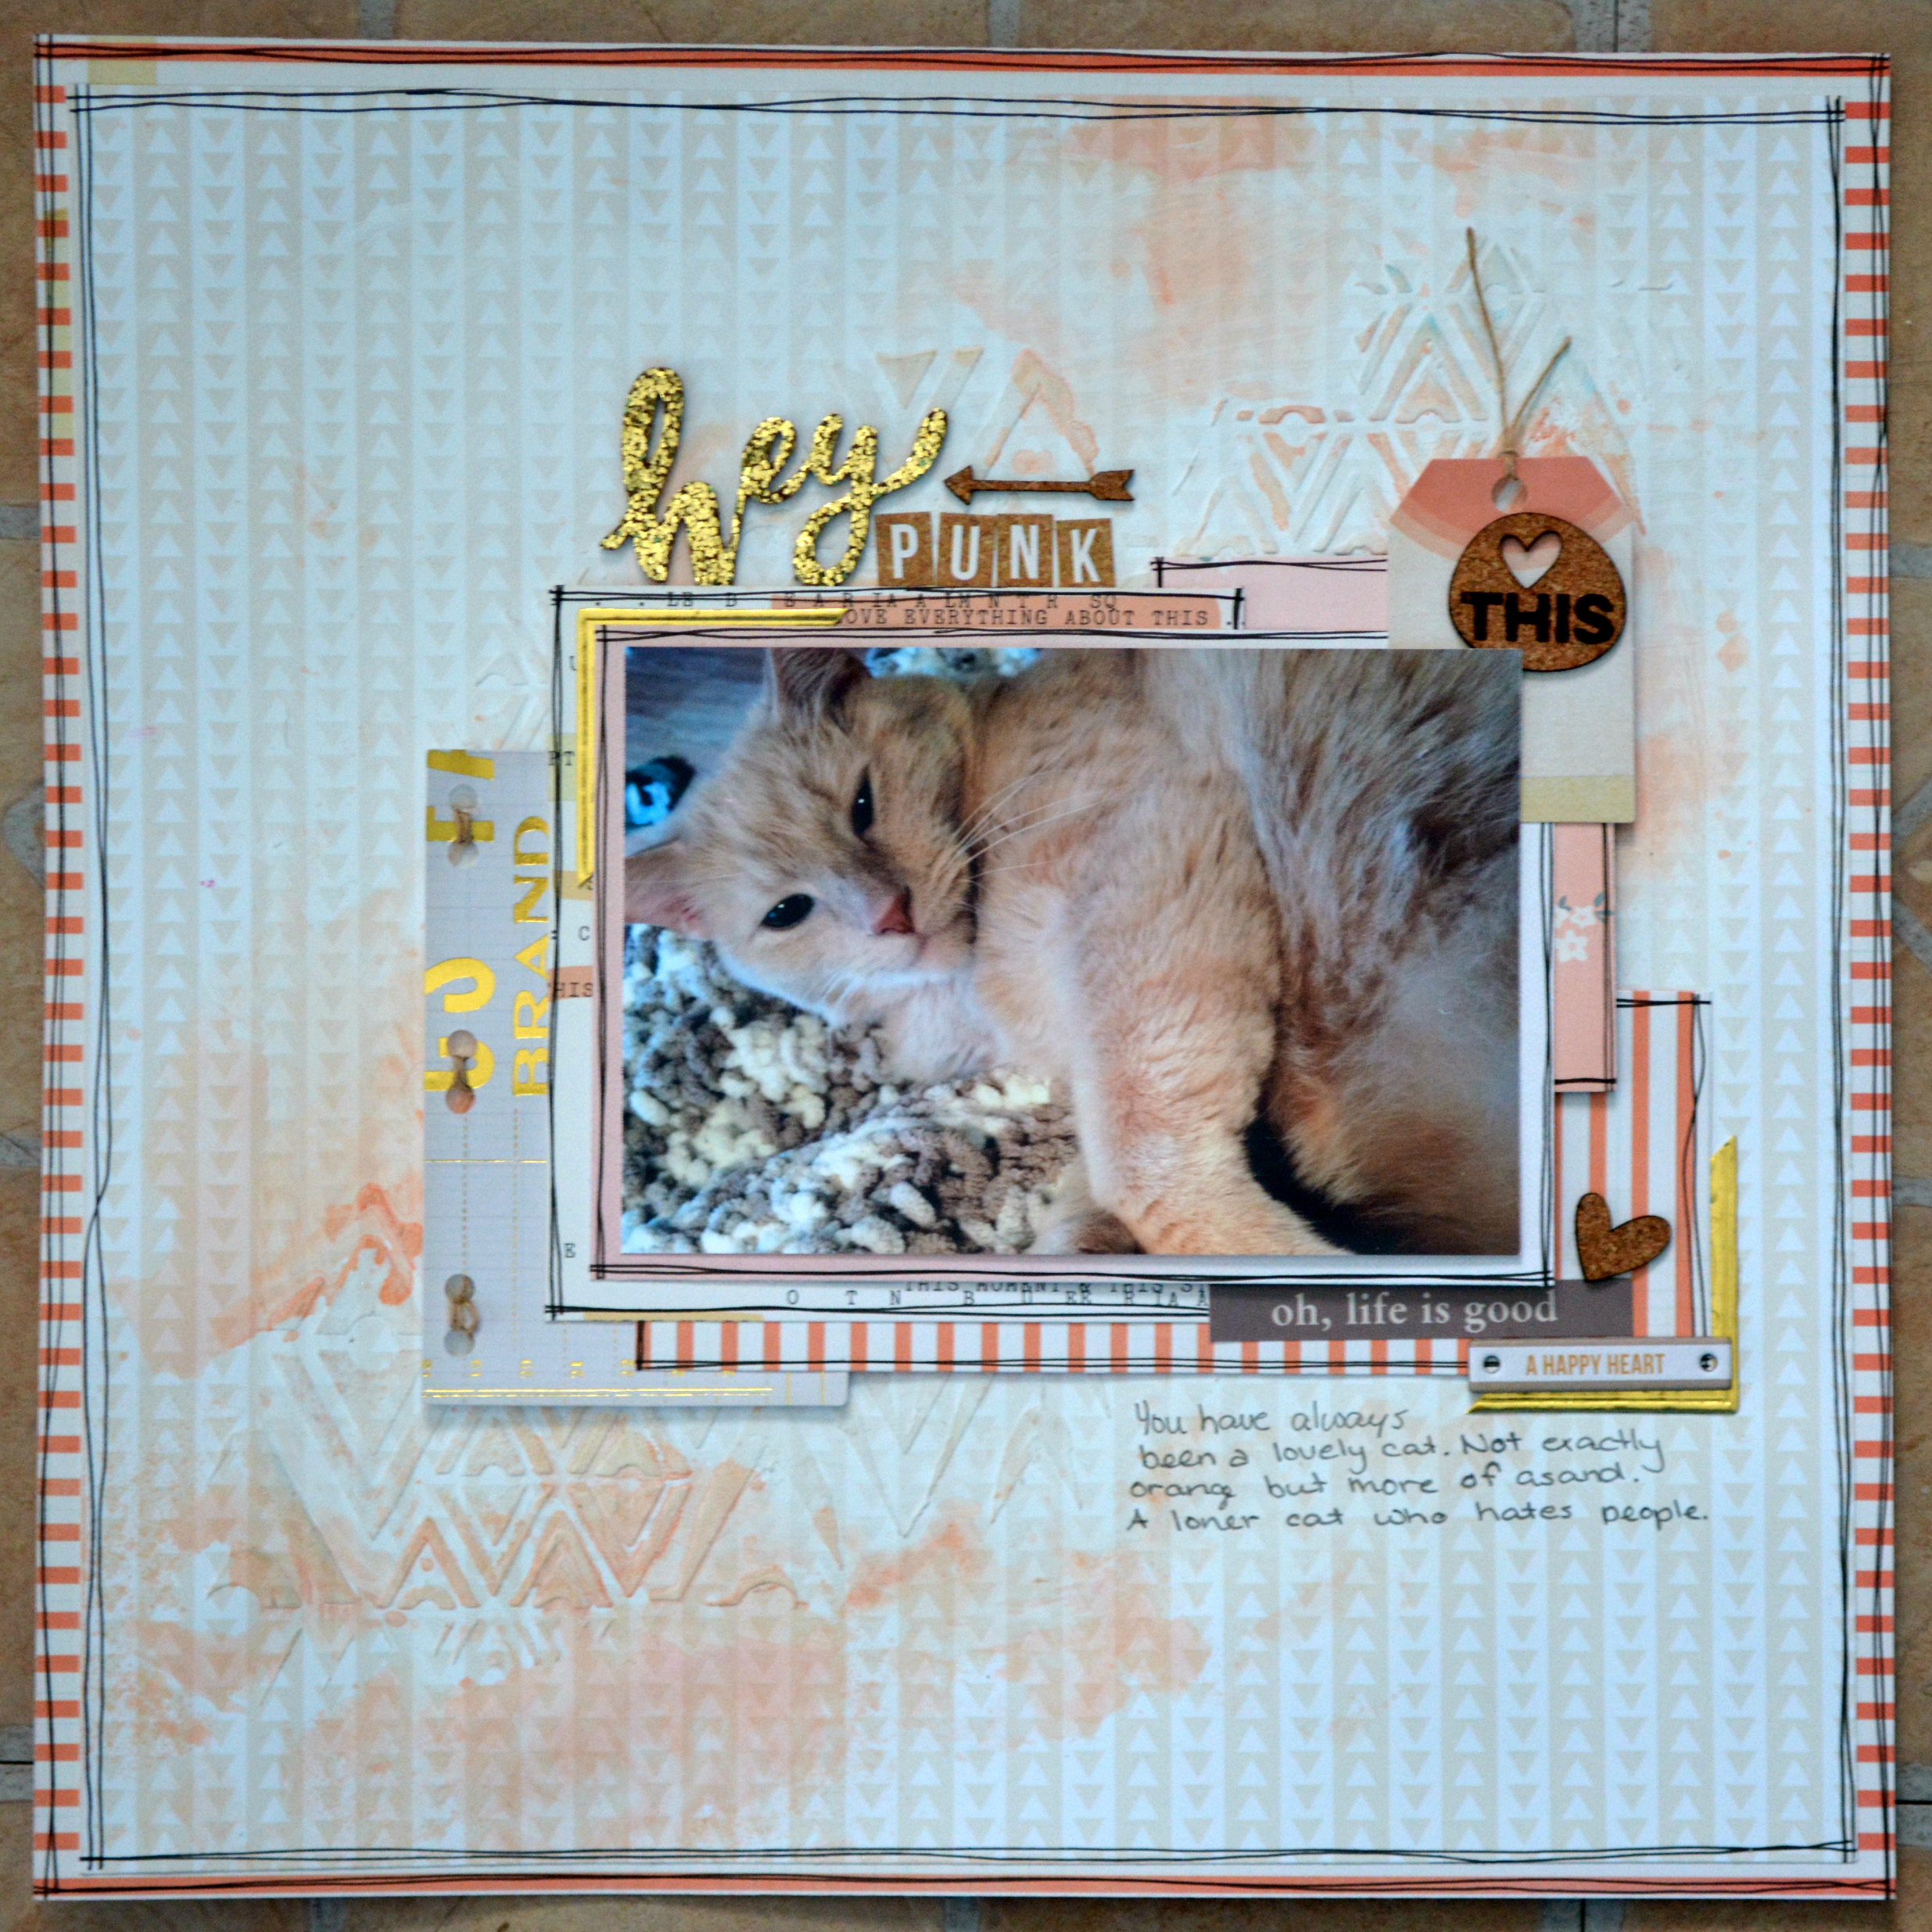
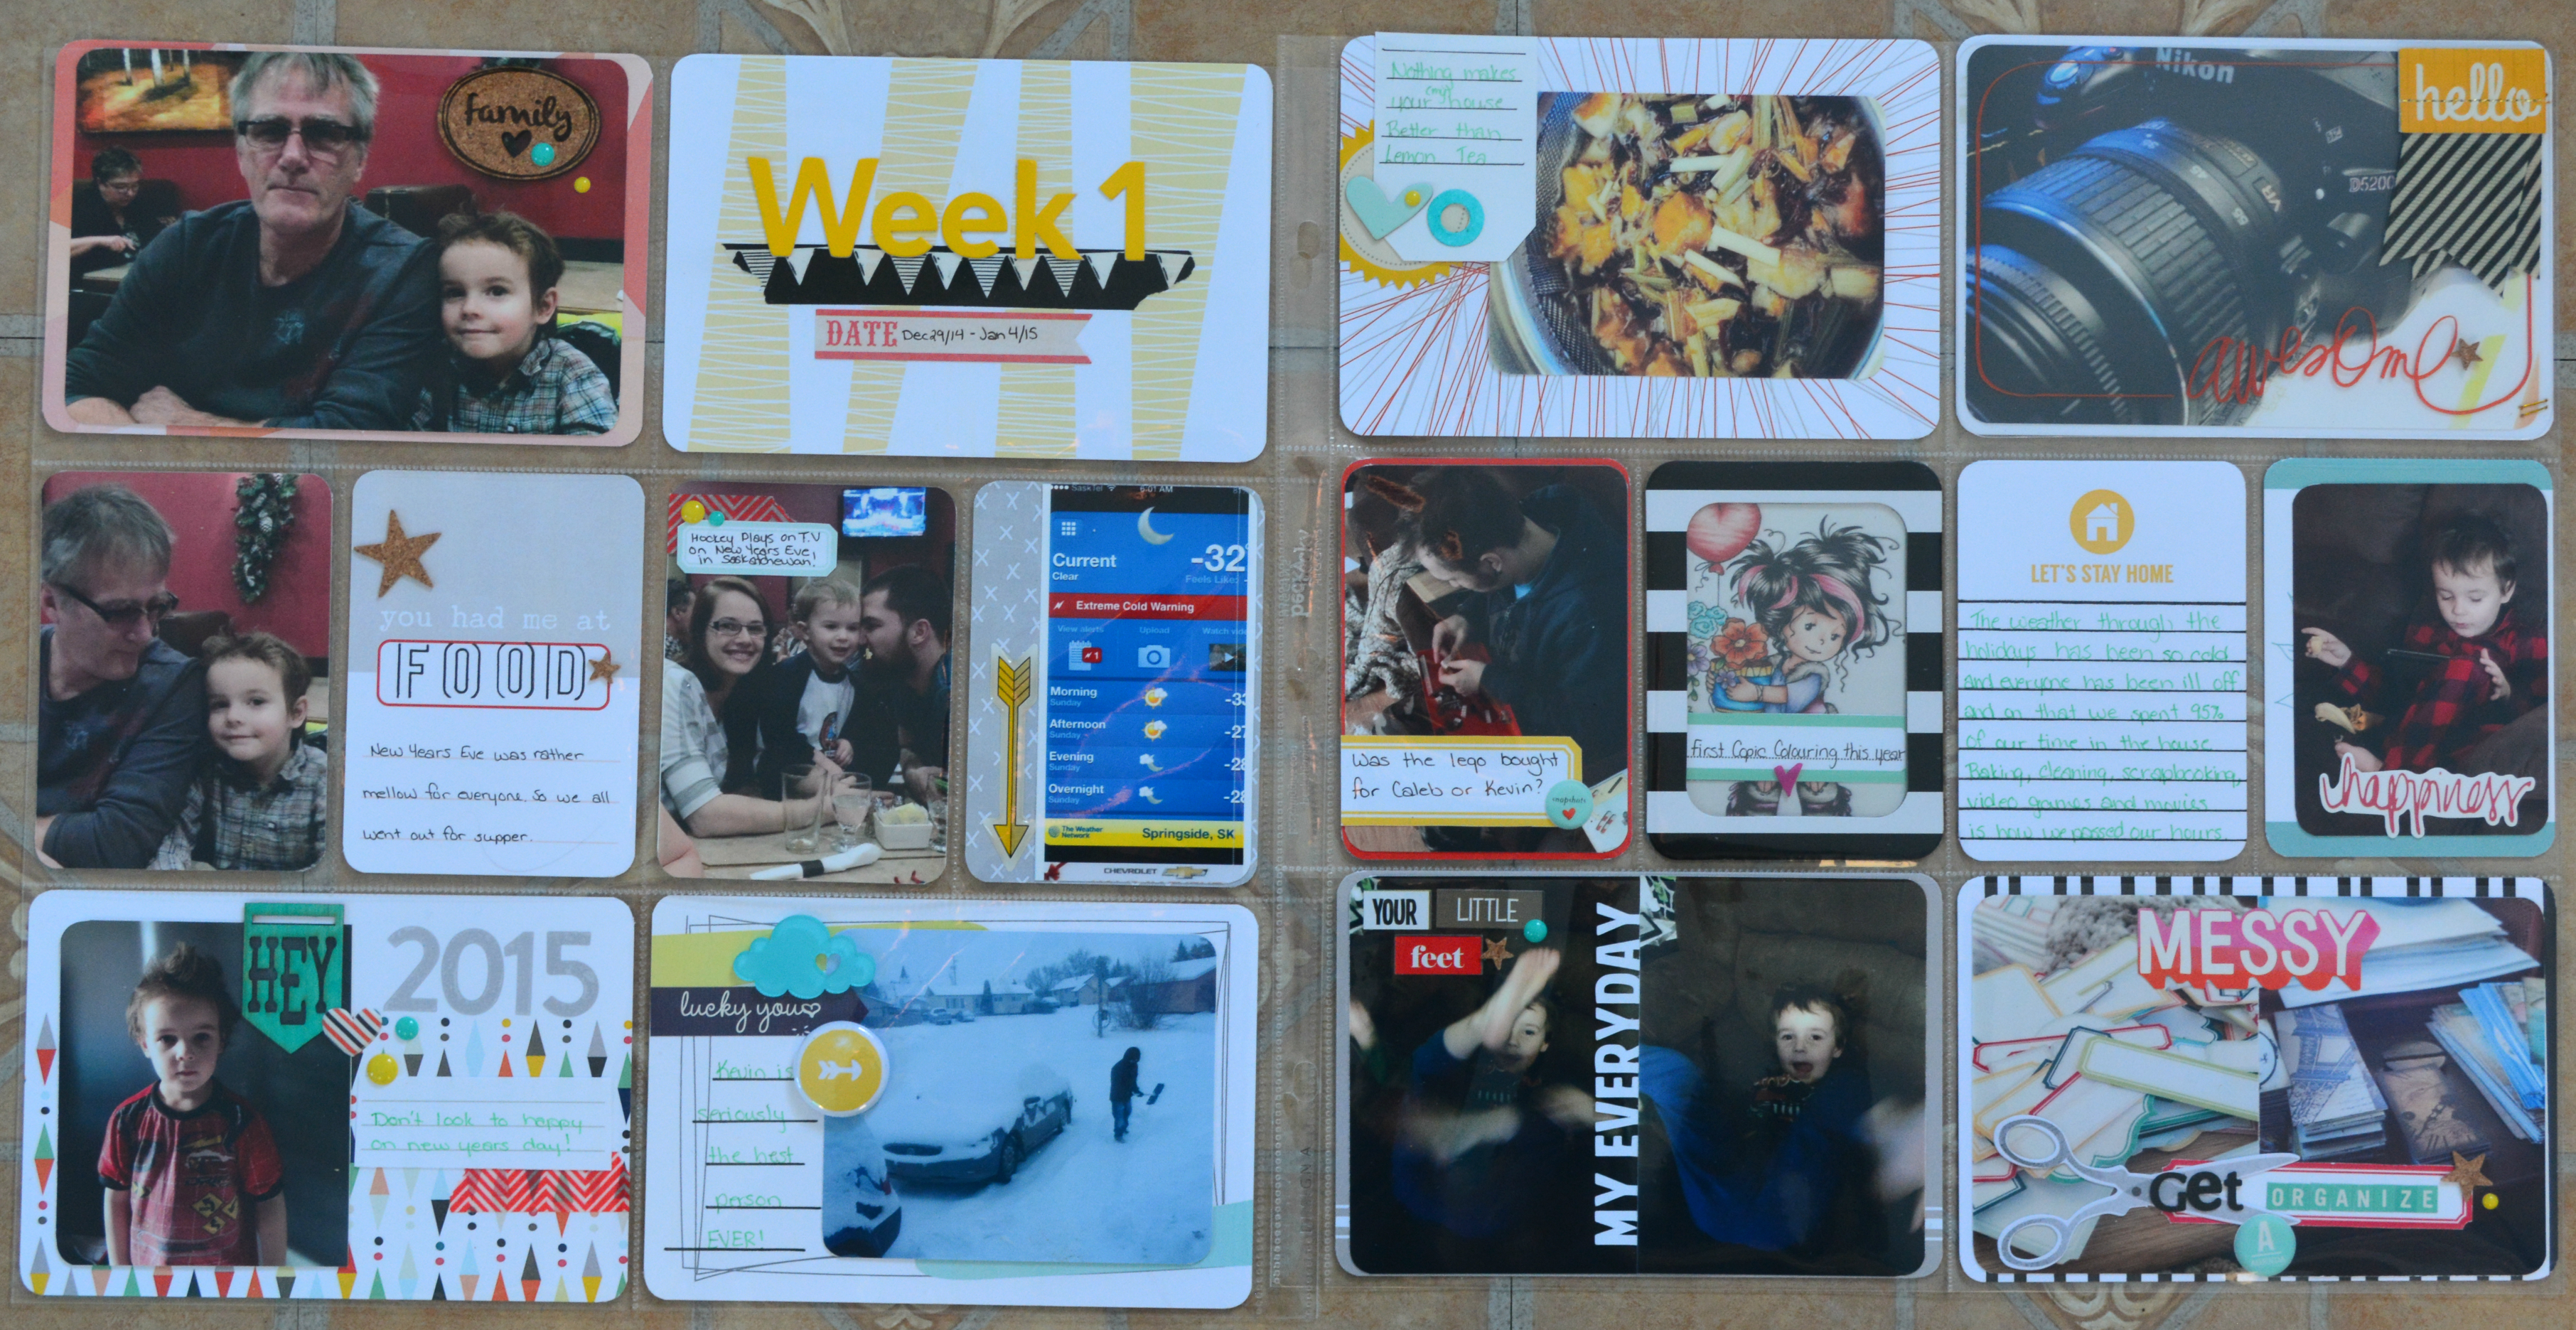
Hey everyone, something most of you that follow my blog may not know is that I am a “project lifer.” This is my second year doing this project and figured I would share it with you this year. As such this is my first week for 2015. Now these posts will be a little different then some, I wont have a linked list of products I used at the end, as lots of it is bits and pieces and left overs.

DSC_0005


DSC_0006

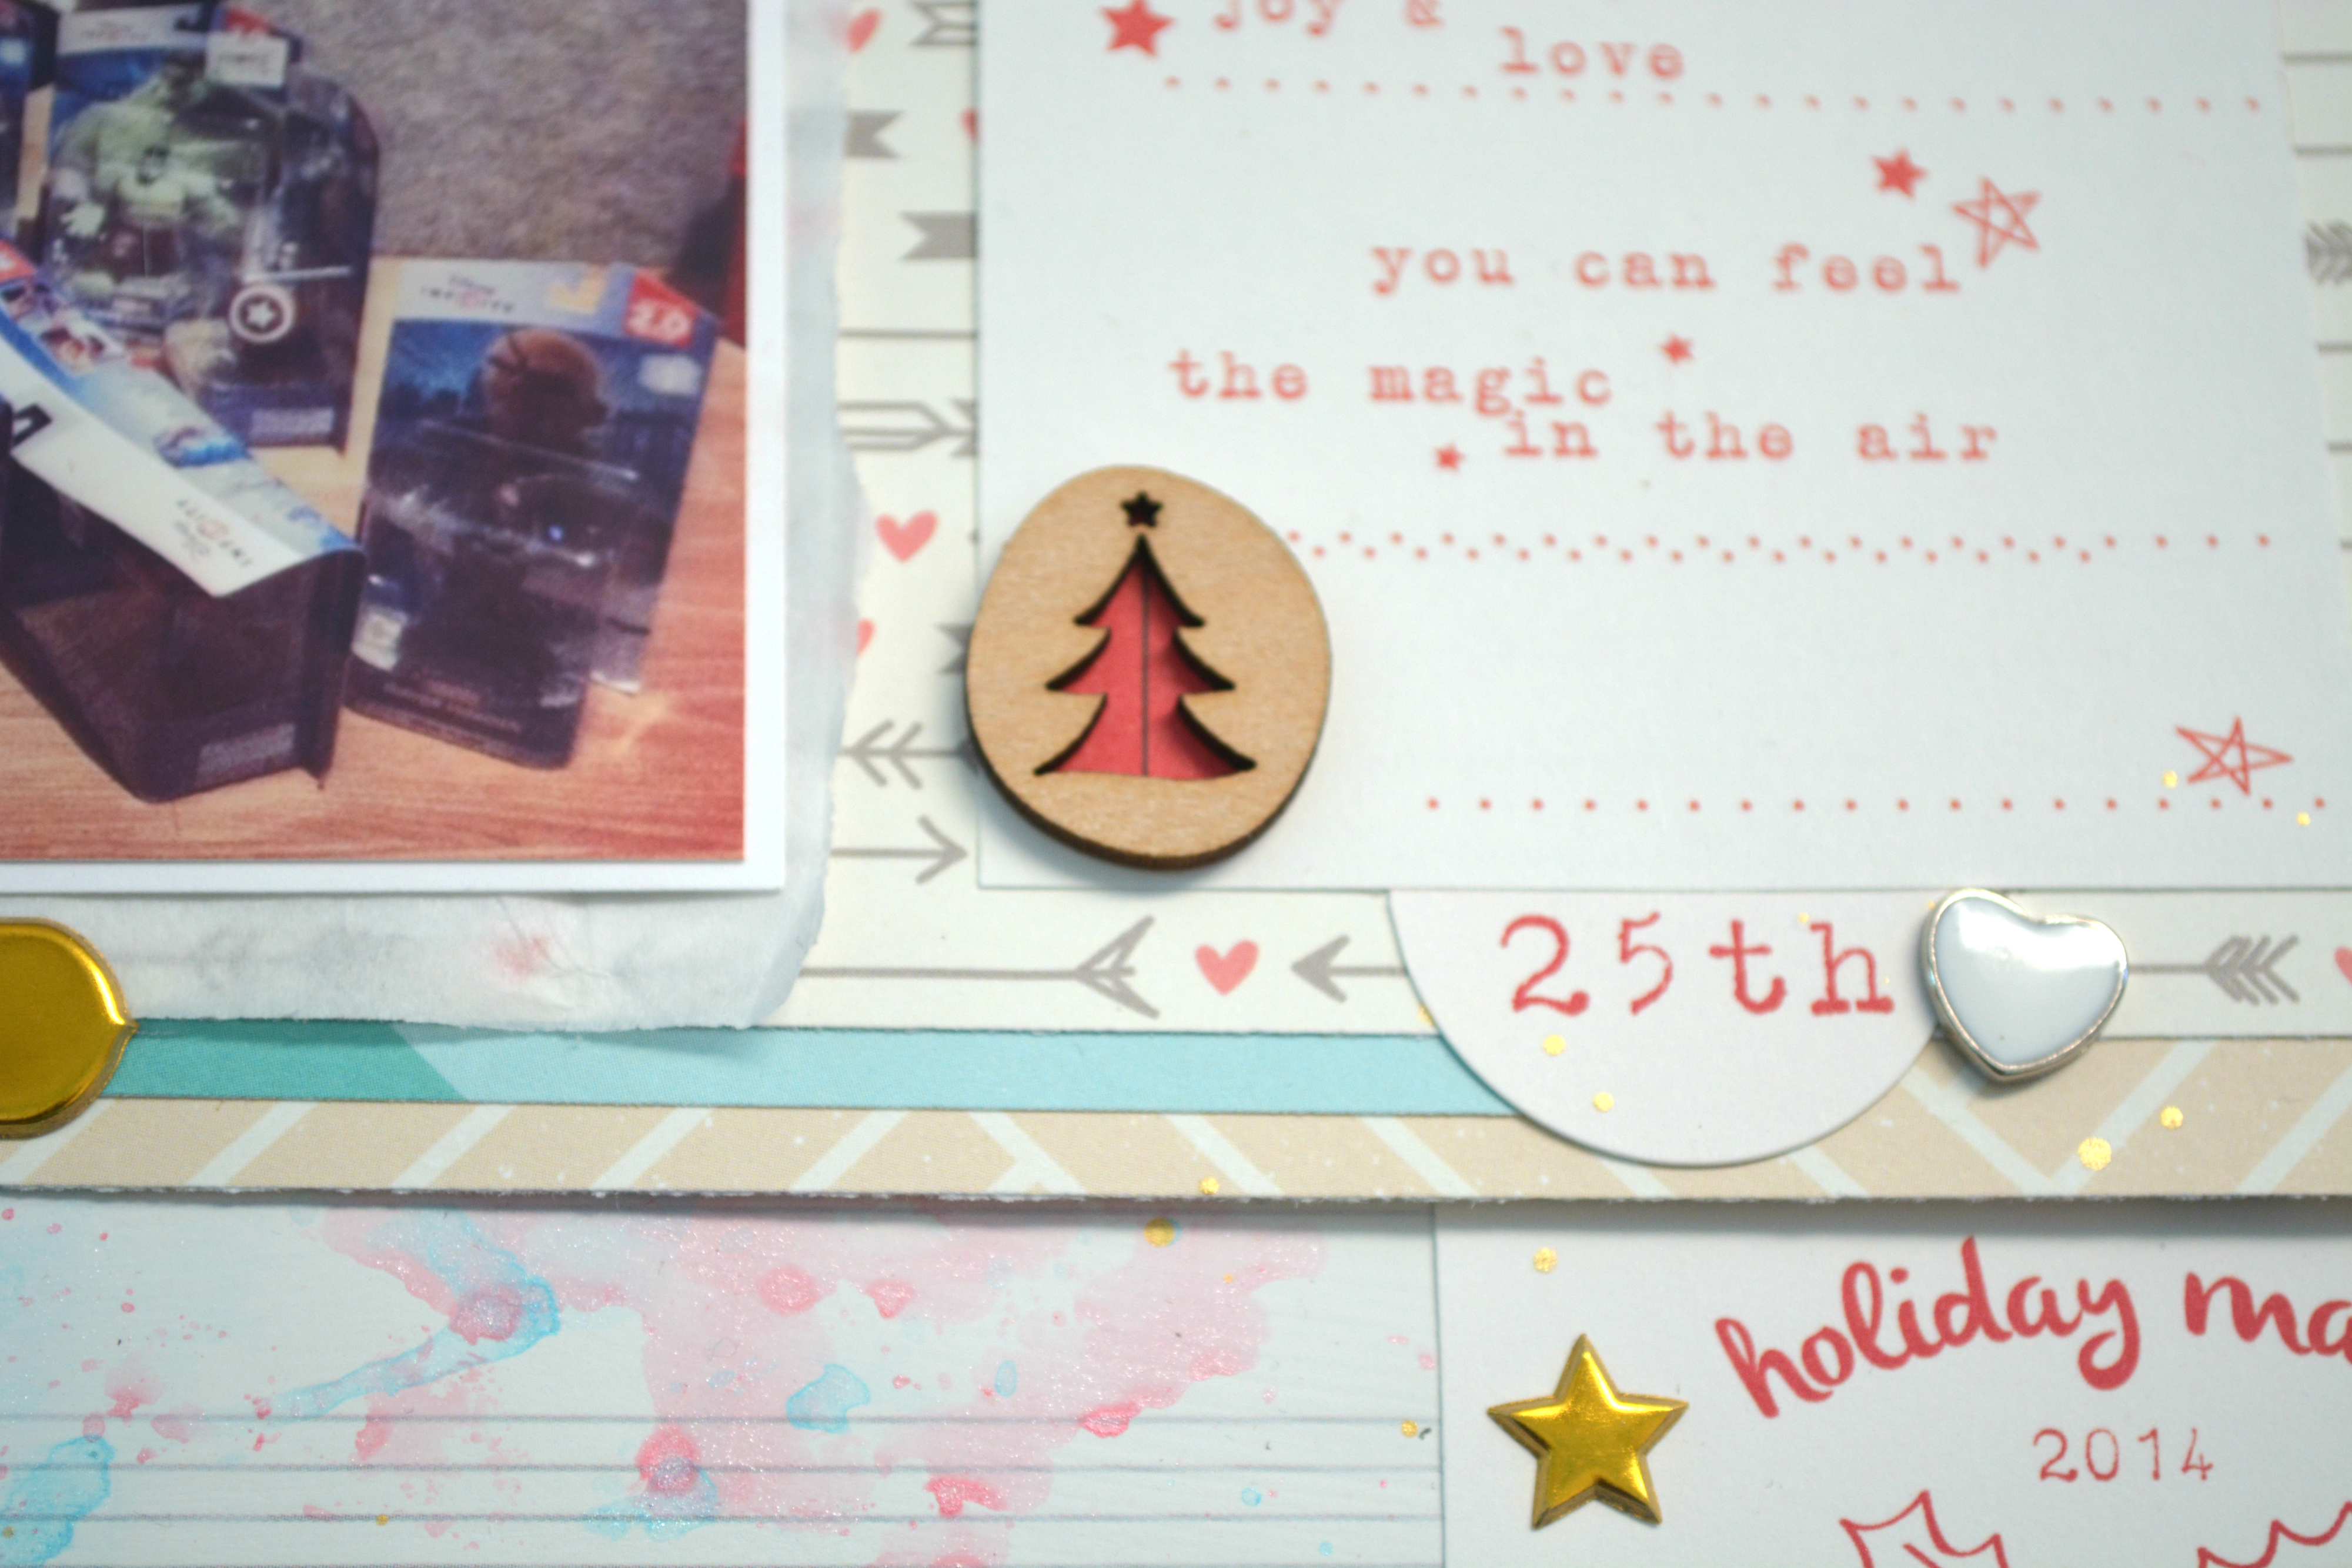
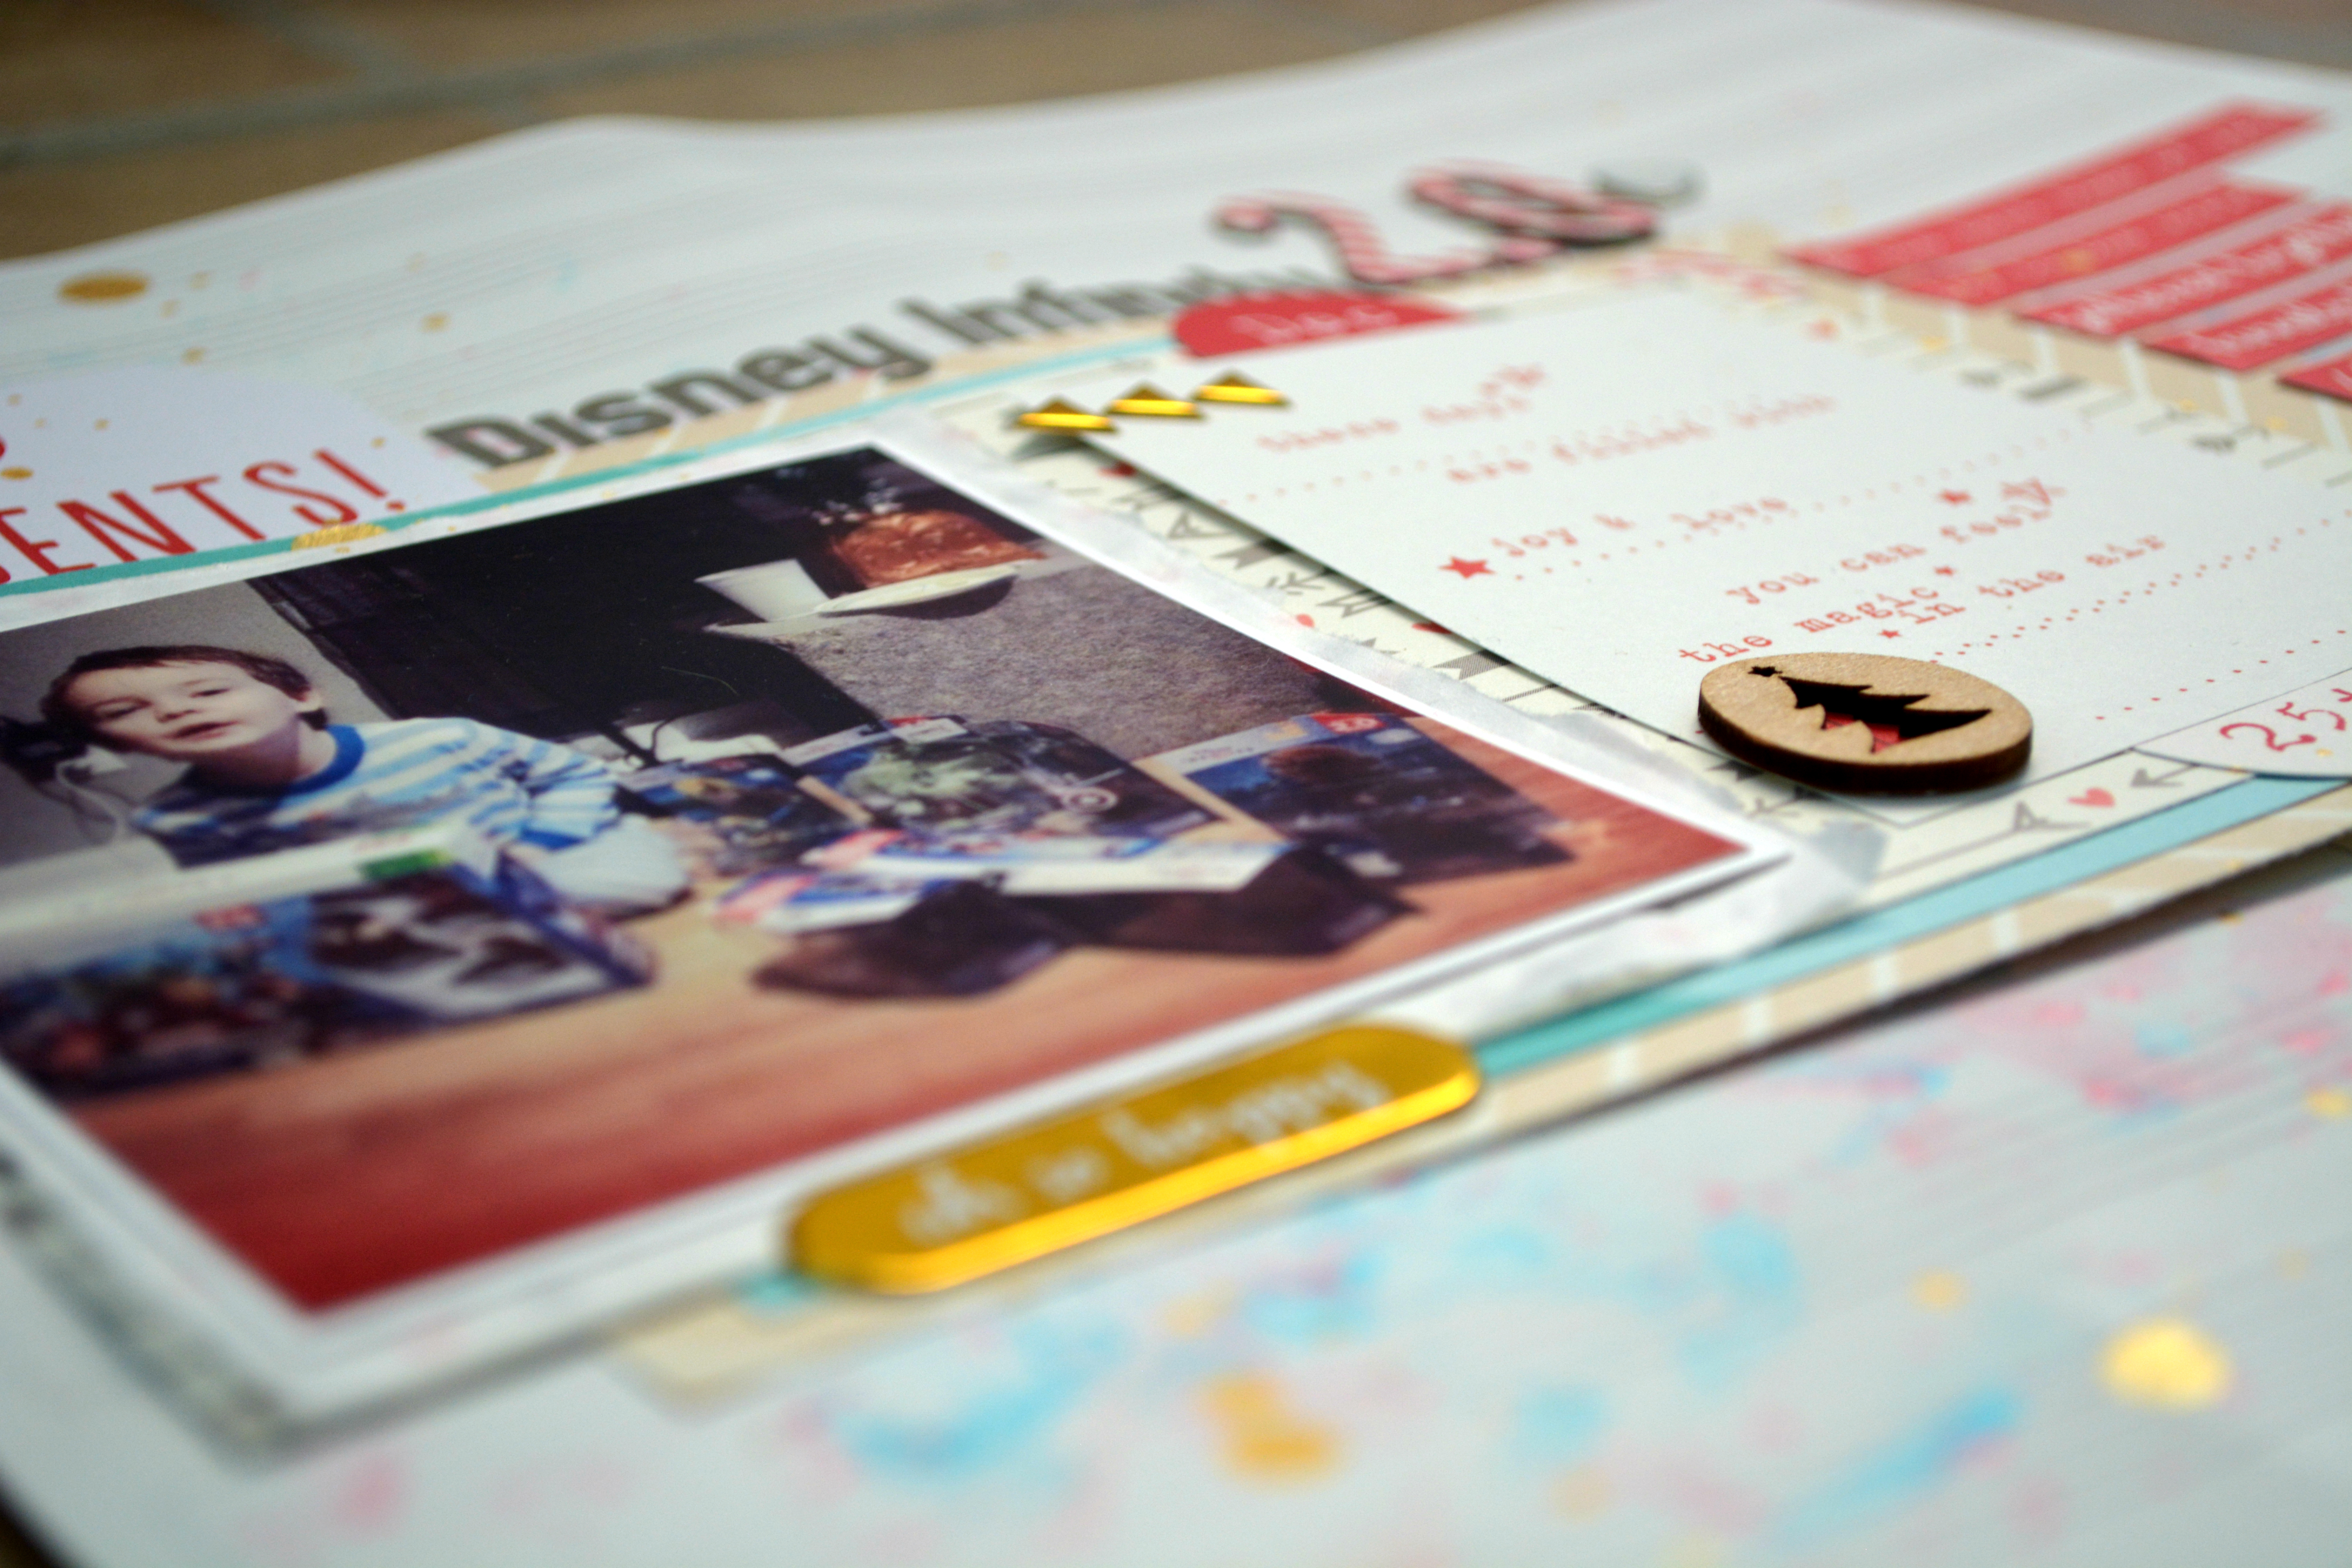
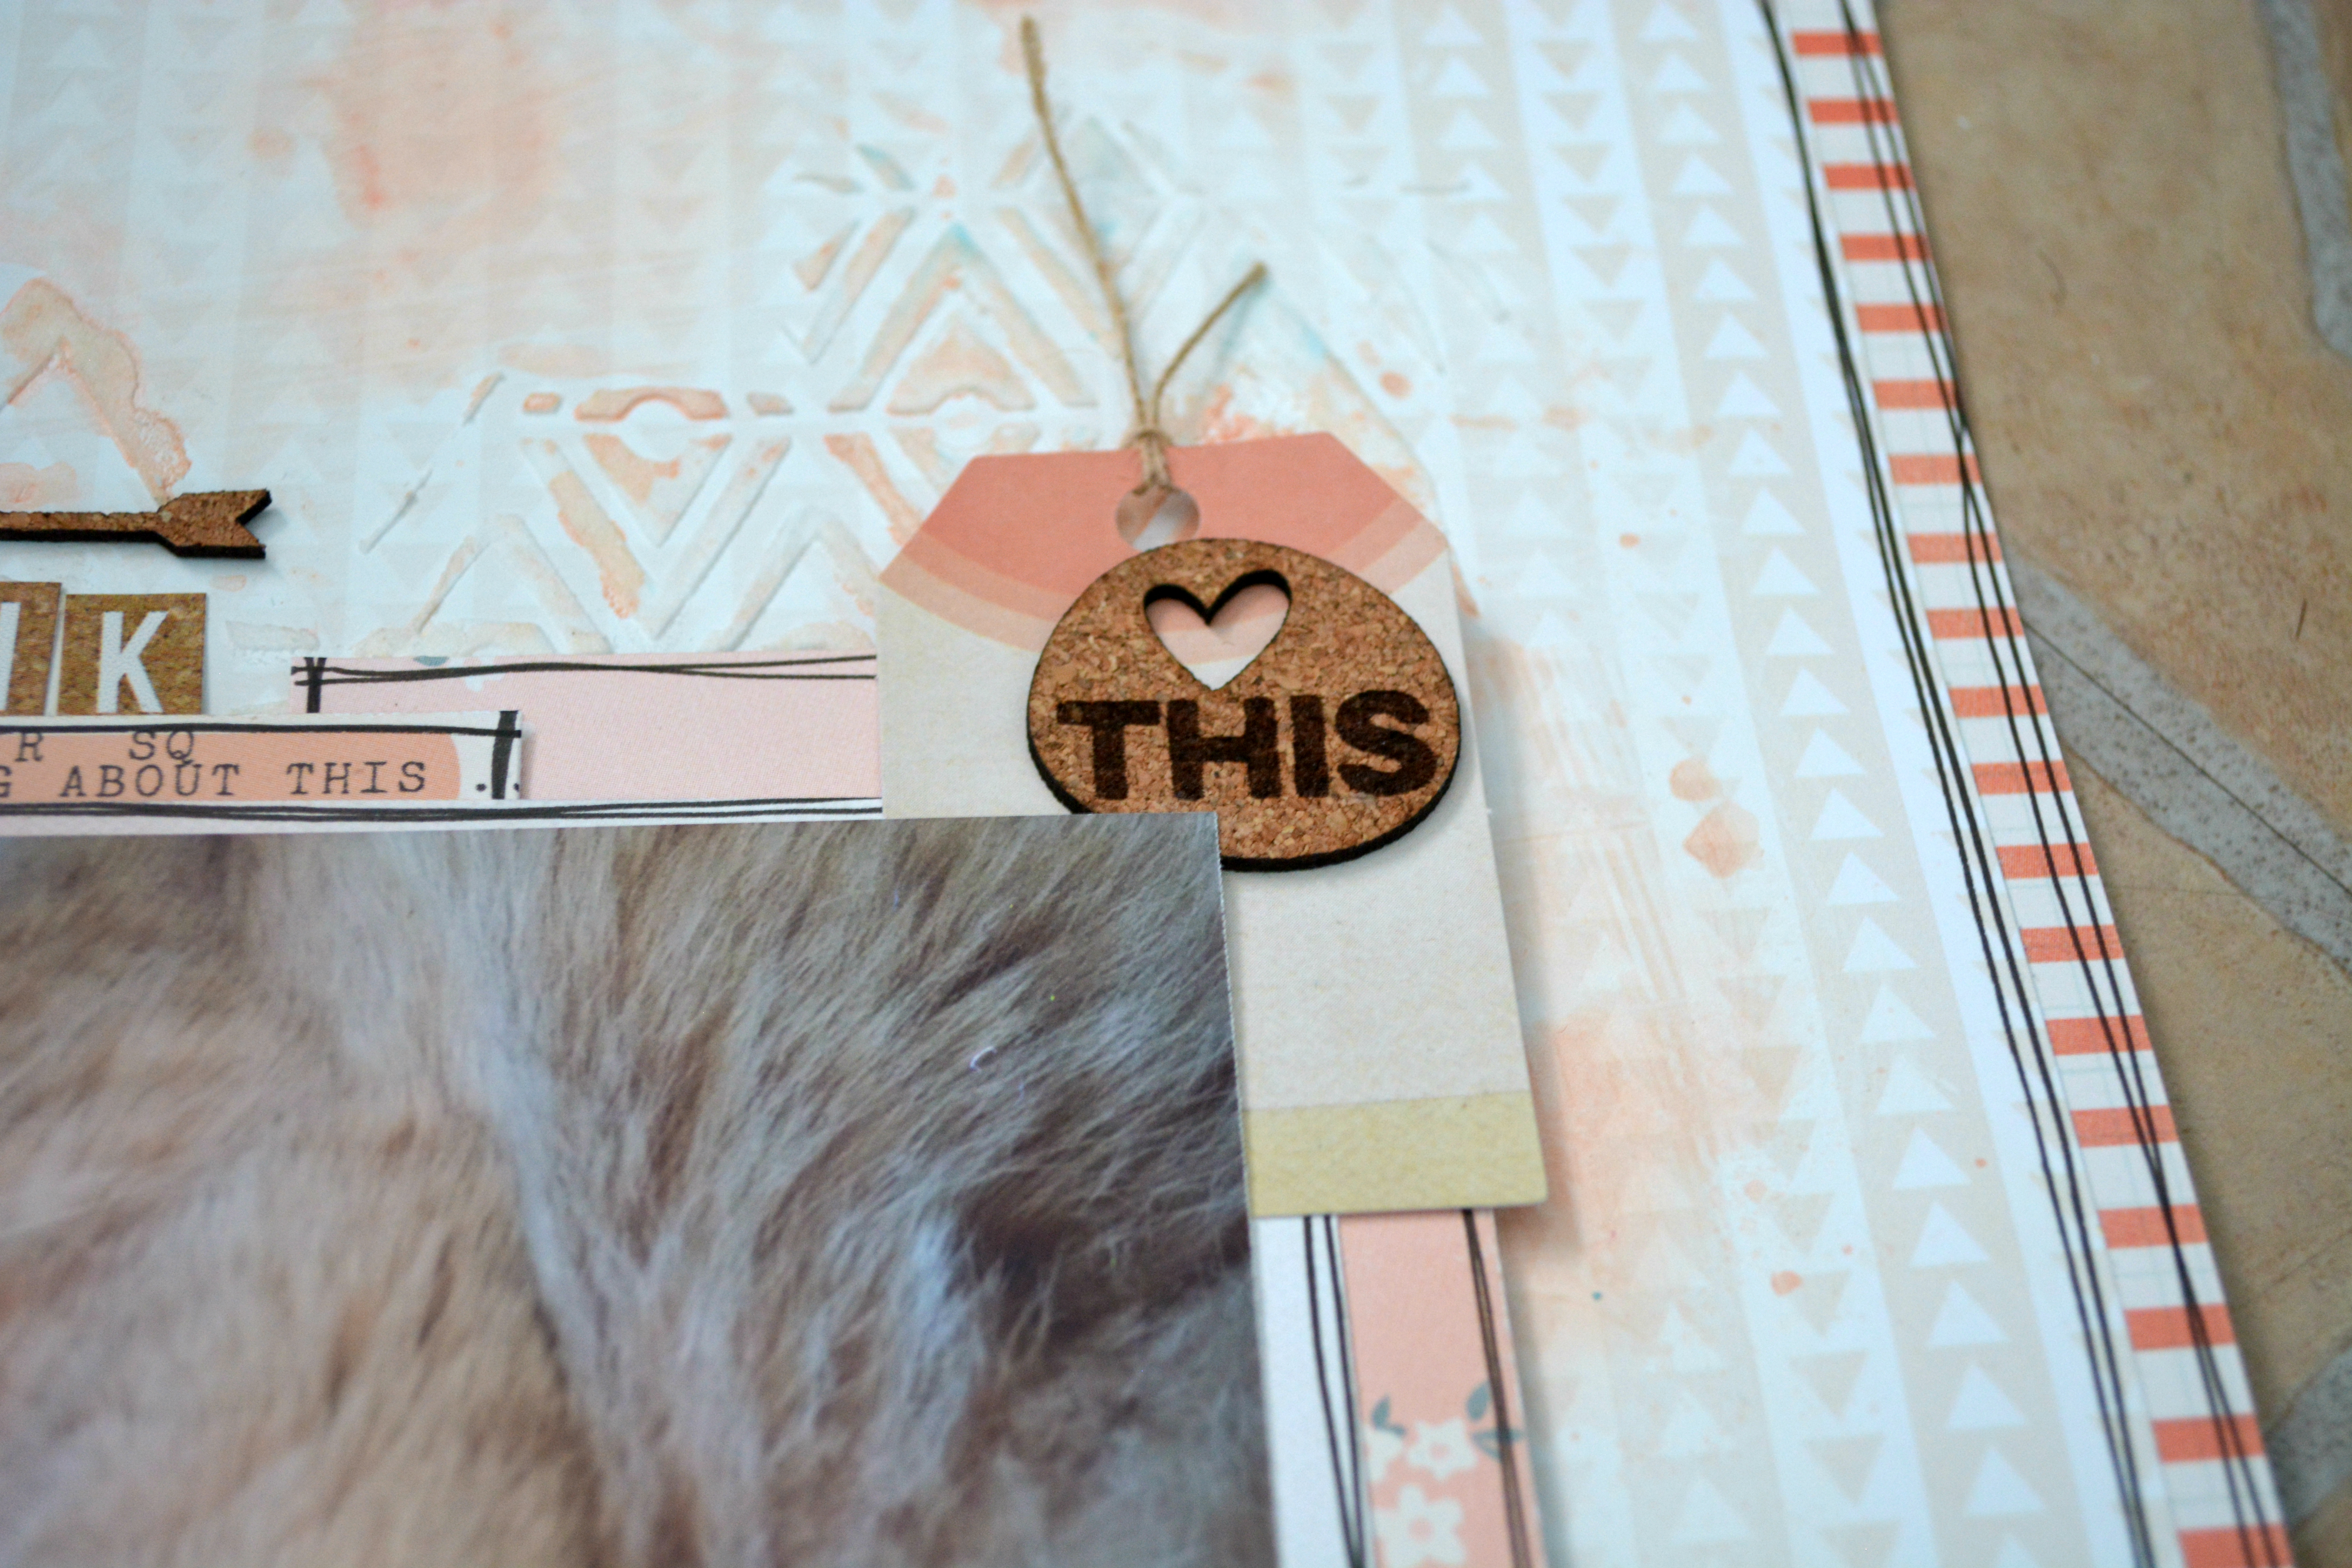
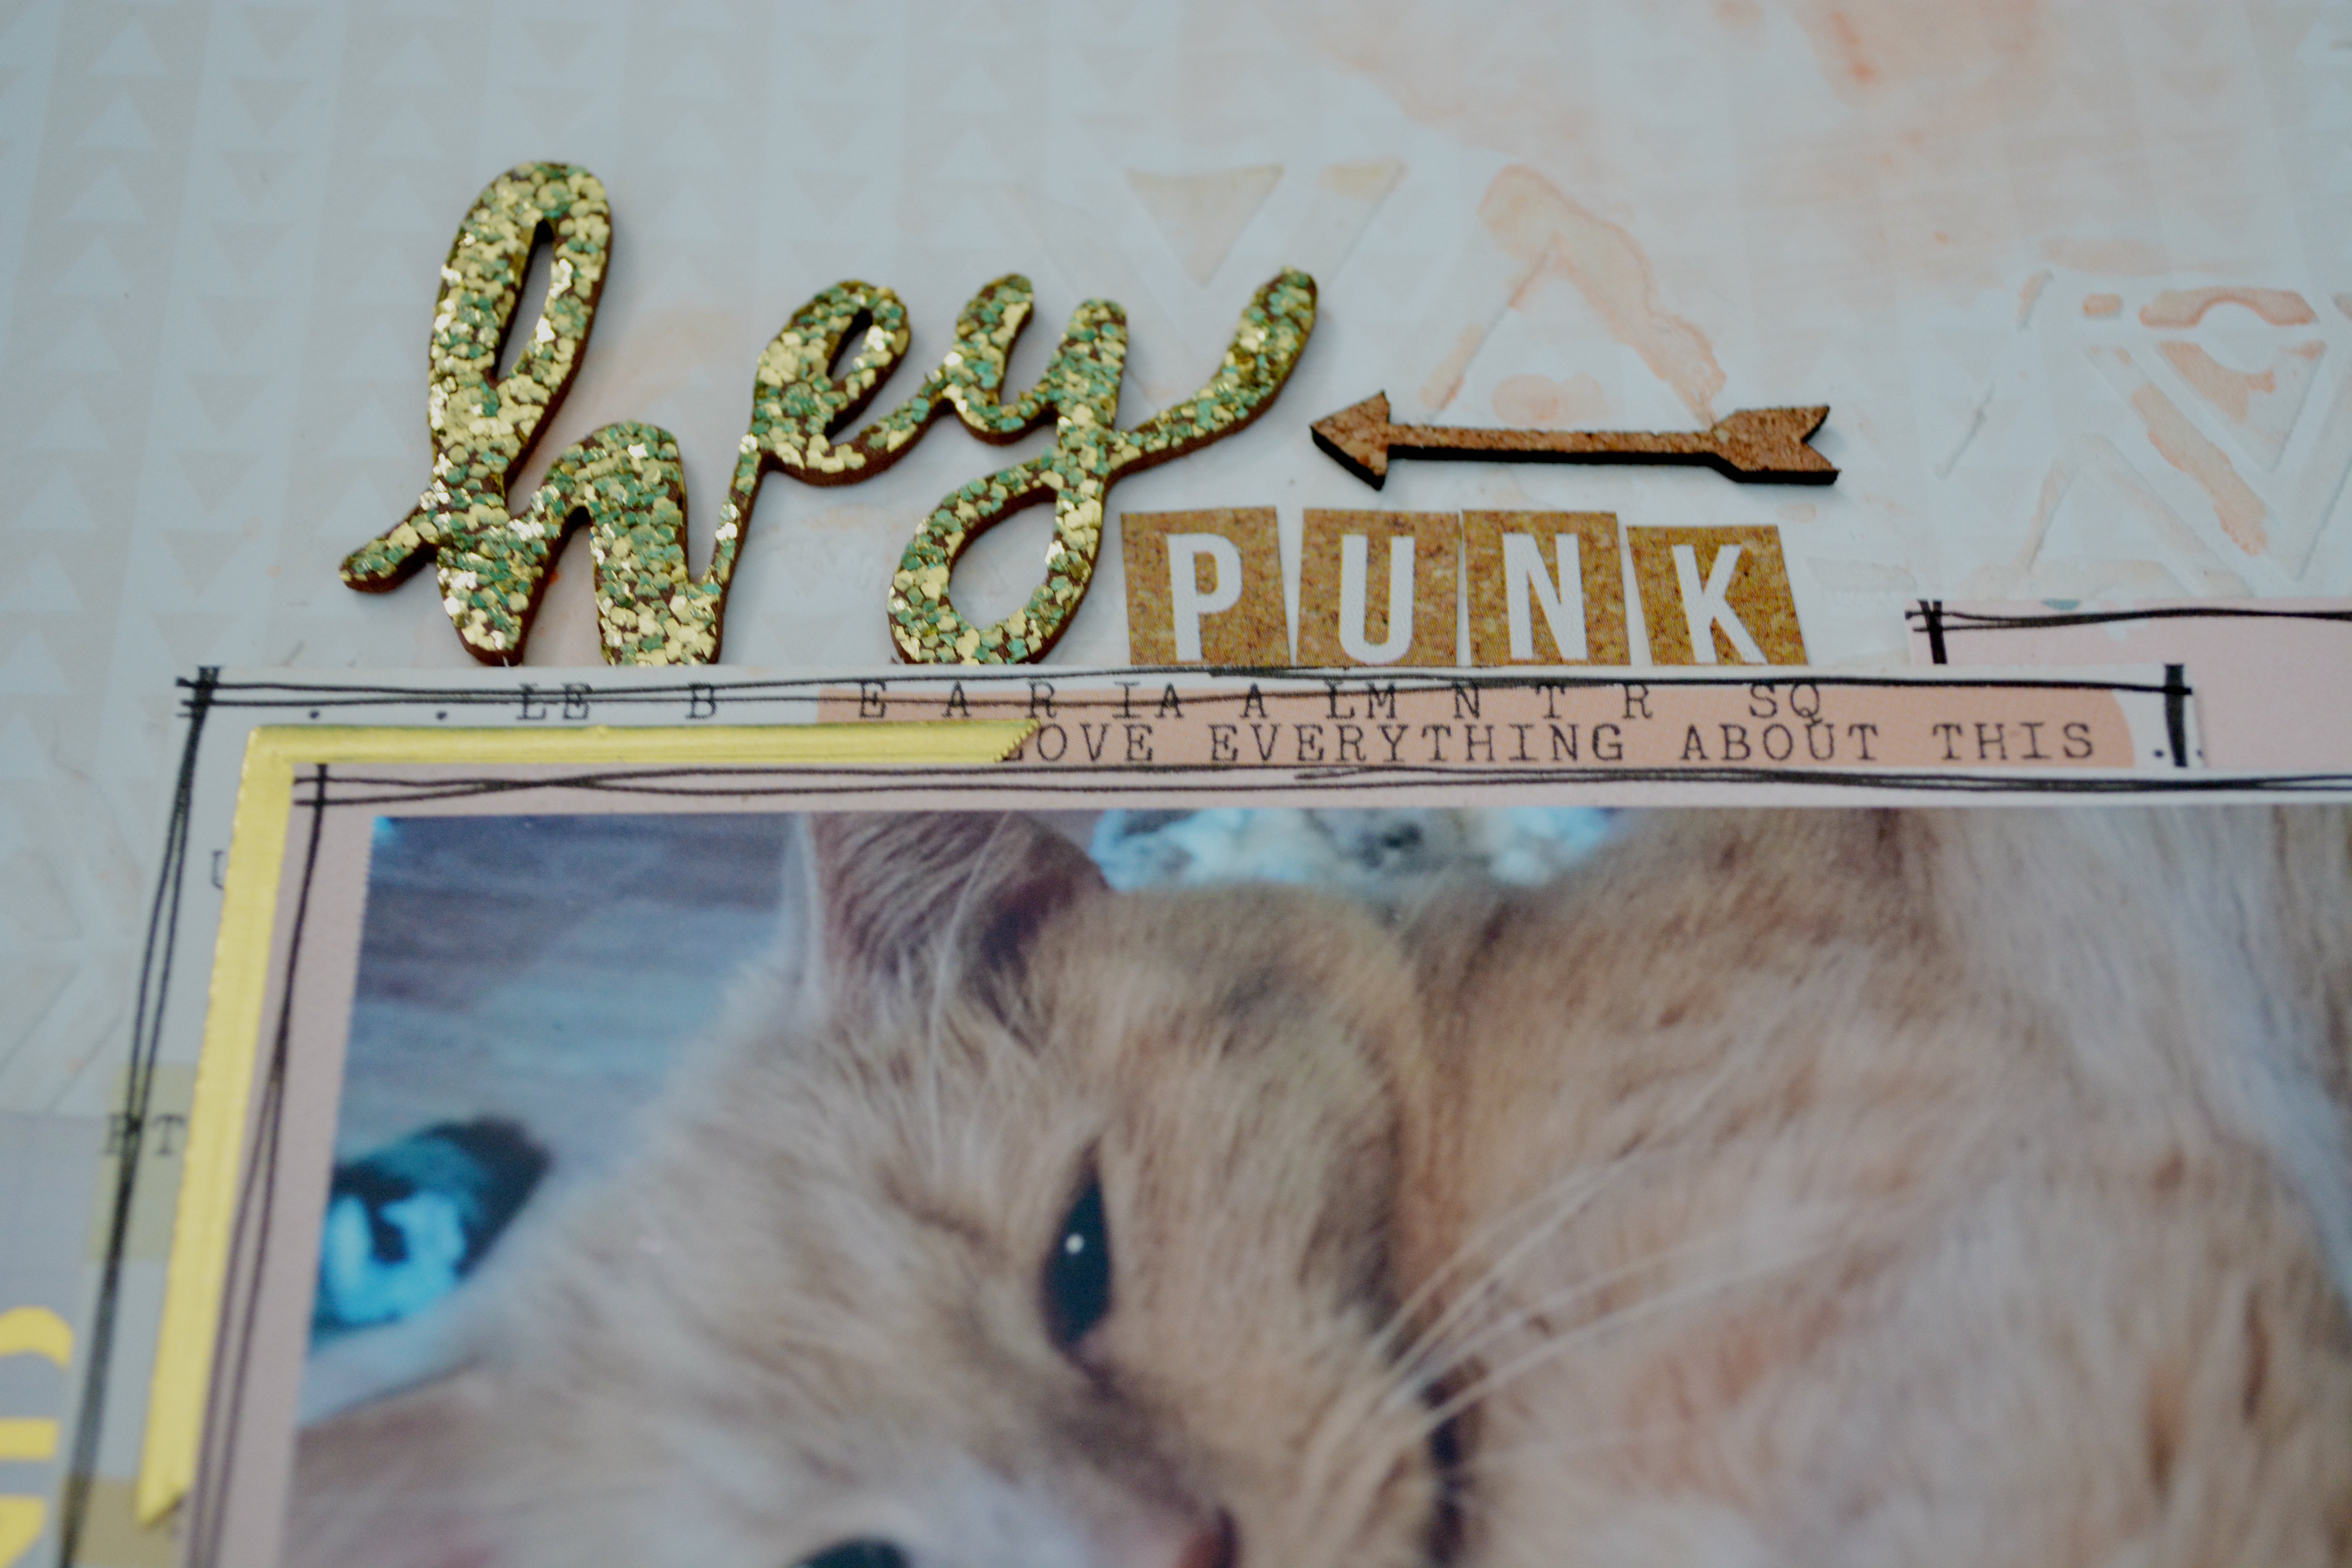
So I used some of my December 2014 Scraptastic This Life Noted kit, as well as other pieces from previous Scraptastic Kits. There are little bits from Freckled Fawn kits (I no longer subscribe to their kit). The cork stars are from Studio Calic0, and the cork family is from Elles’s Studio Sycamore Lane.

DSC_0008


DSC_0009


The lables were purchased from Studio Calico’s website a while ago (I can no longer find them on their site), they are printables and I cut them all out (recently as they are in this PL layout lol). They are acetate pieces from a small Project Life kit I picked up at Micheals.

DSC_0004


If there is anything on this spread in-particular you would like to know where it came from, leave a comment and I will be sure to get back to you where on where it came from.

Thanks for stopping by

Hugz,

Jess

It is now is pieces…

IMG_1565

I apologize for the quality of the photos these were taken with my Iphone, in the not so great basement light.

This is what a Tim Holtz Vagabond looks like taken apart… why you might as… well it was busted anyway and I was out of warranty. So what else was there to do with it? And that question continues now what do I do with it?

Fair warning this is a photo heavy post.

IMG_1568


IMG_1566


Tighter shots of the first two photos.

IMG_1560


Hey look its the other half taking it apart, in his old man slippers, lazy clothes, and messy hair. (Don’t tell him I posted this picture lol)

IMG_1557

So once you spend what feels like an eternity locating all the hidden screws (well done sizzix) so that you do not have to break the case to get into the machine. This is what you find… this is the machine without all the pretty bits, the guts that make it work so to speak.

IMG_1570


Then as you dig further into that, you find this magical piece. It is the real heart of the operation, the motor itself. It is also where my machine went all wrong… See the very top piece there… well it had metal shavings in it… bad bad bad.

IMG_1558

(I left this image large so you can see the shavings easily.) this caused that motor to basically skip or shift slightly when the machine was working… which broke the magnet *this motor runs similar to a lawnmower motor* the magnet is a necessity.

IMG_1571


IMG_1576


And there you have it the reason why my vagabond died… guess I need some sort of a new small machine as my grandemark is to big to lug around. I am thinking of a Grand Calibur.

Here is a few last photos of all the pieces…

IMG_1561


IMG_1572

IMG_1556

IMG_1562


IMG_1559

So what do I do with it now? I have no idea.

Thanks for stopping by,

Hugz,

Jess

Saturated Canary Birthday

SC Bday 1

Hey ya’ll, isn’t she just the sweetest thing ever!!! I love this rubber stamp from Saturated Canary!

SC Bday 2


This is probably the simplest card I have ever created, but I really do not think it needed anything else. That is correct, no twine, no enamel dots, no sequins.

SC Bday 3


Products Used:

Saturated Canary – Balloon Wishes

Memento Tuxedo Black

Versafine Onyx Black

Simon Says Stamp – Balloon Wishes

Pink and Green cardstock scraps (they are most likely Bazzil Cardshoppe)

Again, unfortunately I did not keep track of the colours I used on this image, but I promise I have been keeping track and most of the cards you see in the future will have a list of the colours I used.

I would also like to pass along that the paper I use for colouring with my copics is the Copic x-press it blending card.

Thanks for stopping by,

Hugz,

Jess

Make a wish…

Make a wish PS

Hey everyone! Back today with another sweet little card. I have always loved this stamp set from Lawn Fawn, I have used it over and over again, and still continue to love it.

Make a wish PS 2


There is no patterned paper on this card, which has been one of my favorite things it seems lately. Ink and white paper seems to keep very happy, probably considering the abundance of colouring mediums I have in my possession.

Make a wish PS 3


Supplies used:

Lawn Fawn – Critter Ever After

Neenah Solar White 80lbs

Neenah Solar White 110lbs

Inkadinkadoo Stamping Mask Paper

Distress Ink – Peeled Paint, Mowed Lawn, Crushed Olive, Salty Ocean, Broken China, Weathered Wood, Peacock Feathers 

Spellbinders – Regal Frames

Recollections – Adhesive Faux Pearls

Simon Says Stamp – Handwritten Greetings *inside sentiment*

Unfortunately I do not have list of the copic’s I used on this card… next time maybe 😛

Thanks for stopping by,

Hugz,

Jess

It’s Your Bday

Its your bday1


Welcome back, I am up with my first card of the year. This sweet little image from Kraftin Kimmie Stamps, was so fun to colour. I decided to go a different way with this image and coloured it using only my Prismacolors. Supplies and colours will be listed at the end of the post.

Its your bday 2


Kept this card rather simple with just a little watercolour and a simple black sentiment. A little twine and some enamel dots for embellishing.

Its your bday 3


Supplies used:

Kraftin Kimmie Stamps – Birthday Buddies (Can no longer find it on the site)

Ranger watercolor paper

SSS Bundle of Stitched Shapes

Lawn Fawn Stitched Party Banners

White Large Eyelets- Westtrim Crafts

Twinking h2o’s – Sunflower , Luv-u-pink, Bashful Blue

Twinery Teal Twine

My Minds Eye – Miss Caroline – Pink Twine,

Versafine Onyx Black

Paper Smooches Party Posse

Prima Sugar Dots – The Optimist

Neenah Solar White 80lbs

SSS Birthday Messages (inside sentiment)

Memento Tuxedo Black

Golden Titanium White heavy body acrylic paint

Prisma colours used:

Skin – PC 997, PC927, PC939, PC928, PC941

Hair – PC997, PC1093, PC1080, PC948

Chair – PC992, PC905

Green – PC989, PC912, PC1005, PC1091

Purple – PC1026, PC934, PC1008, PC1078

Cake – PC1080, PC1082, PC946, PC947

Icing – PC1001, PC929, PC994, PC930,

 Jellyfilling – PC922, PC923

Plate – PC1070, PC1074

Balloons – Blue – PC1086, PC 1088, PC902, PC903

Yellow – PC940, PC916, PC1003, PC917, PC1002

Pink – PC1092, PC930, PC1030

Green weight – PC1005, PC909, PC907

Table Top – PC916, PC1002, PC918, PC921, PC1032

Shadows all over image PC935 (black)

Thanks for stopping by

Hugz

Jess

Infinity Christmas 2014

Disney 1 xmas

Wahoo, I am on a roll two blog posts and its only the 4th of January, and I have a few more that are ready to go, maybe I will keep up posting this year (fingers crossed).

This is a photo from my instagram from Christmas morning, one happy little guy with his new video game.

So I started this layout by adding gesso and Izink’s to the backround then splattering some gold mist.

Disney 2 xmas

Layering up some of my scraps from the December Hip Kit and adding some tissue paper from my stash finishing the base for the photo to lay on,

disney 3 xmas

Embellishing with different bits and pieces from the kit brought this layout together rather fast, and the Elle’s studio grey letter stickers were perfect because there are so many of every letter I had no issue making the words I needed.

Disney 4 xmas


If you are looking for a kit to try, I highly recommend the Hip Kits, Kim seems to find the perfect balance between paper, and TONS of embellishments to meet any need you may run into on your layout.

Products used:

Hip Kit – November Main Kit (sold out)

Hip Kit – November Color Add-on

Shimelle Grey Precision Pen

Heidi Swapp Gold Lame Color Shine

Freckled Fawn Metal Hearts (Oh Deer Me kit) I can’t find them in their shop any longer

White Gesso (I used Artist Loft from Michaels)

Thanks for stopping by,

Hugz,

Jess

Puddle Jumpin’

Puddle Jumpin 1


Hey everyone! Welcome to 2015, I hope this year treats you all well in whatever goals, aspirations, and just life in general. This is my first layout I have made this year. I did it yesterday before I began what I am calling the “great clean up of 2015”, but that’s another post for another day (if I ever complete the clean up).

Puddle Jumpin 2


This is my son in the summer time, I have a low spot in the front of my driveway, and I honestly believe, he secretly hopes for rain so he can go out and play in the puddle.

Puddle Jumpin 3


I really had fun with this layout and kept it very simple… I went into it with a goal. Aside from the 12×12 background paper, I only wanted to use scraps. Best part, I succeeded! I also got to use a bunch of my die cuts and stickers which was also exciting to me.

Puddle Jumpin 4


Products used:

Heidi Swapp – September Skies – Open air

Basic Grey – Fresh cut – Orchid Alley

Teresa Collins – Something Wonderful – Alpha paper

Gossamer Blue – On My Desk – List Maker

Carta Bella – Baby Mine – (the blue with white polka dot paper)

Amy Tangerine – Plus One – (watercolour flower paper)

Silver Chevron Paper (I think its MME scrap)

Gansai Tambi Watercolours – #51, #62

Amy Tangerine Thickers – Charcoal Rubber

Amy Tangerine – Stitched – Die Cuts

Maggie Holmes – Open Book – Die cuts

Maggie Holmes – Open Book – Sticker sheet

Shimelle – Sticker Book

Teresa Collins – Life Emporium – Alpha Stickers

Shimelle – Cork Stickers

Thanks for stopping by,

Hugz,

Jess

Let’s Bake

Cookies

Hey everyone! Christmas is so close, and I am almost ready!! One of the last things I do to prepare is a bunch of baking and this past weekend that included a crazy amount of cookie baking (I think its my sons favorite activity). So here I am scrapbooking a few instagram pictures of the cookies we made on the weekend.

Cookies 2

I am a subscriber to the Hip Kit Club scrapbooking kit, and on the member forum on facebook, Kimberly gave us a weekend challenge and this is the layout I did for the challenge. The recipe that needed to be used for the challenge was using an image she posted as inspiration for the layout (that is where my stenciled backround came in to play), include a minimum of three fonts in your title, use stamping on your project (this is difficult to see on my layout but on the bright green paper I stamped falling snow in versamark and embossed it in silver), include gold or silver, and use a minimum of three patterned papers.

Cookies 3


It was a challenge for me to make sure I had everything included that is for sure! I rarely follow a recipe or sketch for my layouts, but it was fun to play along!

Cookies 4


Products used:

Hip Kit November Main Kit

Hip Kit November Color Add-on

Hip Kit November Cardstock

Wow Embossing Powder Silver

Simon Says Stamp Be Joyful Stamp Set

Dylusions Cut Grass Spray Ink

Studio Calico Alpha Stickers Green

Simple Stories DIY Letter- Aqua

Golden Light Molding Paste

Cotman Watercolor Sap Green

Crafters Workshop 12×12 Tiny Circles

Versamark Ink Pad

White Tissue Paper

Thanks for stopping by

Hugz,

Jess

Hey Punk

Punk 1

Hey everyone! I have recently signed up for the Hip Kit Club monthly kits, Being as though I live in Canada, I have opted for shipping two kits together to save a few dollars, which means that I have just received the October and November kits from them (I actually got them a couple of weeks ago but have just started playing with them

I really do love these kits so far, there is a process video at the end of this blog post.

Punk 2

Is it sad, that at the time of writing this blog post, I am only 3 layouts into these 2 kits and I can not wait to get my hand on the December and January kits.

Punk 3


Let’s Dance

Marry 5


So this is my first layout using the November Shake it off kit and add on from Scraptastic. I really do love this kit, but being in Canada, these kits seem to take forever to get to me… like 1 1/2 weeks longer then another kit club I subscribe to that shipped 3 days after this one. Oh well I ❤ it regardless.

Marry 4


Aside from the kit and add-on, things added from my stash were Canson 140lbs watercolour paper, my Smash book roller date stamp, Lindy’s Stamp Gang sprays in a coral and a yellow (I don’t have the colours beside me at the moment but if you would like to know just leave me a comment and I will get them for you, they were both Flat Fabio’s), as well as I cut down one of the polka dot acetate dividers from PL, and finally some beloved enamel dots from my stash.


marry3


I love taking things apart, like that stitched pocket here, I pulled the tag out of it, took the remember this off of the front added one of the fabric banner pieces and then put the remember this back on the front. Layers make me happy even if they are simple.

Marry 2


In the background here you can see that I started with some Golden Light Molding paste, and a butterfly stencil from prima.

This little tag with the crate paper on it was ever so cute but it was too tall for what I wanted… easy fix! Just cut it in half and glue it back together the crate paper hides the joint perfectly, later a few stickers from the sticker sheet and it is done!

I have been working on these pages for a while now, my little sister got married in August and I have been slowly completing layouts for her book. That is why, unlike most of my layouts, there is no journaling on this page, I leave that for her to do.